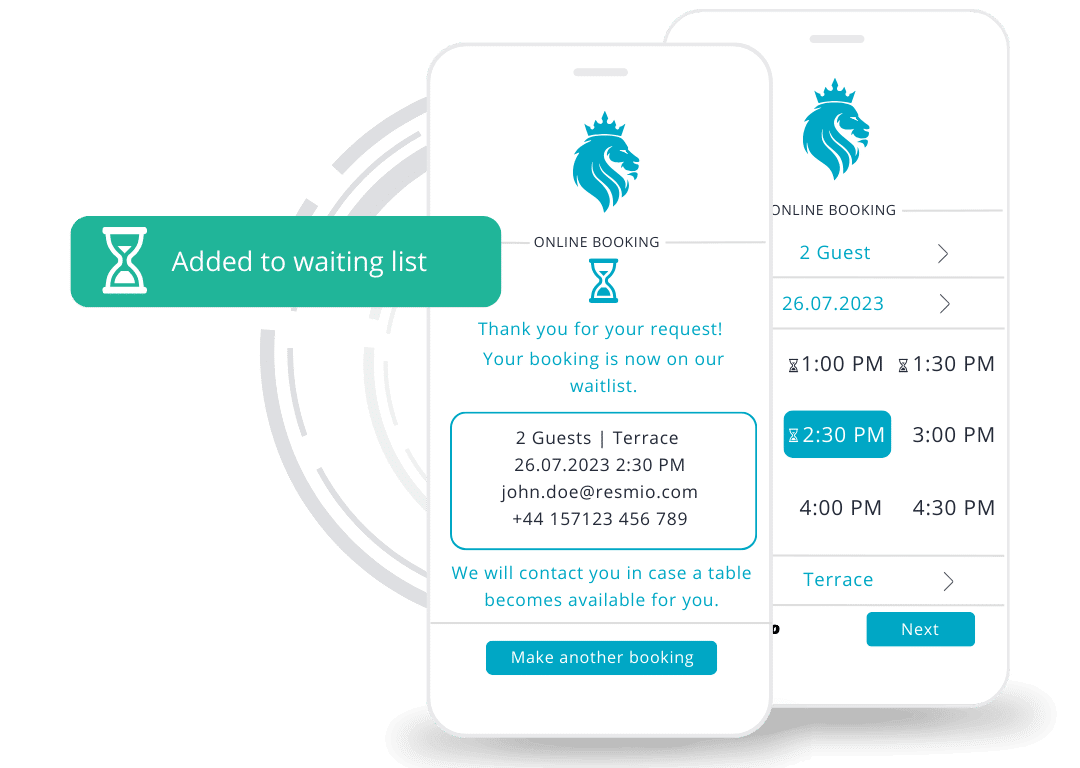
Allow your guests to be put on the waiting list via your reservation widget.
- If your stored capacities are exhausted in a certain time slot, the guest will see the entry “Waitlist” instead of “available” in your widget.
- The guest can then choose to pass on his reservation request for the fully booked period to your restaurant.
- The desired time of the reservation request together with your guest’s contact details can then be viewed in your system at the top under
 “Waitlist”.
 - In case of a confirmation or cancellation, the guest will receive an automatic e-mail notification.
How to activate the online waiting list
- In your resmio account, go to “Settings” > “Bookings” > “Online bookings“.
- Check the box “Activate online waiting list” and confirm your changes by clicking on “Save”.
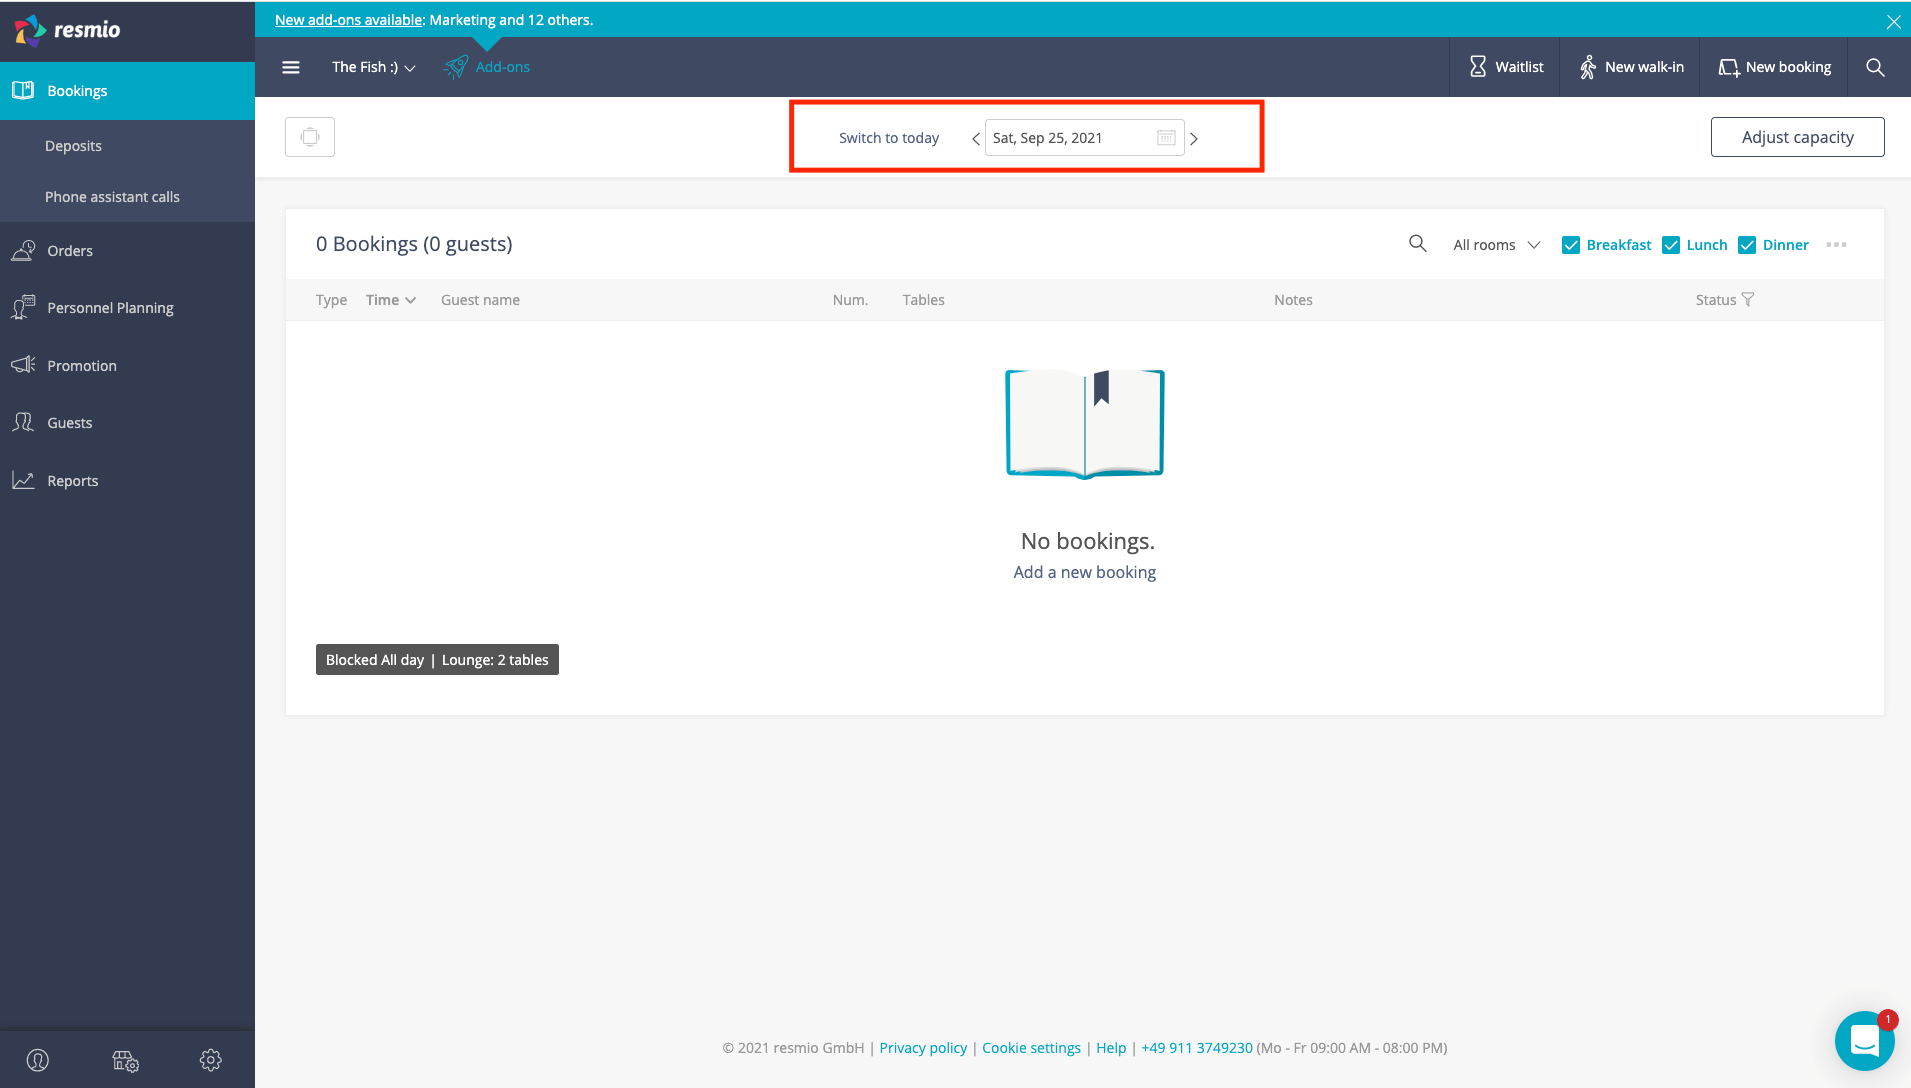
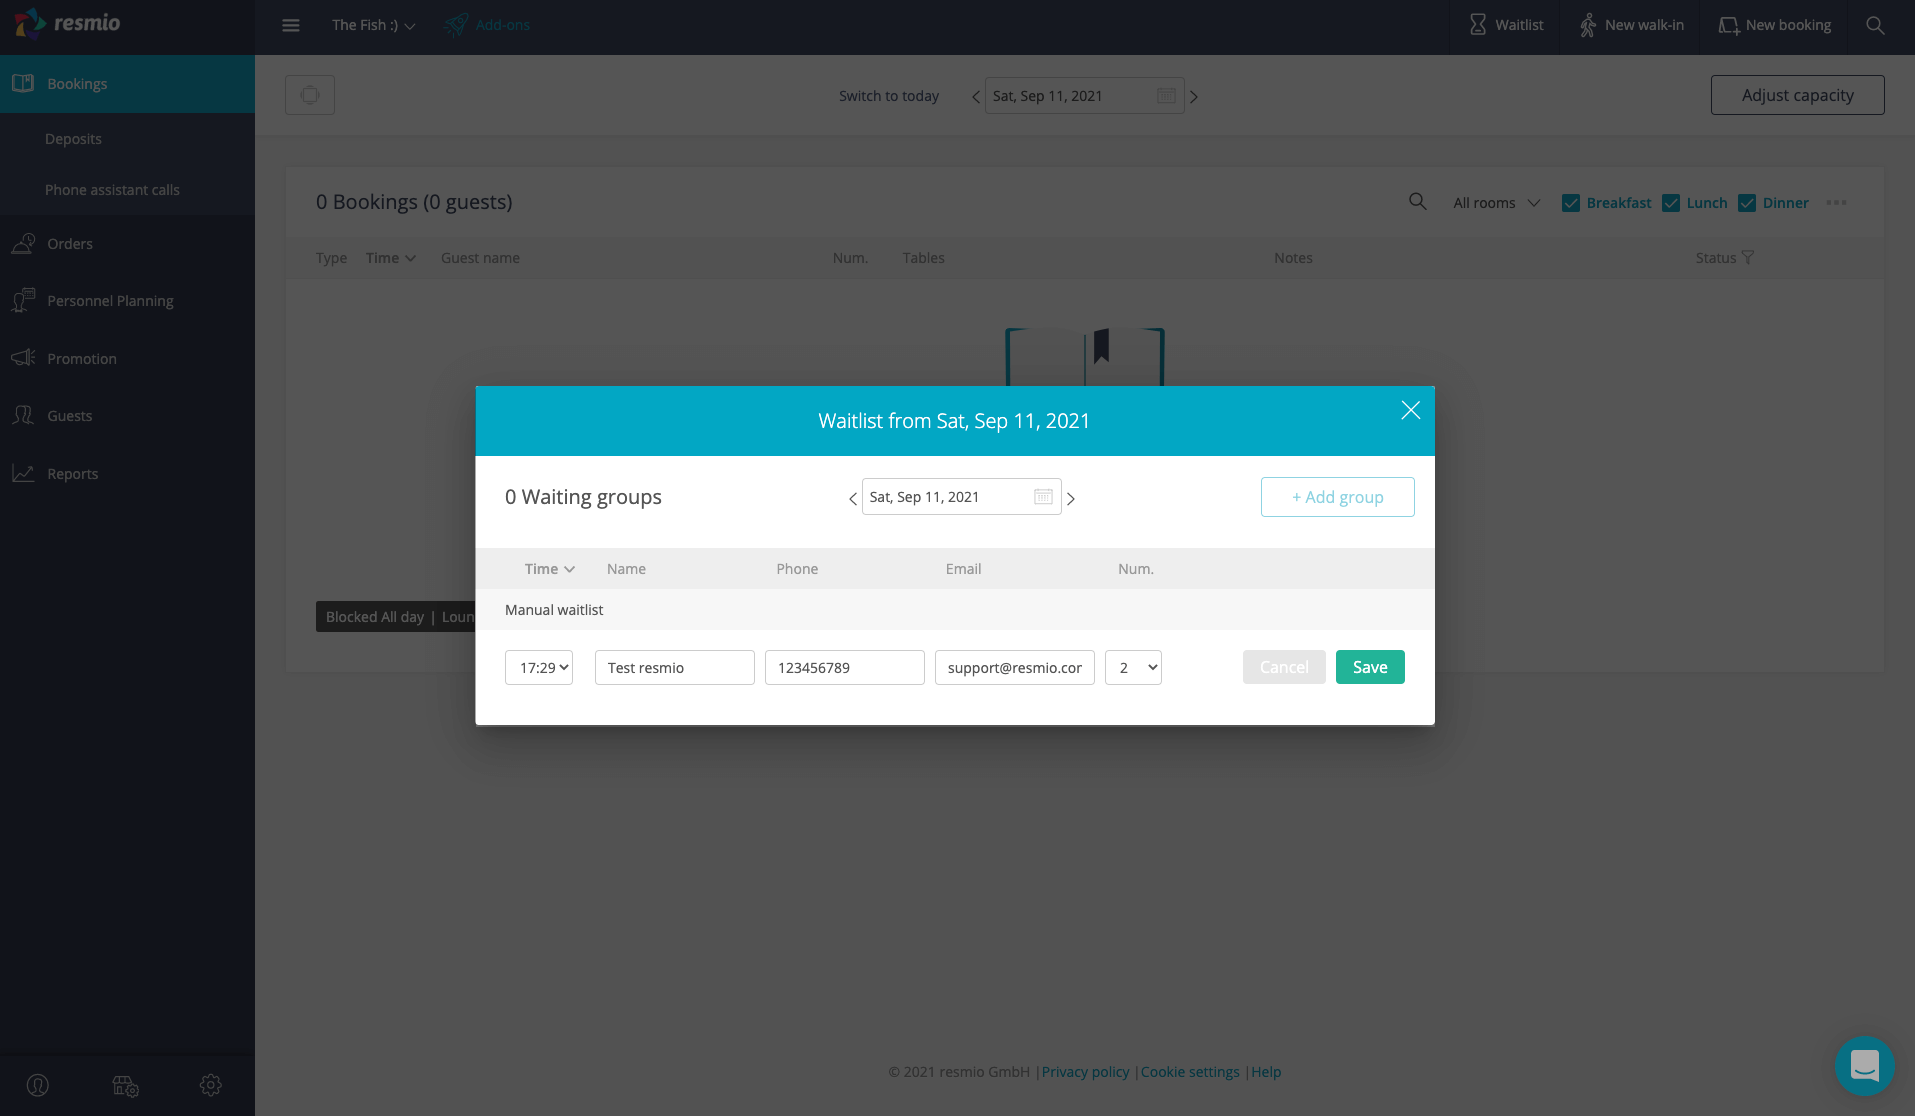
If your restaurant is completely booked, you have the possibility to manually put guests on your waiting list in case of a telephone reservation request and then place them later if a table becomes available.
- Click on the button “Waitlist” in the bar at the top of your webapp.
- As soon as you click on this button a window will open
- If it is walk-in, leave the default time in the first column.
- If it is a reservation for a later time, you enter the time at which the guest would like to come.
- Finally, enter the guest’s contact details and confirm the waiting list entry by clicking on “Save”.
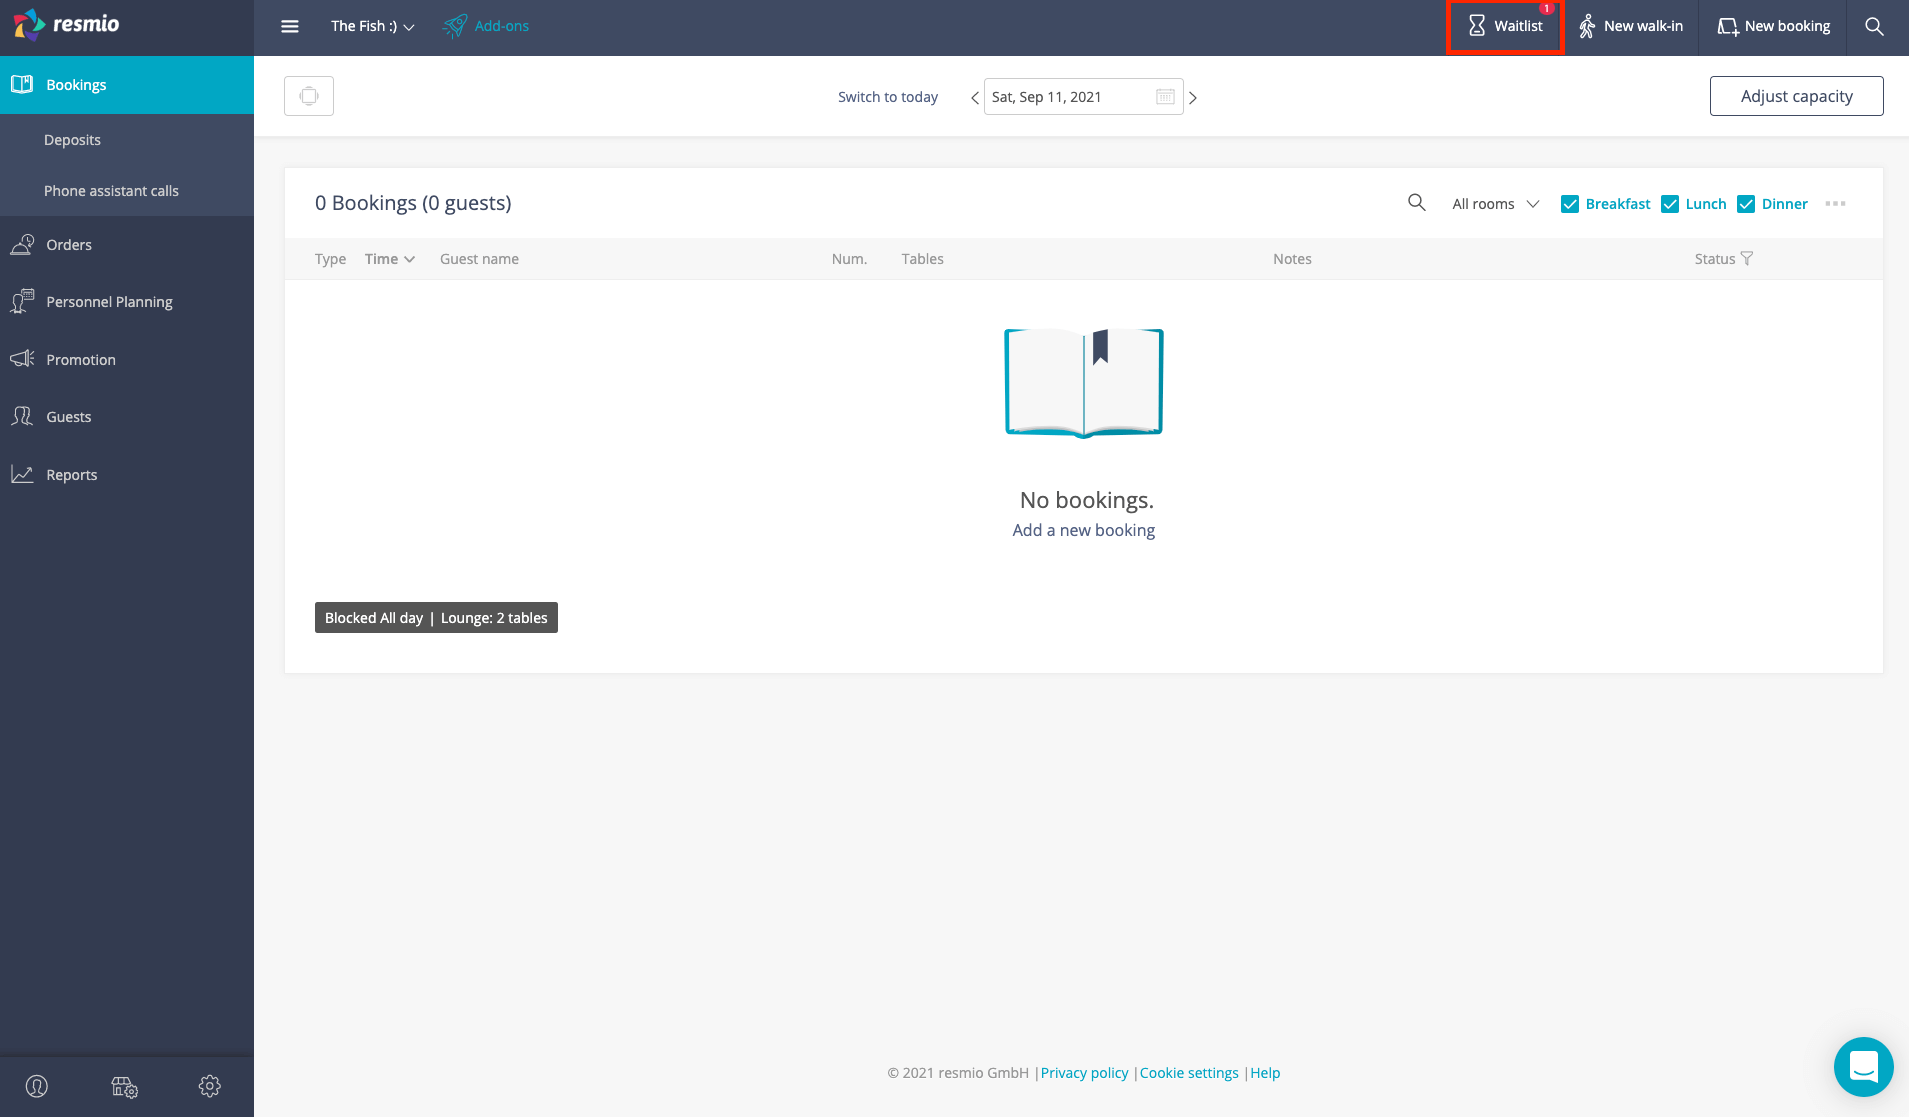
- After you have made an entry, you will see a small red number in the upper right corner above the “Waitlist” button, which indicates the current number of entries on the waiting list.

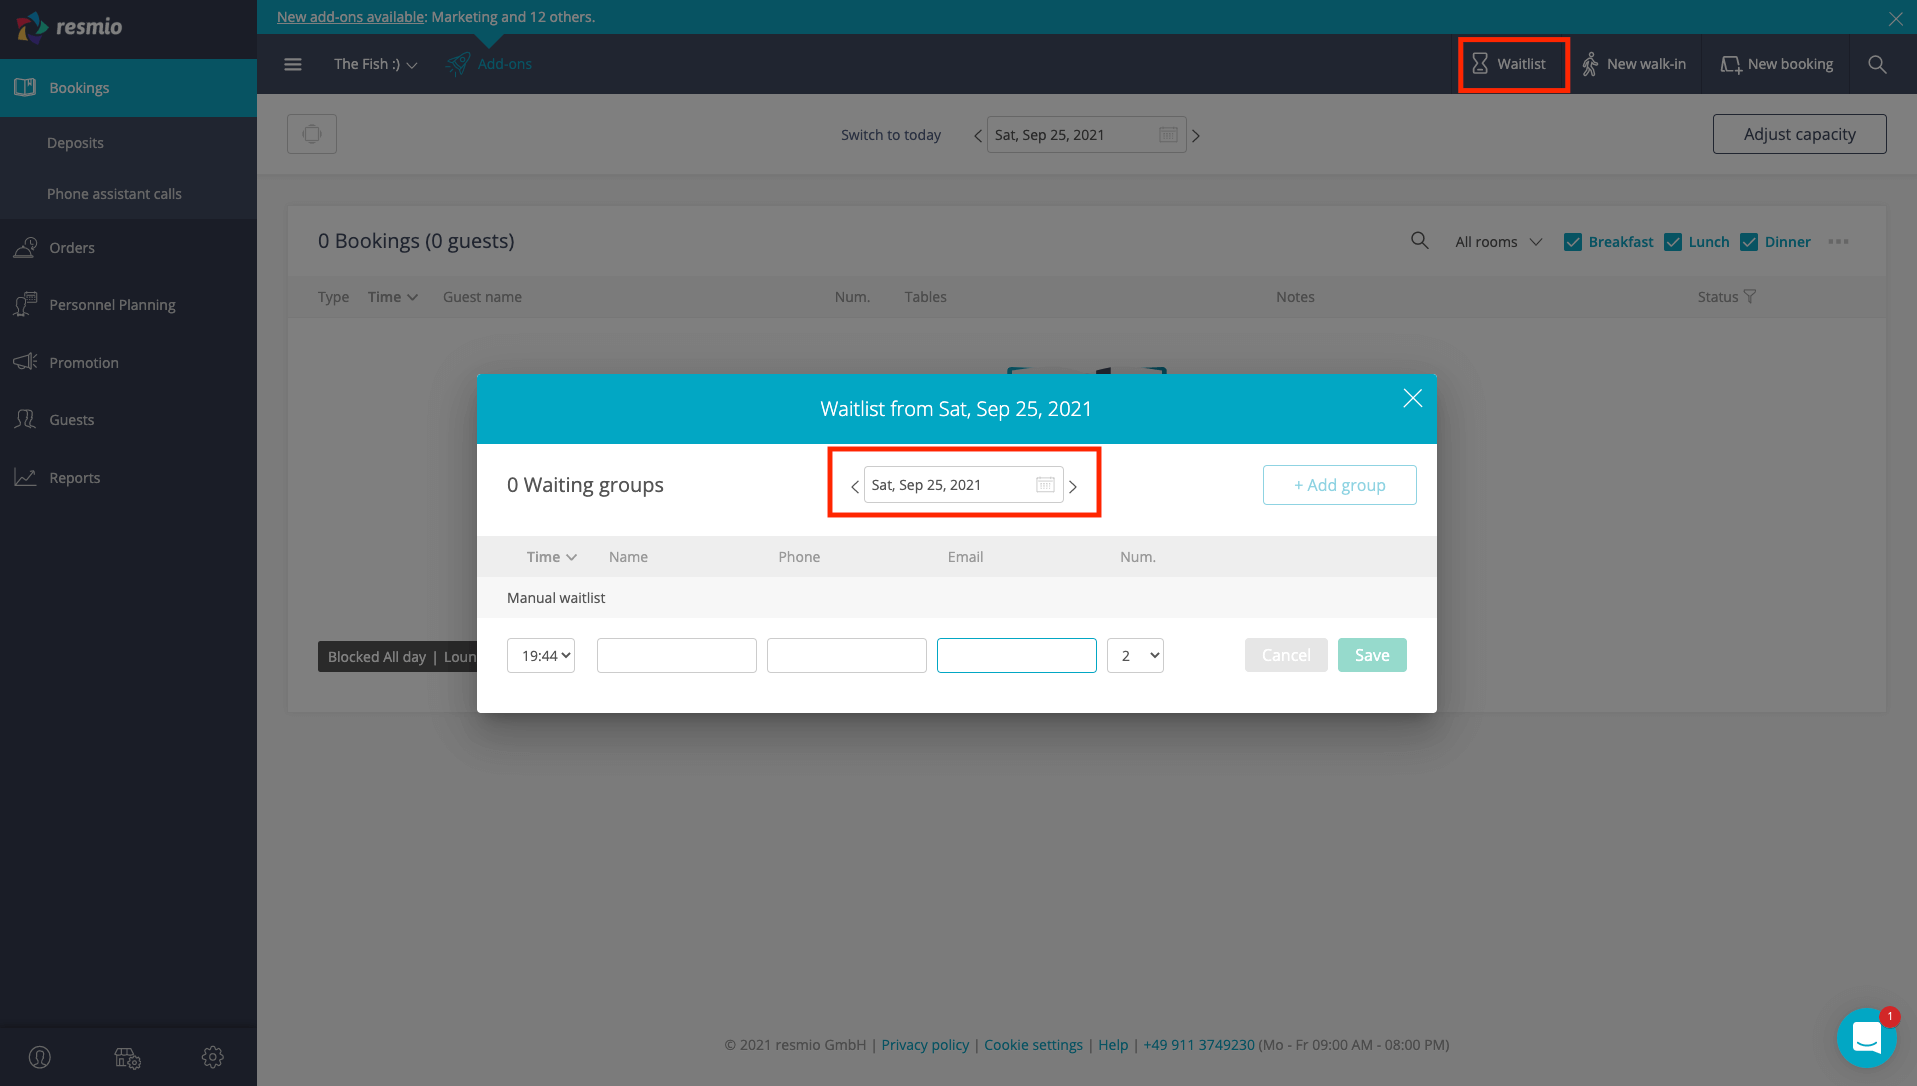
You can access the waitlist on any given day and add guests there. This is how you do it:
- Either you select the corresponding day in your booking overview and click on “Waitlist”
- …or you first click on “Waitlist” and then select the corresponding day. If you make entries there, they will be made immediately for the corresponding day.
- As soon as you select the corresponding day in your booking overview, the red number next to the “Waitlist” button indicates how many guests are already on your waitlist that same day.
- As soon as you want to accept a guest from the waitlist, you simply go back to your waitlist using the “Waitlist” button.
- There you click on the checkmark next to the guest you want to place. This will automatically open a new window to convert the entry into a reservation and thereby add it to your booking overview.
- After saving, the guest will be automatically entered into your booking overview with the status “Seated”.
- If a guest has been added to the waitlist for a later time, you will also have the option to select an available time slot right away.
- The time periods are preset as defined in your booking interval.
- The status of this booking will then be displayed as “Confirmed”.
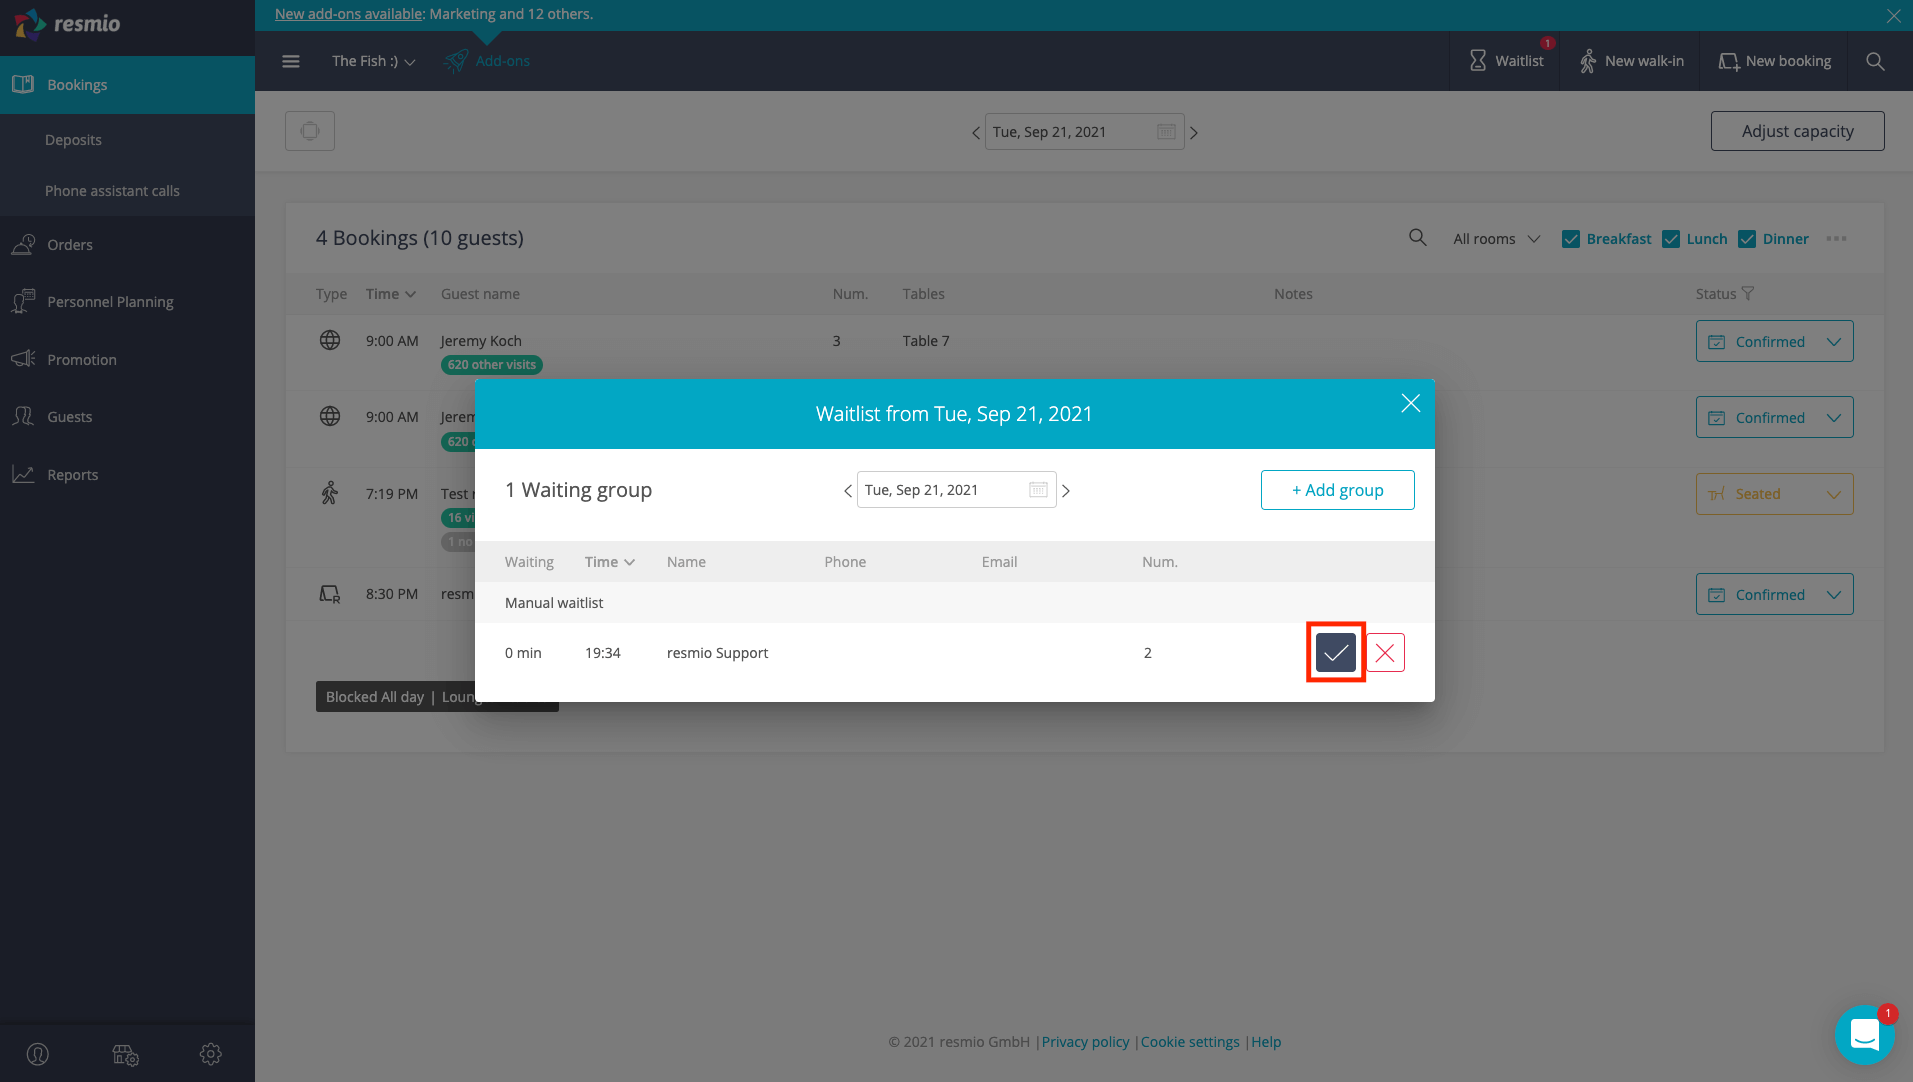
- If you want to remove a guest from the waitlist again, simply go back to your waitlist using the “Waitlist” button.
- There you will find a red “X” to the right of the guest’s details.
- Click on the “X” and the guest will be deleted from the waitilist.


