Graphical Table Plan for Web
Table of contents
Managing the Table Plan
- Are incoming online reservations automatically assigned to a table or do I have to do this manually?
- Can I block tables (e.g. because the terrace is closed in winter)?
- Can I still book blocked or already occupied tables manually?
- How can I manually unblock my tables or make changes?
- How can I maximize my capacity?
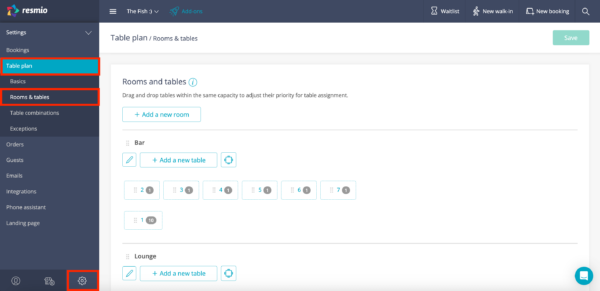
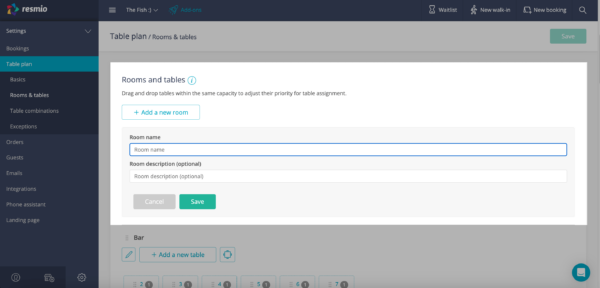
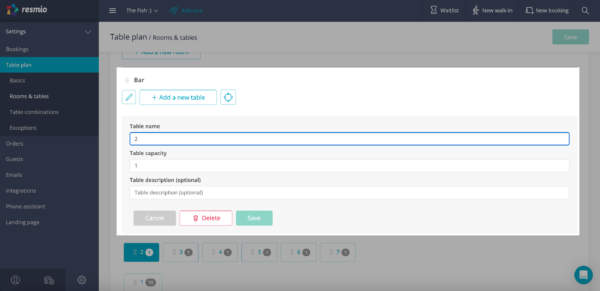
Under ![]() “Settings” > “Table plan” > “Rooms & tables” you can create a table plan according to your requirements:
“Settings” > “Table plan” > “Rooms & tables” you can create a table plan according to your requirements:
-
- First you need to set the room in which your tables are located. Therefore click on the “+ Add a new room” button and set a name (e.g. lounge, terrace) resp. optionally also a room description (e.g. only open in summer).
- After that you can add tables by clicking on “+ Add a new table”. You need to set a table name (e.g L1 for table 1 in the lounge) and the capacity of the table (= how many guests can be seated here).
- To avoid confusion we recommend that you do not assign table names twice.
- It is important that you enable your table plan so that you can use it for bookings. The activation is done in your resmio account under
 “Settings” > “Table plan” > “Enable the table plan”.
Please note: As soon as you enable “Online bookings will be assigned to tables automatically” the system uses the capacity you set in your table plan and not the one you set below “Booking hours & capacities”. If you select “Online bookings won’t be assigned to tables automatically” your capacity set below “Booking hours & capacities” will still be used.
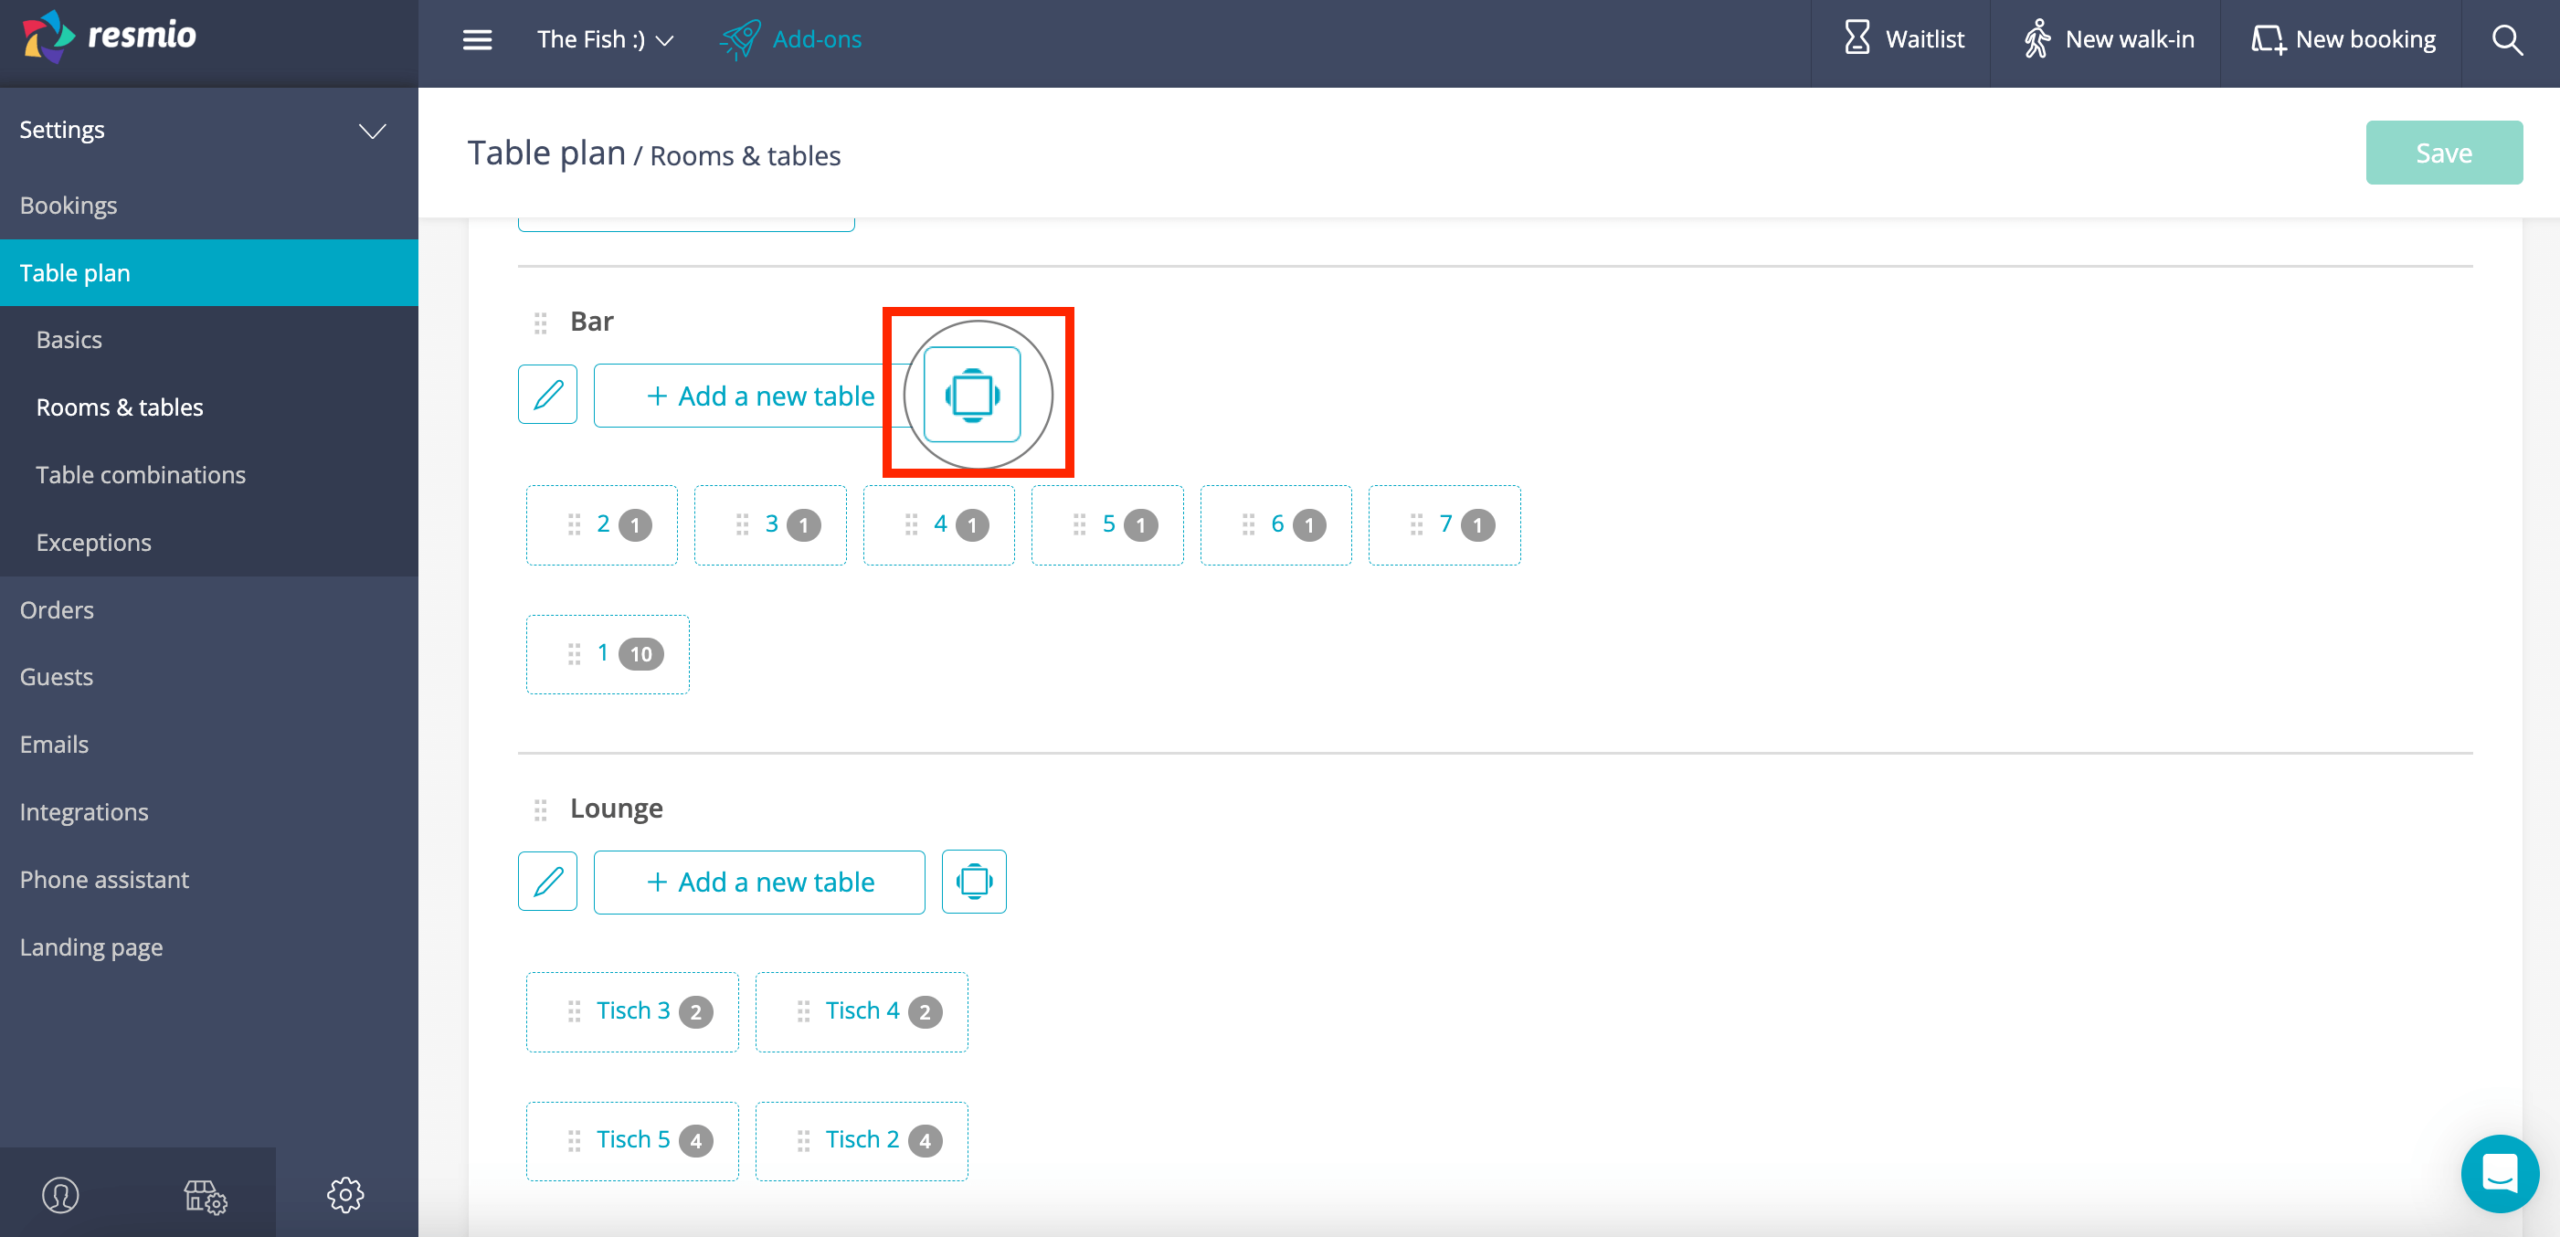
Yes, the feature is designed so that you can map the table arrangement as well as the design of individual rooms of your restaurant in the graphical table plan.
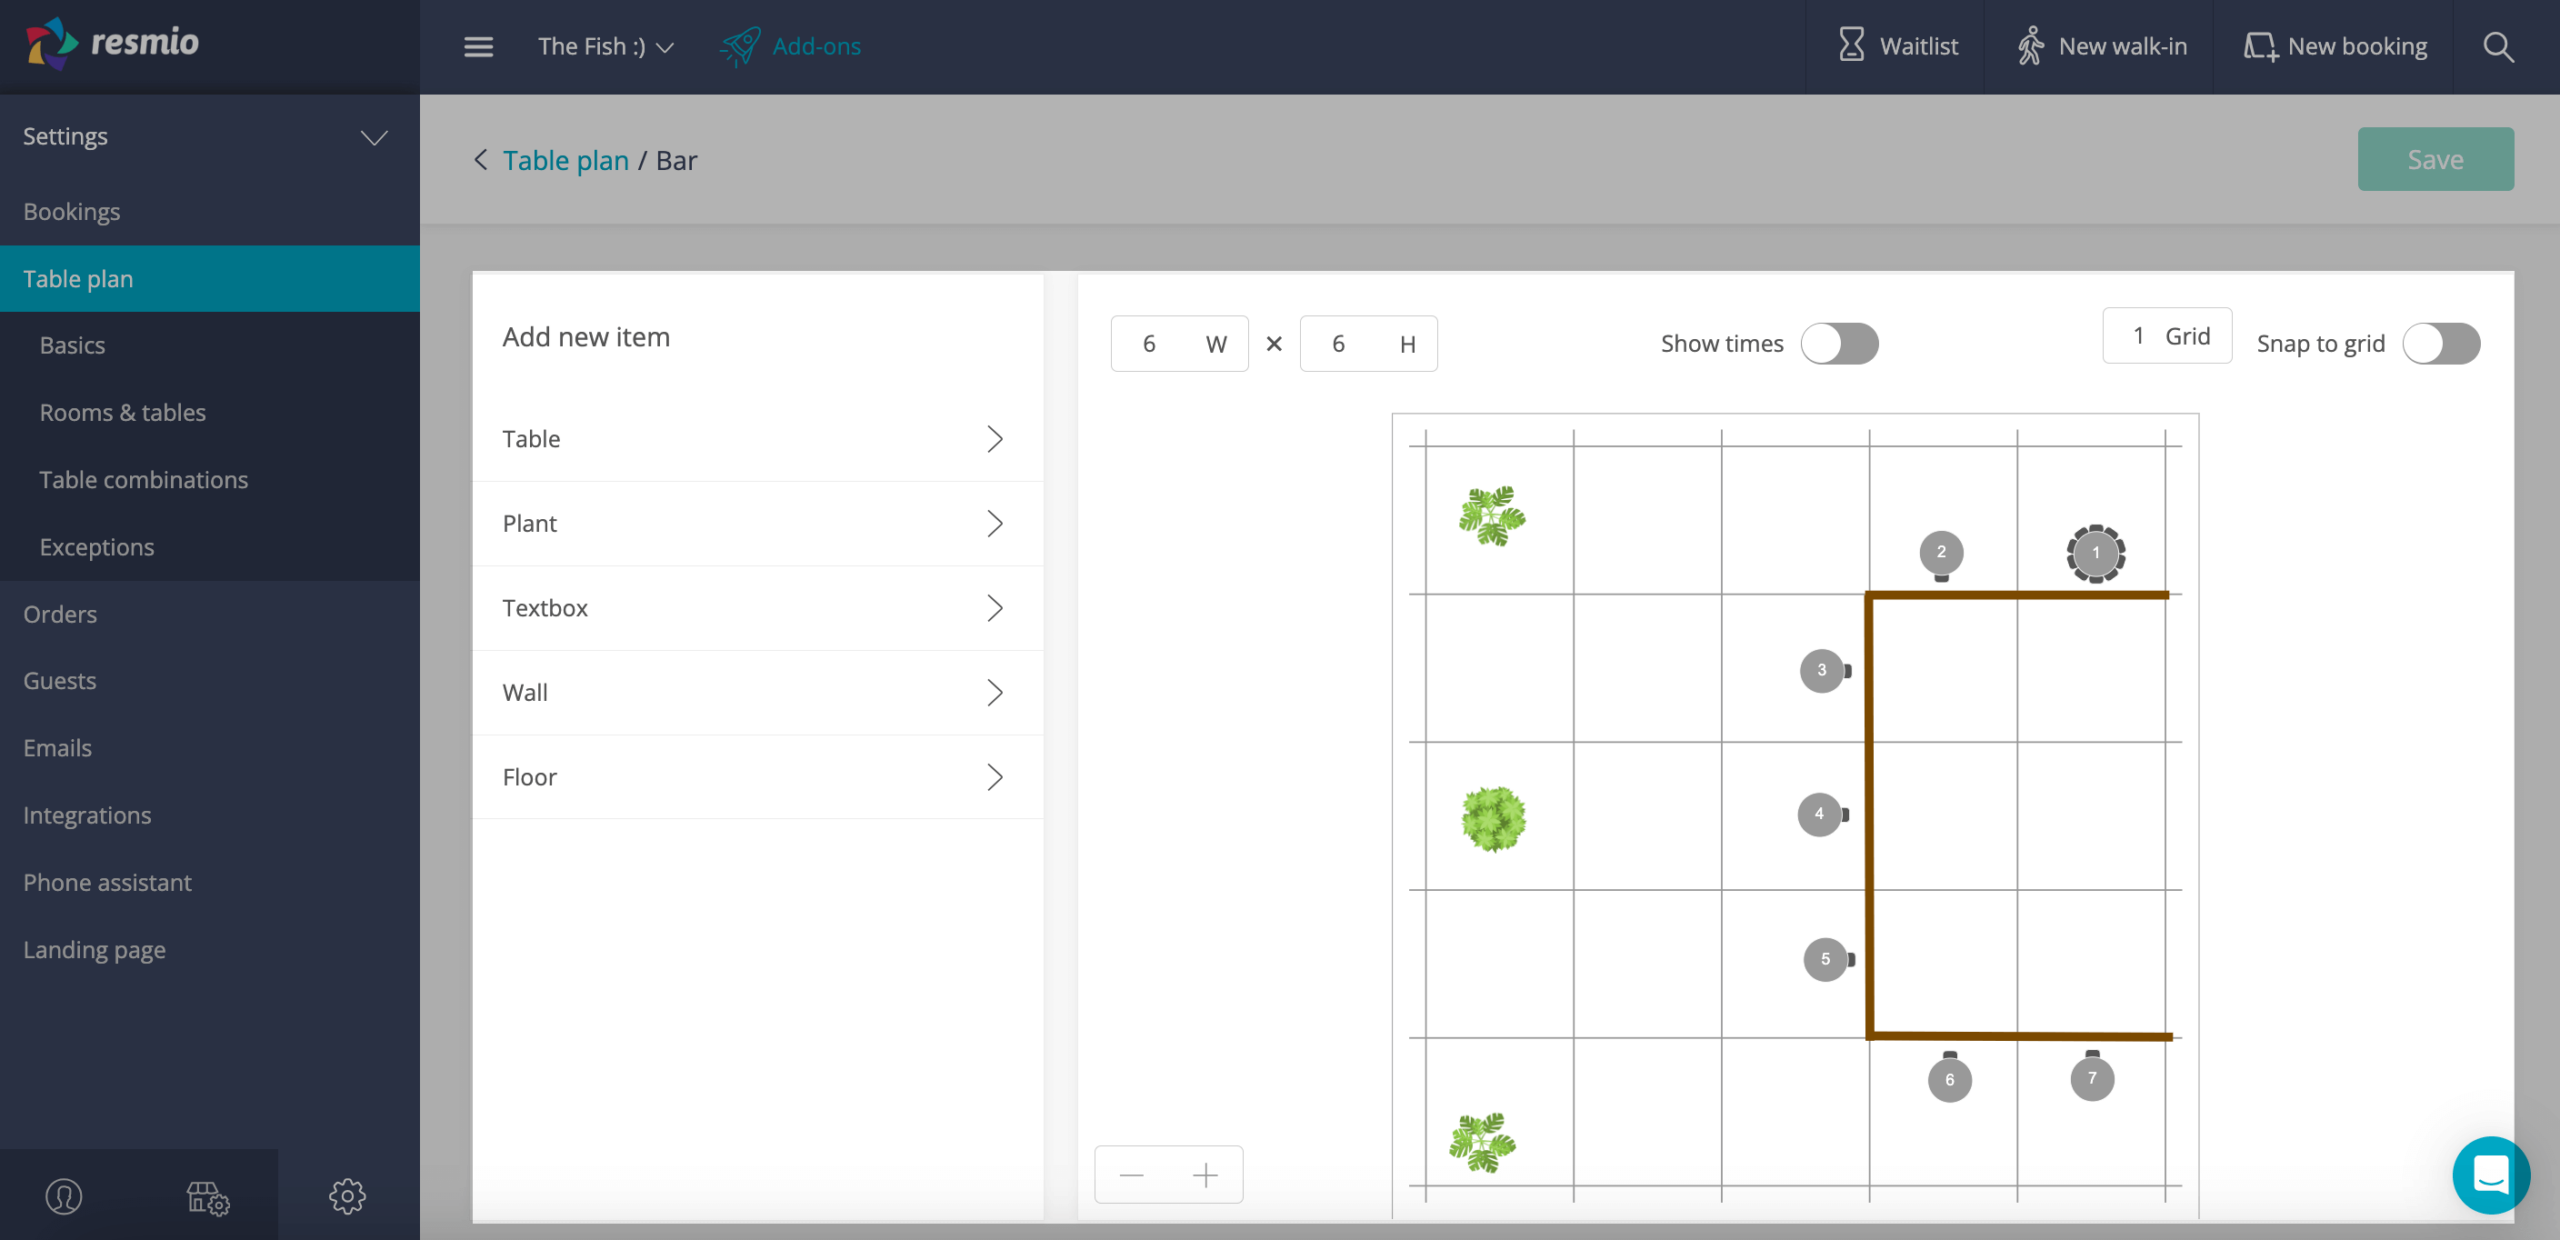
- It works this way: First you create seperate rooms and tables. To set the table arrangement click on the table symbol next to the “+Add a new table” button. Now you can see the room in front of you and insert your tables and other objects.
- By using the window at the top left of the room display you can change the height and the width of the room. The “Show times” slider allows you blend in booking times in the graphical table plan. With the settings of the “grid” you determine the fineness of the grid, that helps you to place the elements in your plan more accurately.
- Select “Table” on the left hand side and you will find all the tables you have created. Now you can place them to the desired location by simply using drag & drop. On top of that you can define the table form and size. With the “Orientation” bar you can rotate the table on the graphical plan to it’s final position. Furthermore you can add other elements like plants, text boxes and walls and set the ground color.
It is possible for the system to automatically combine tables if a group is too big for small individual tables.
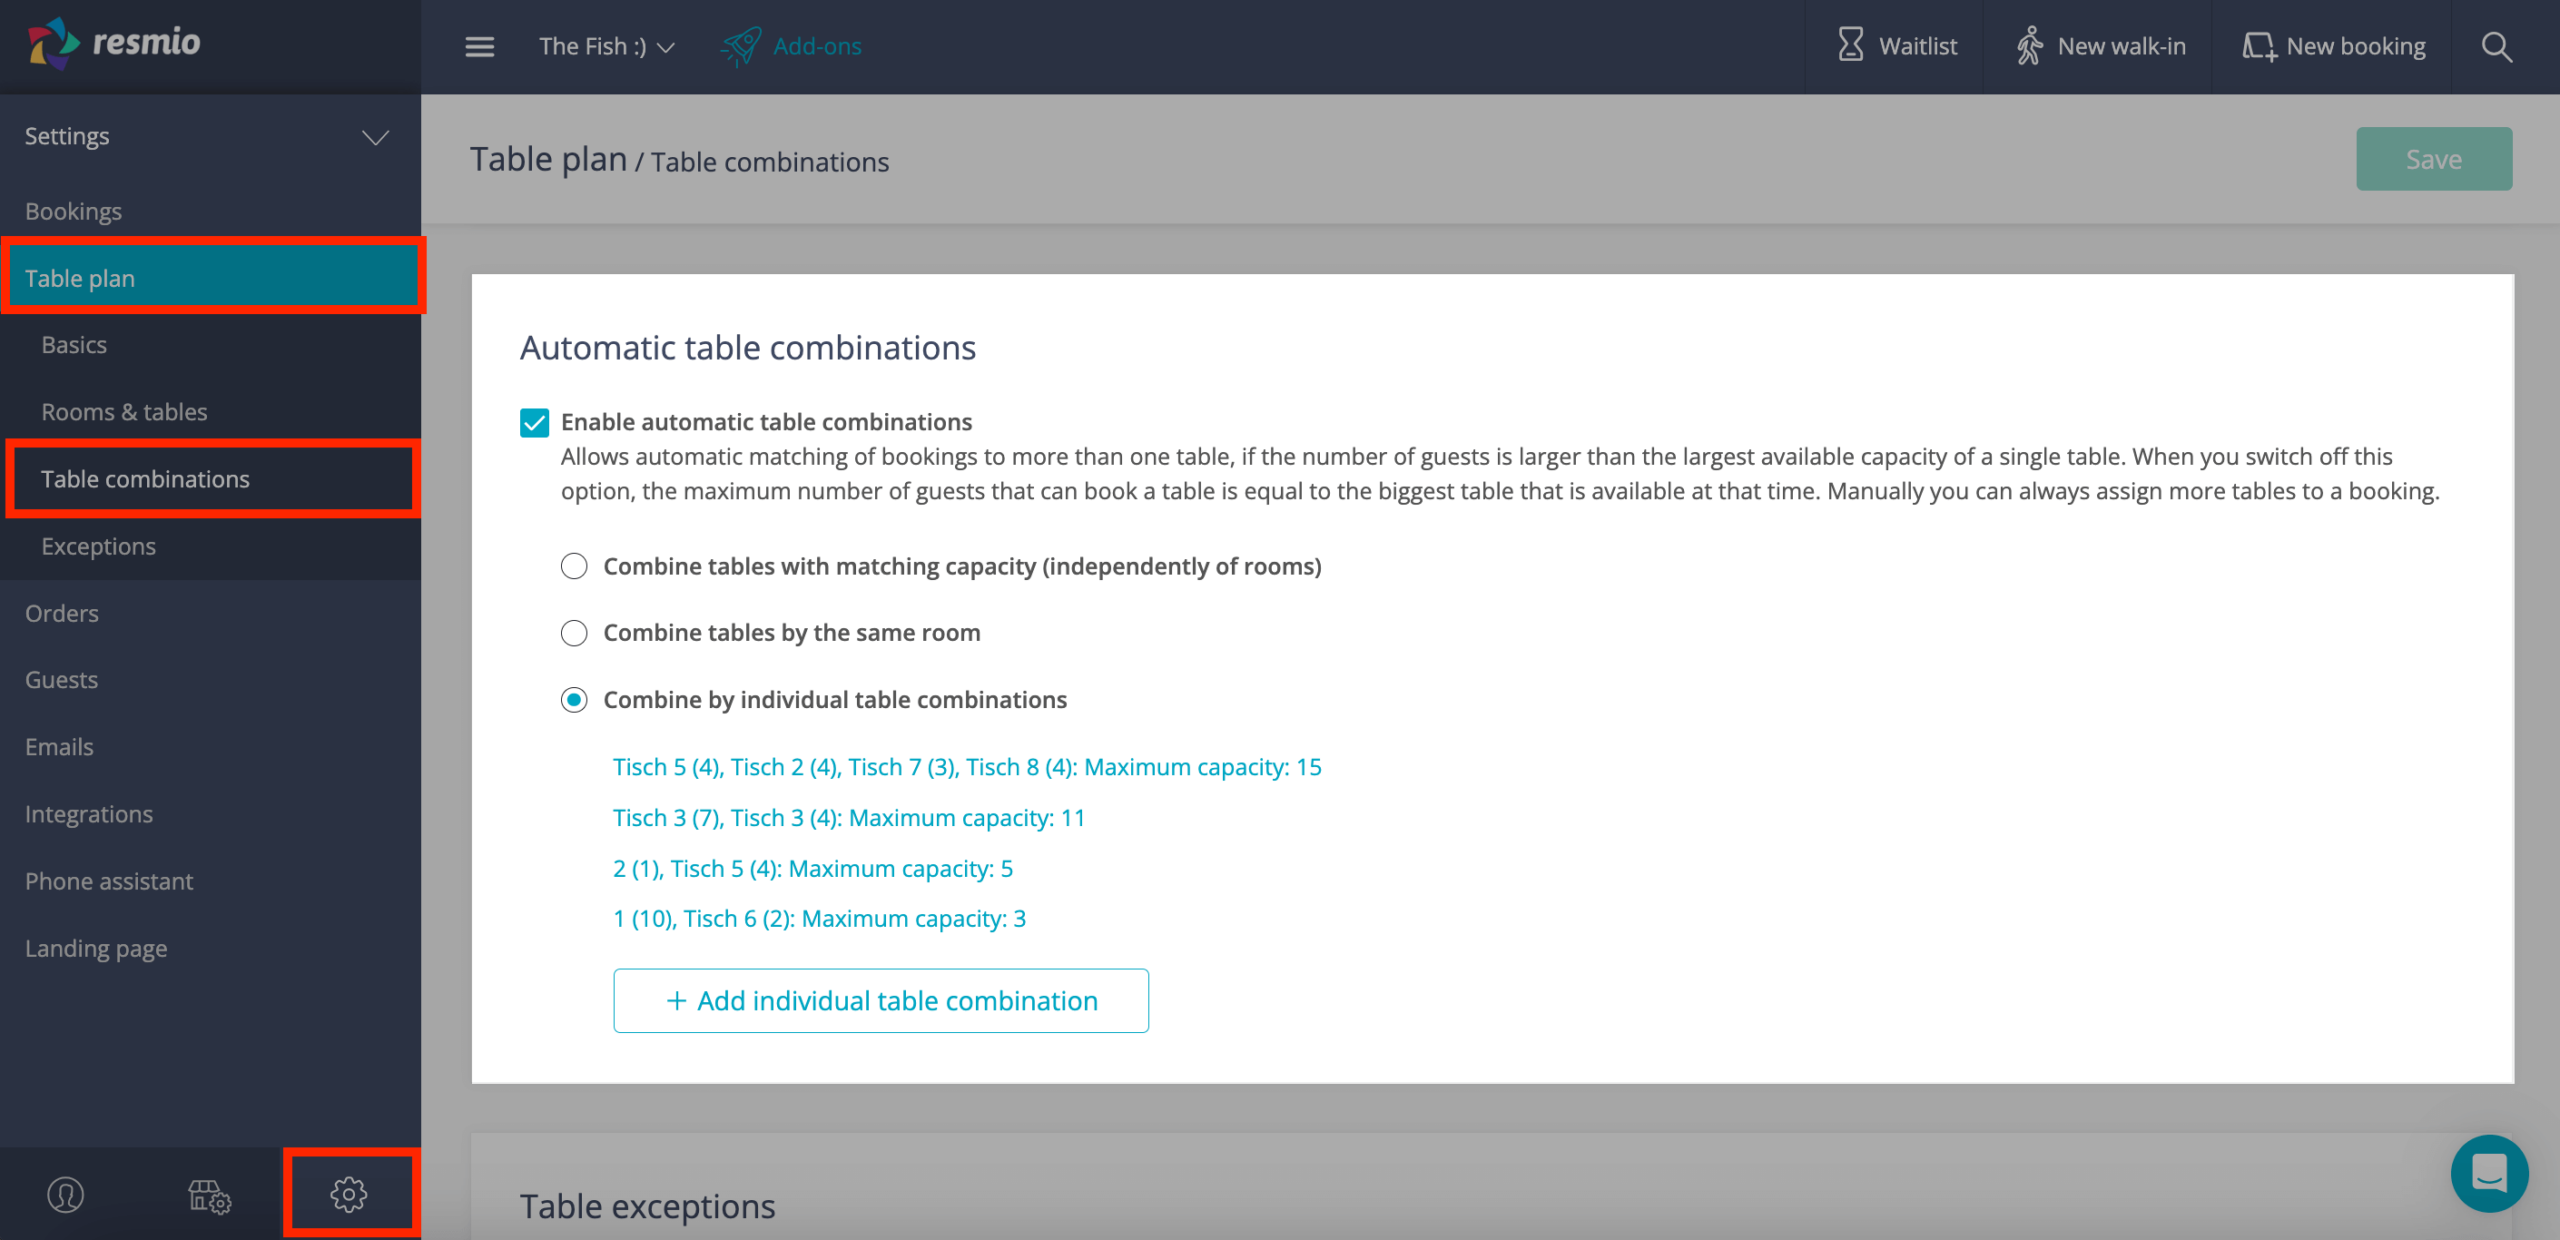
Under ![]() “Settings” > “Table plan” > “Automatic table combinations” you can set if and how your tables should be combined automatically. If you check “Enable automatic table combinations” bookings will be automatically distributed to several tables when the group size exceeds the capacity of the individual tables.
“Settings” > “Table plan” > “Automatic table combinations” you can set if and how your tables should be combined automatically. If you check “Enable automatic table combinations” bookings will be automatically distributed to several tables when the group size exceeds the capacity of the individual tables.
Below that you have three choices that control how your tables are combined:
- Combine tables with matching capacity (independently of rooms) – That means even if the tables are located in two different rooms they are combined.
- Combine tables by the same room
- Combine by individual table combinations – Attention: If you choose this last setting, you have to use the button “+ Add individual table combination” to actually enter all your desired combinations individually so that the system can implement them!
If you uncheck the “Enable automatic table combinations” setting, the maximum number of guests that can reserve a table will be equal to the largest table available at that moment. Manually you can assign multiple tables to a reservation at any time.
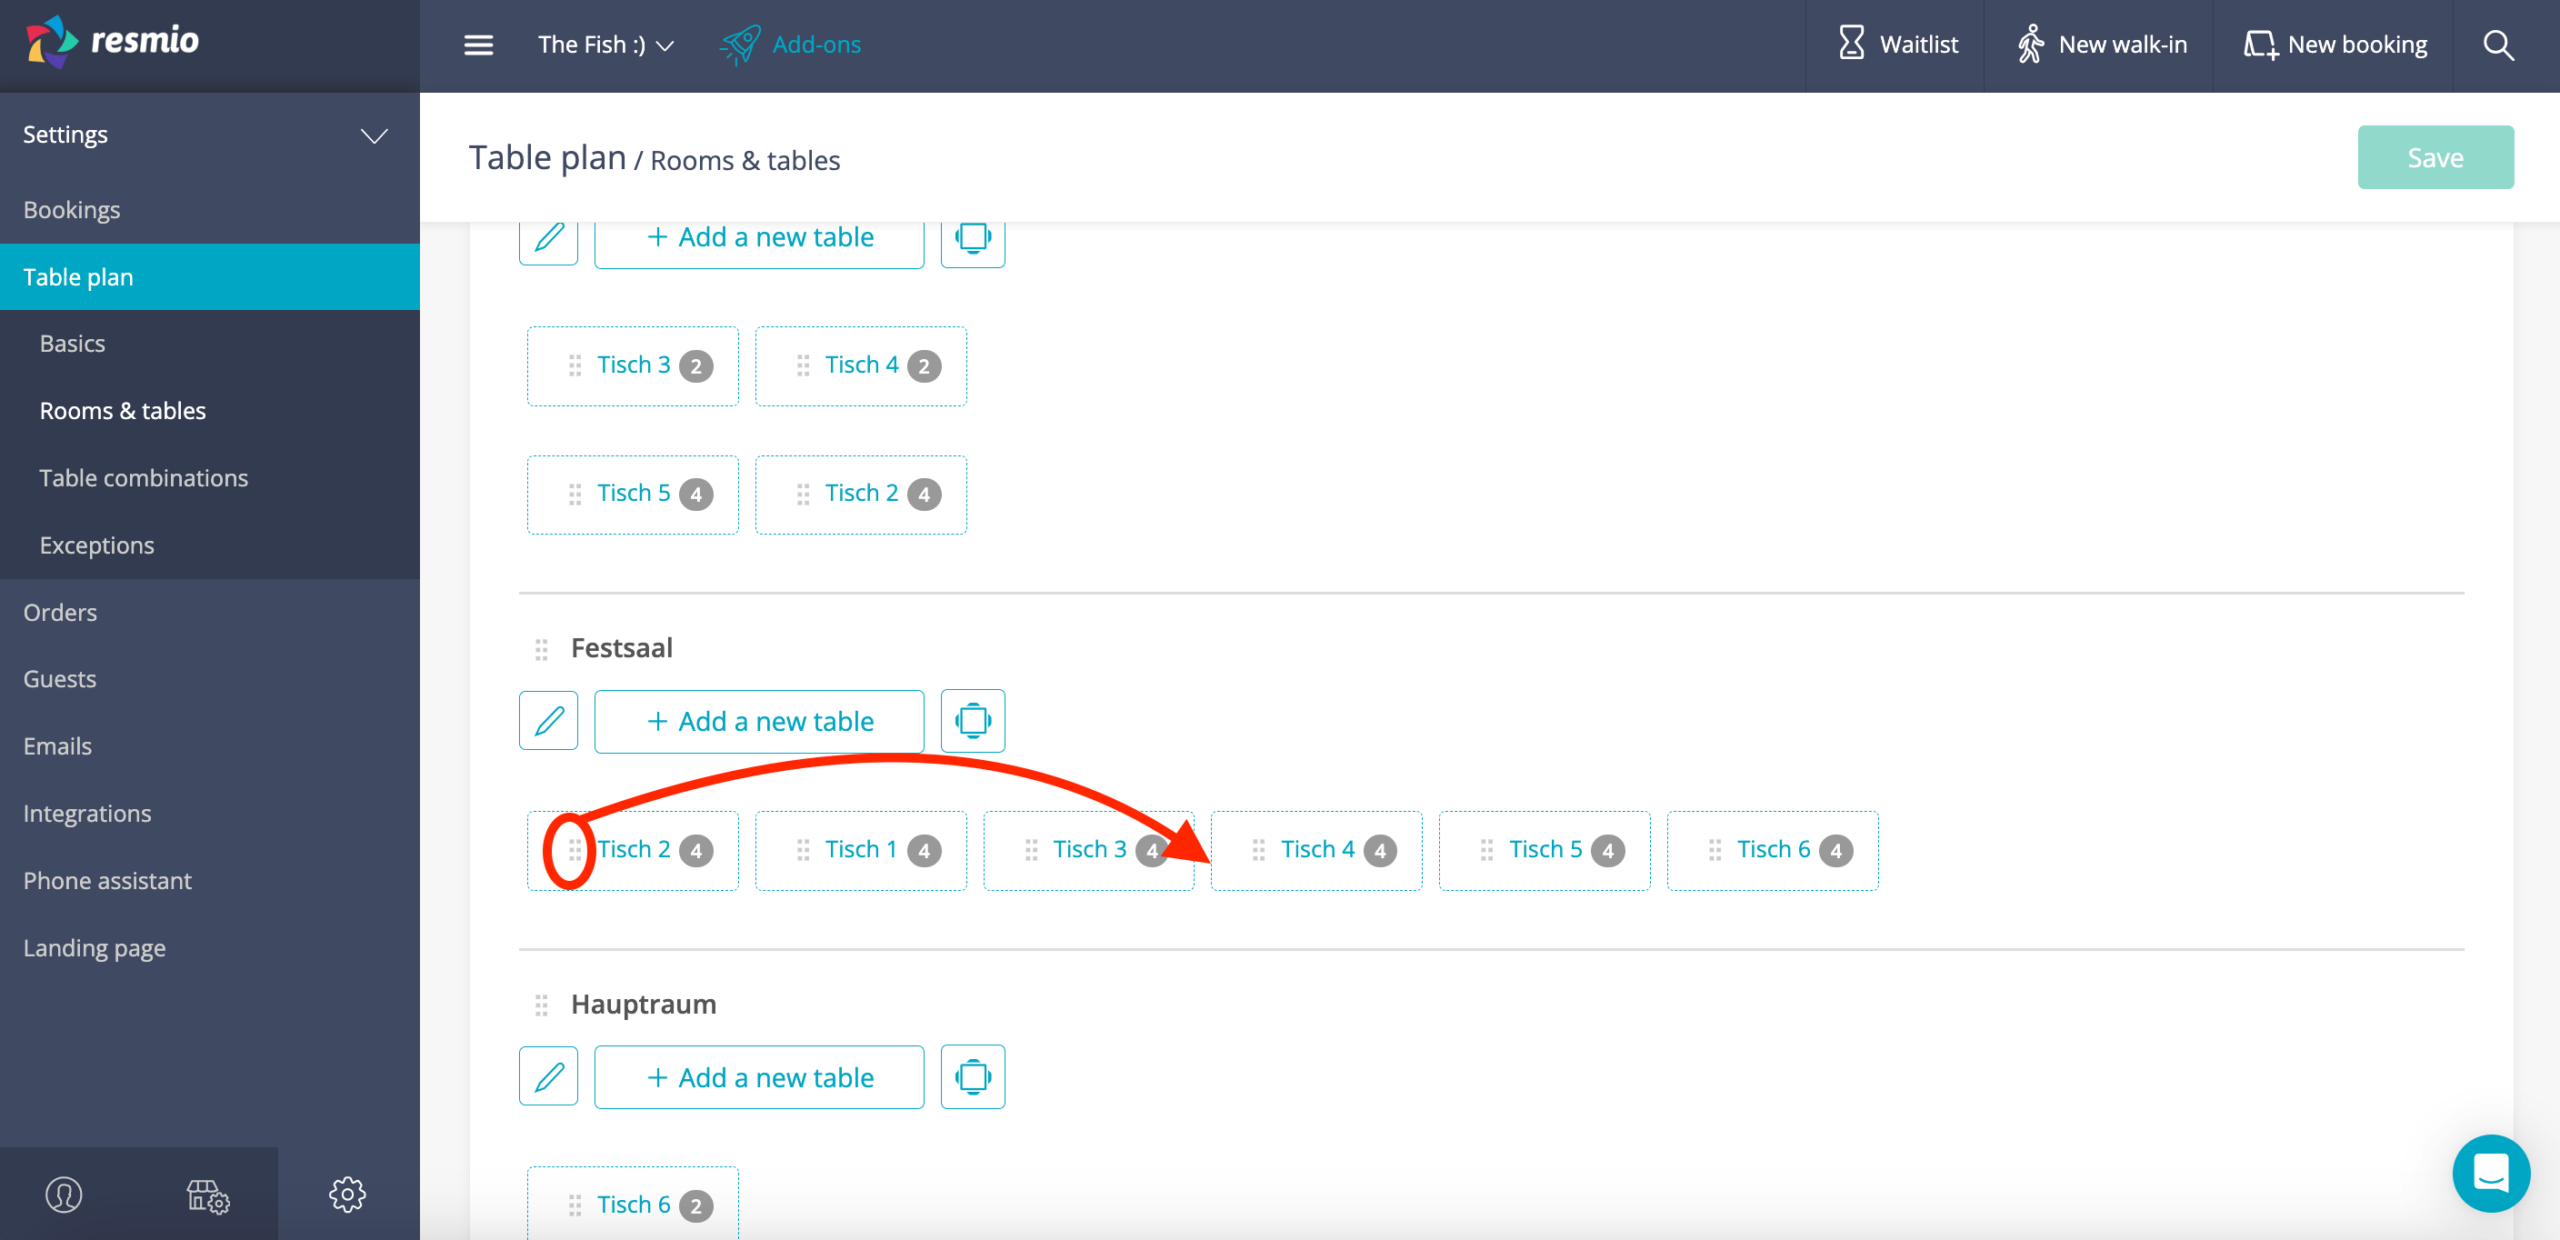
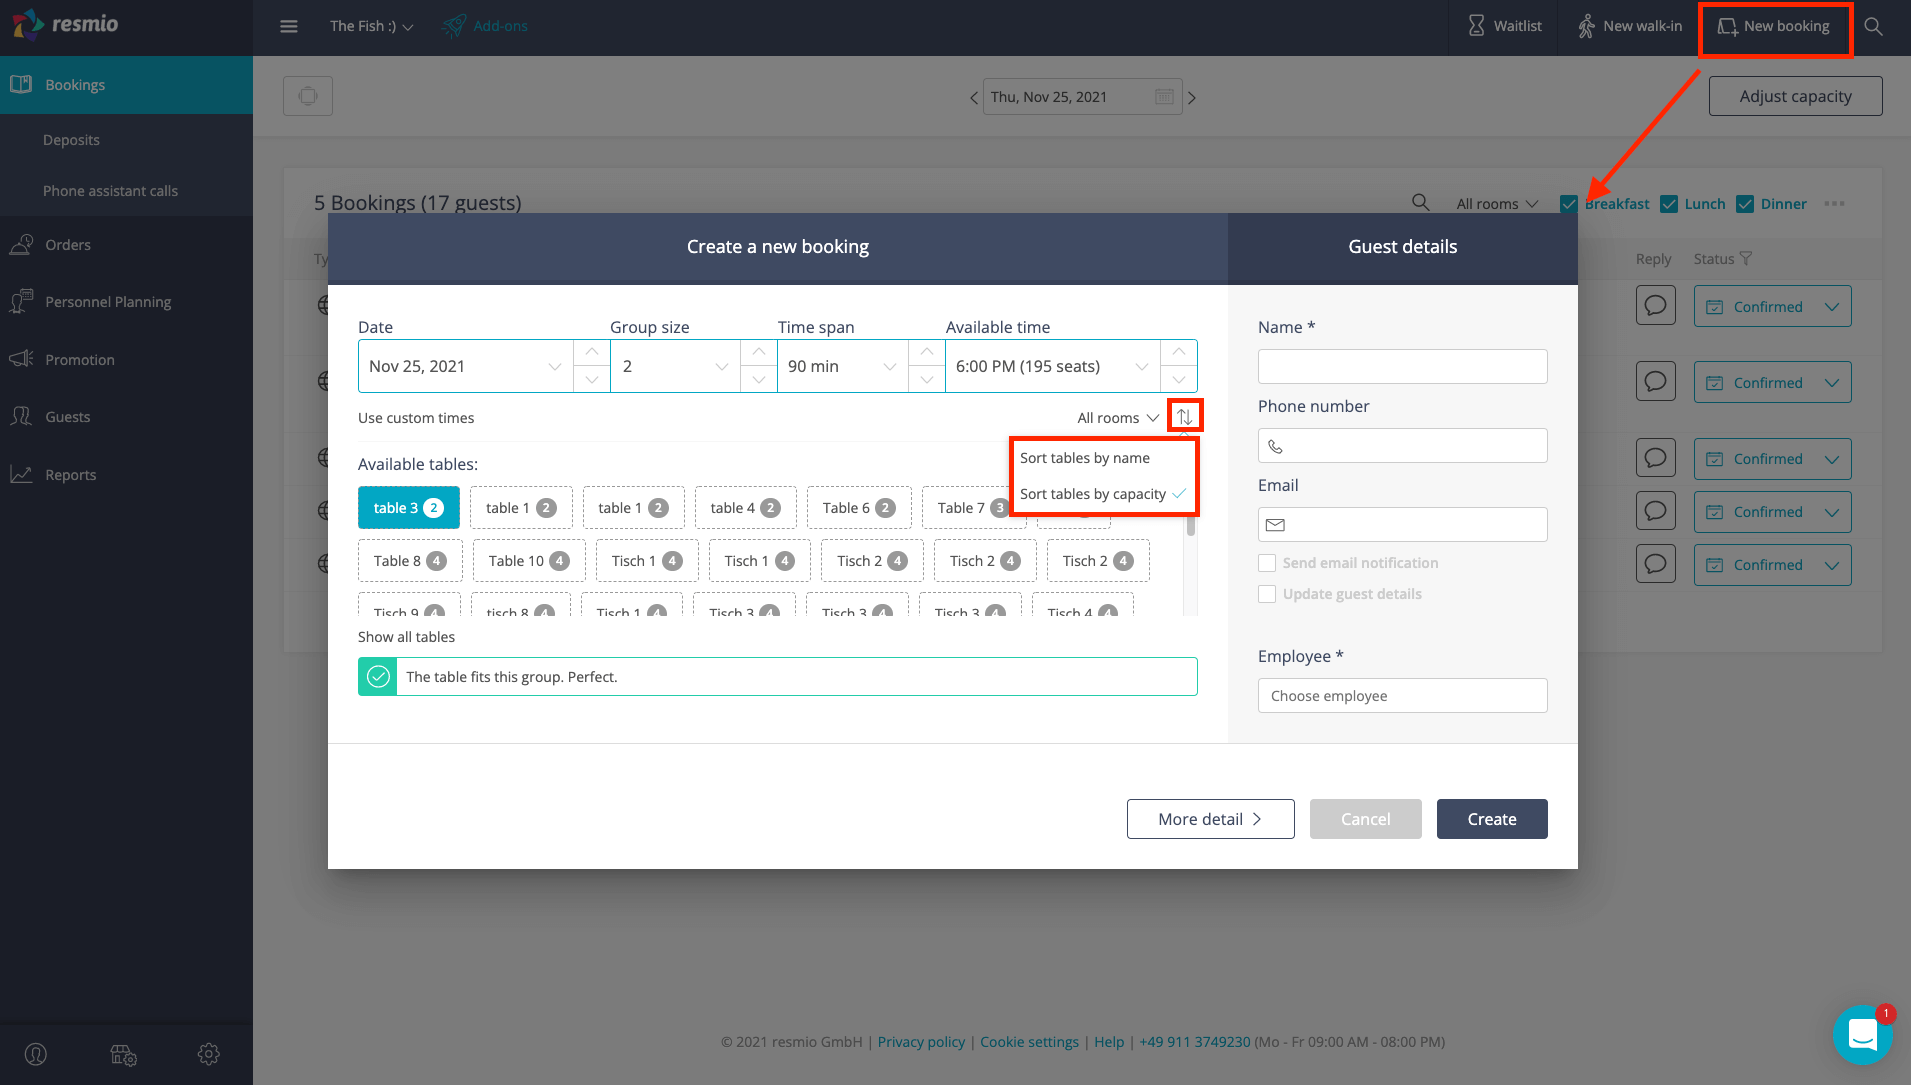
You have the possibility to set up the order of tables which have the same capacity. Under ![]() “Settings” > “Table plan” > “Rooms & tables” you can move your cursor over the six little dots in front of the table and then select the table and move it to the desired place via drag and drop. Tables on the left hand side are selected first.
“Settings” > “Table plan” > “Rooms & tables” you can move your cursor over the six little dots in front of the table and then select the table and move it to the desired place via drag and drop. Tables on the left hand side are selected first.
When manually adding or editing a booking, tables are listed in the same order as defined in your priortisation. However, you can also sort the tables by name for manual adjustments. Therefore you have to select the arrow symbol in the window where you can add or edit a booking. The setting is automatically saved once it has been changed.
Both options are available, you just have to adjust the preferred setting in your resmio account.
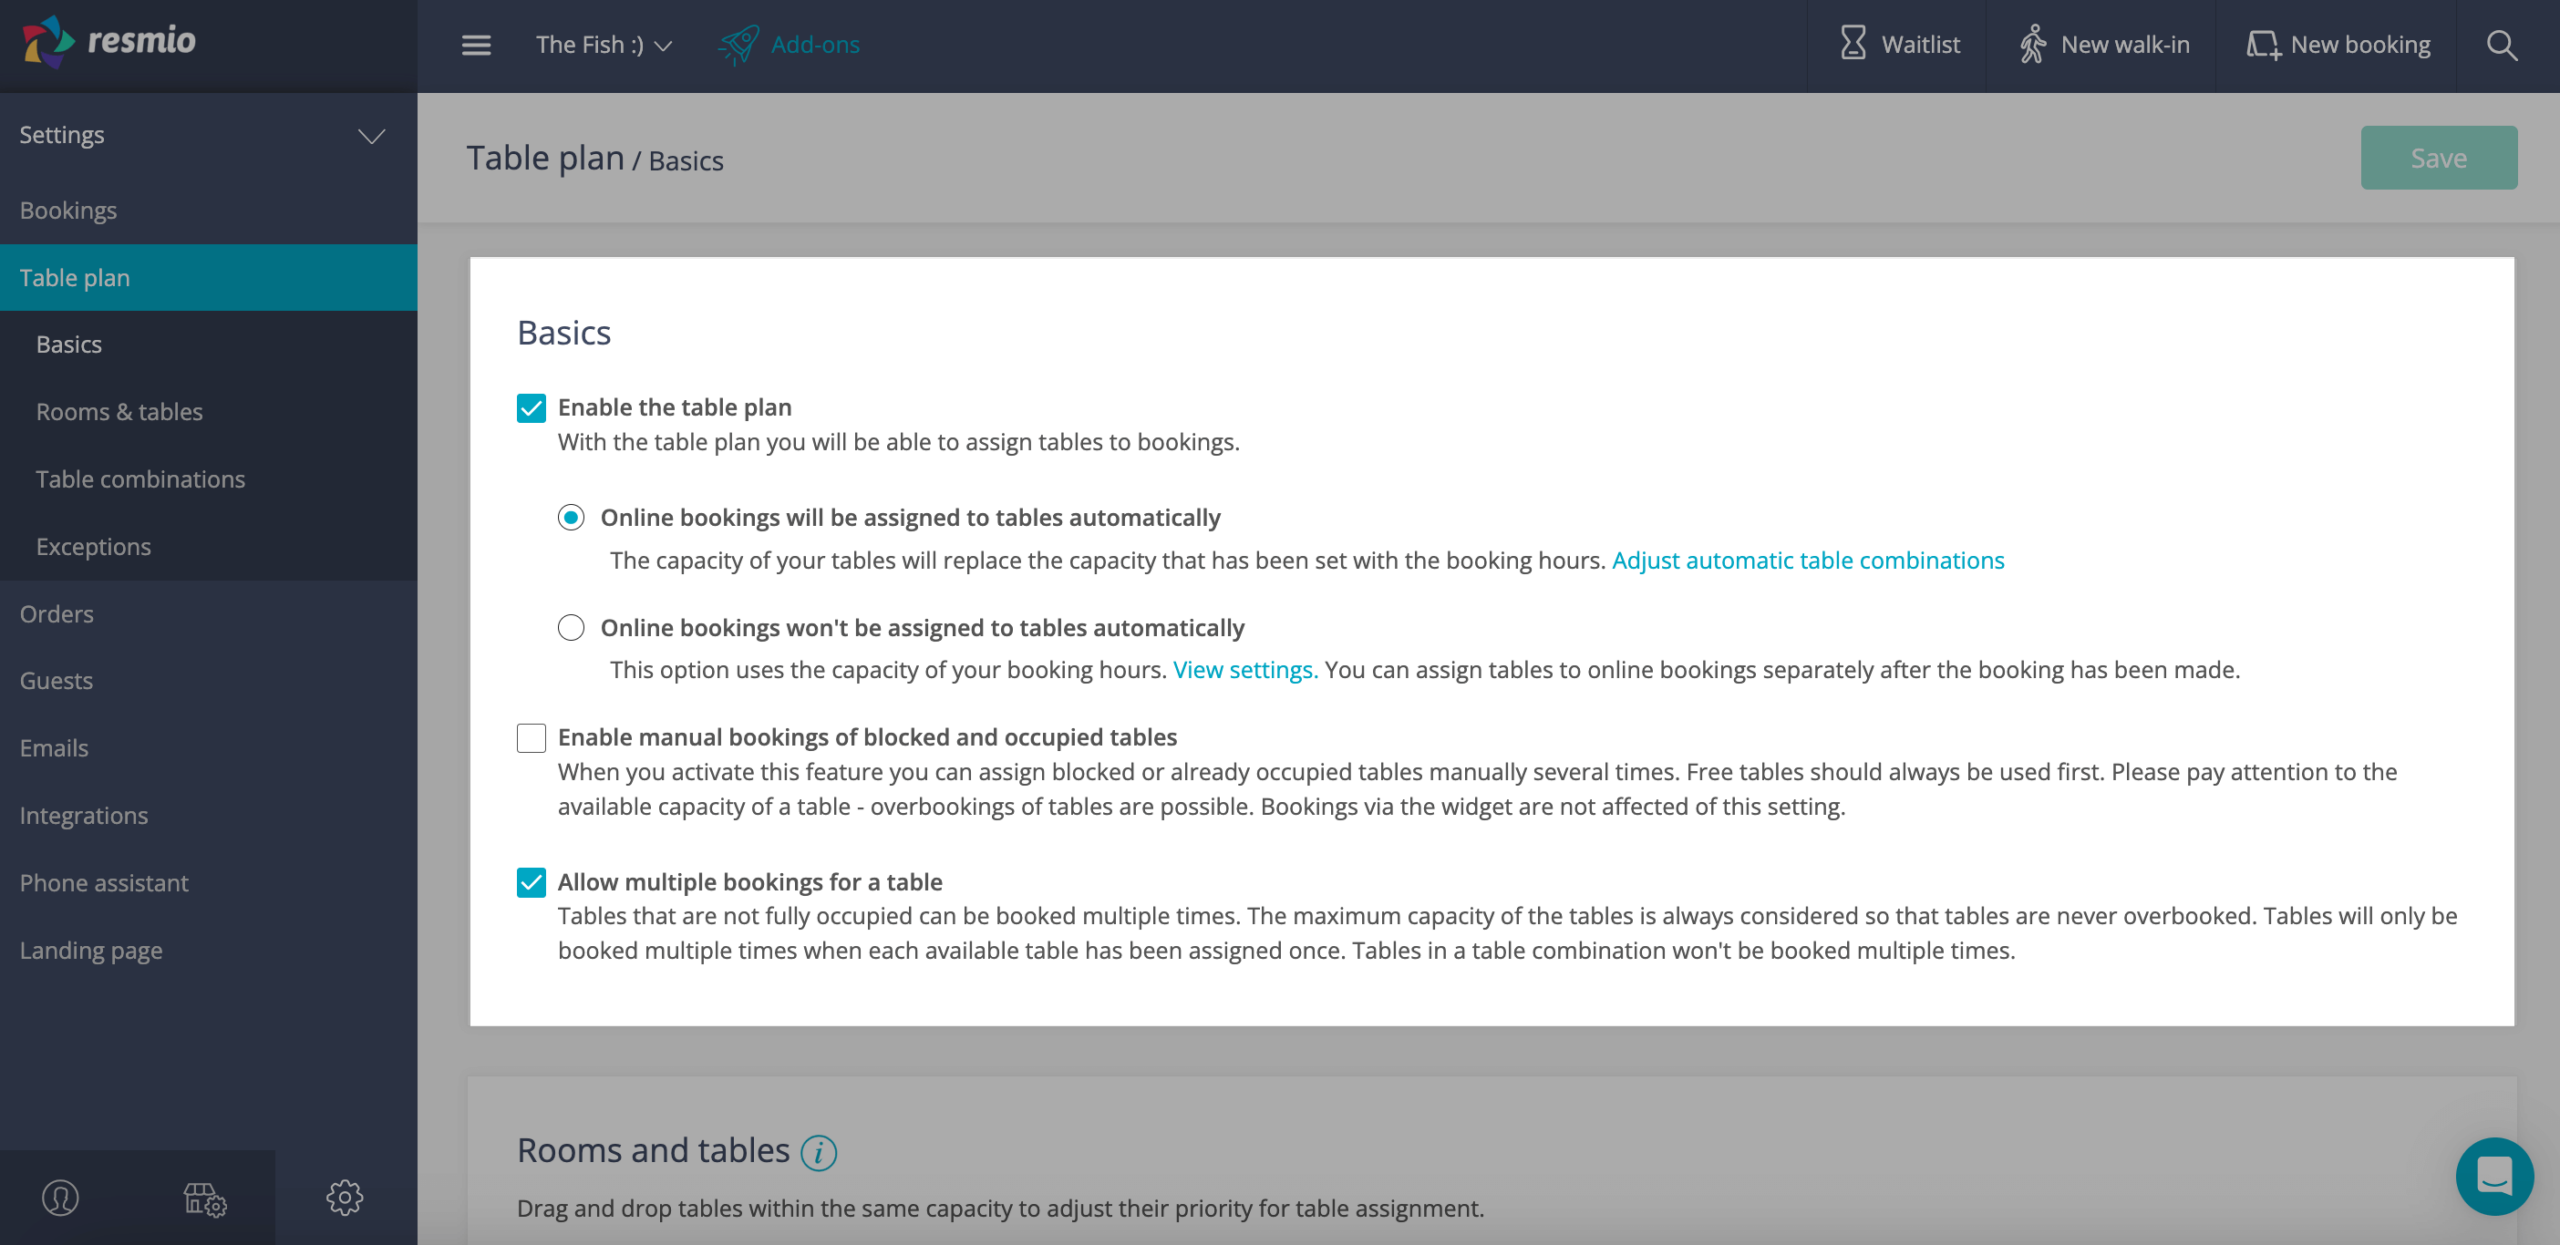
Under![]() “Settings” > “Table plan” > “Basics” you can select “Online bookings will be assigned to tables automatically”. If you choose this option bookings will automatically be assigned to a table.
“Settings” > “Table plan” > “Basics” you can select “Online bookings will be assigned to tables automatically”. If you choose this option bookings will automatically be assigned to a table.
Other than that you can select “Online bookings won’t be assigned to tables automatically” so that the system does not automatically assign a table to a booking. If you choose this option the capacity you set below “Booking hours & capacities” is used. Otherwise, the capacities of the table plan are used.
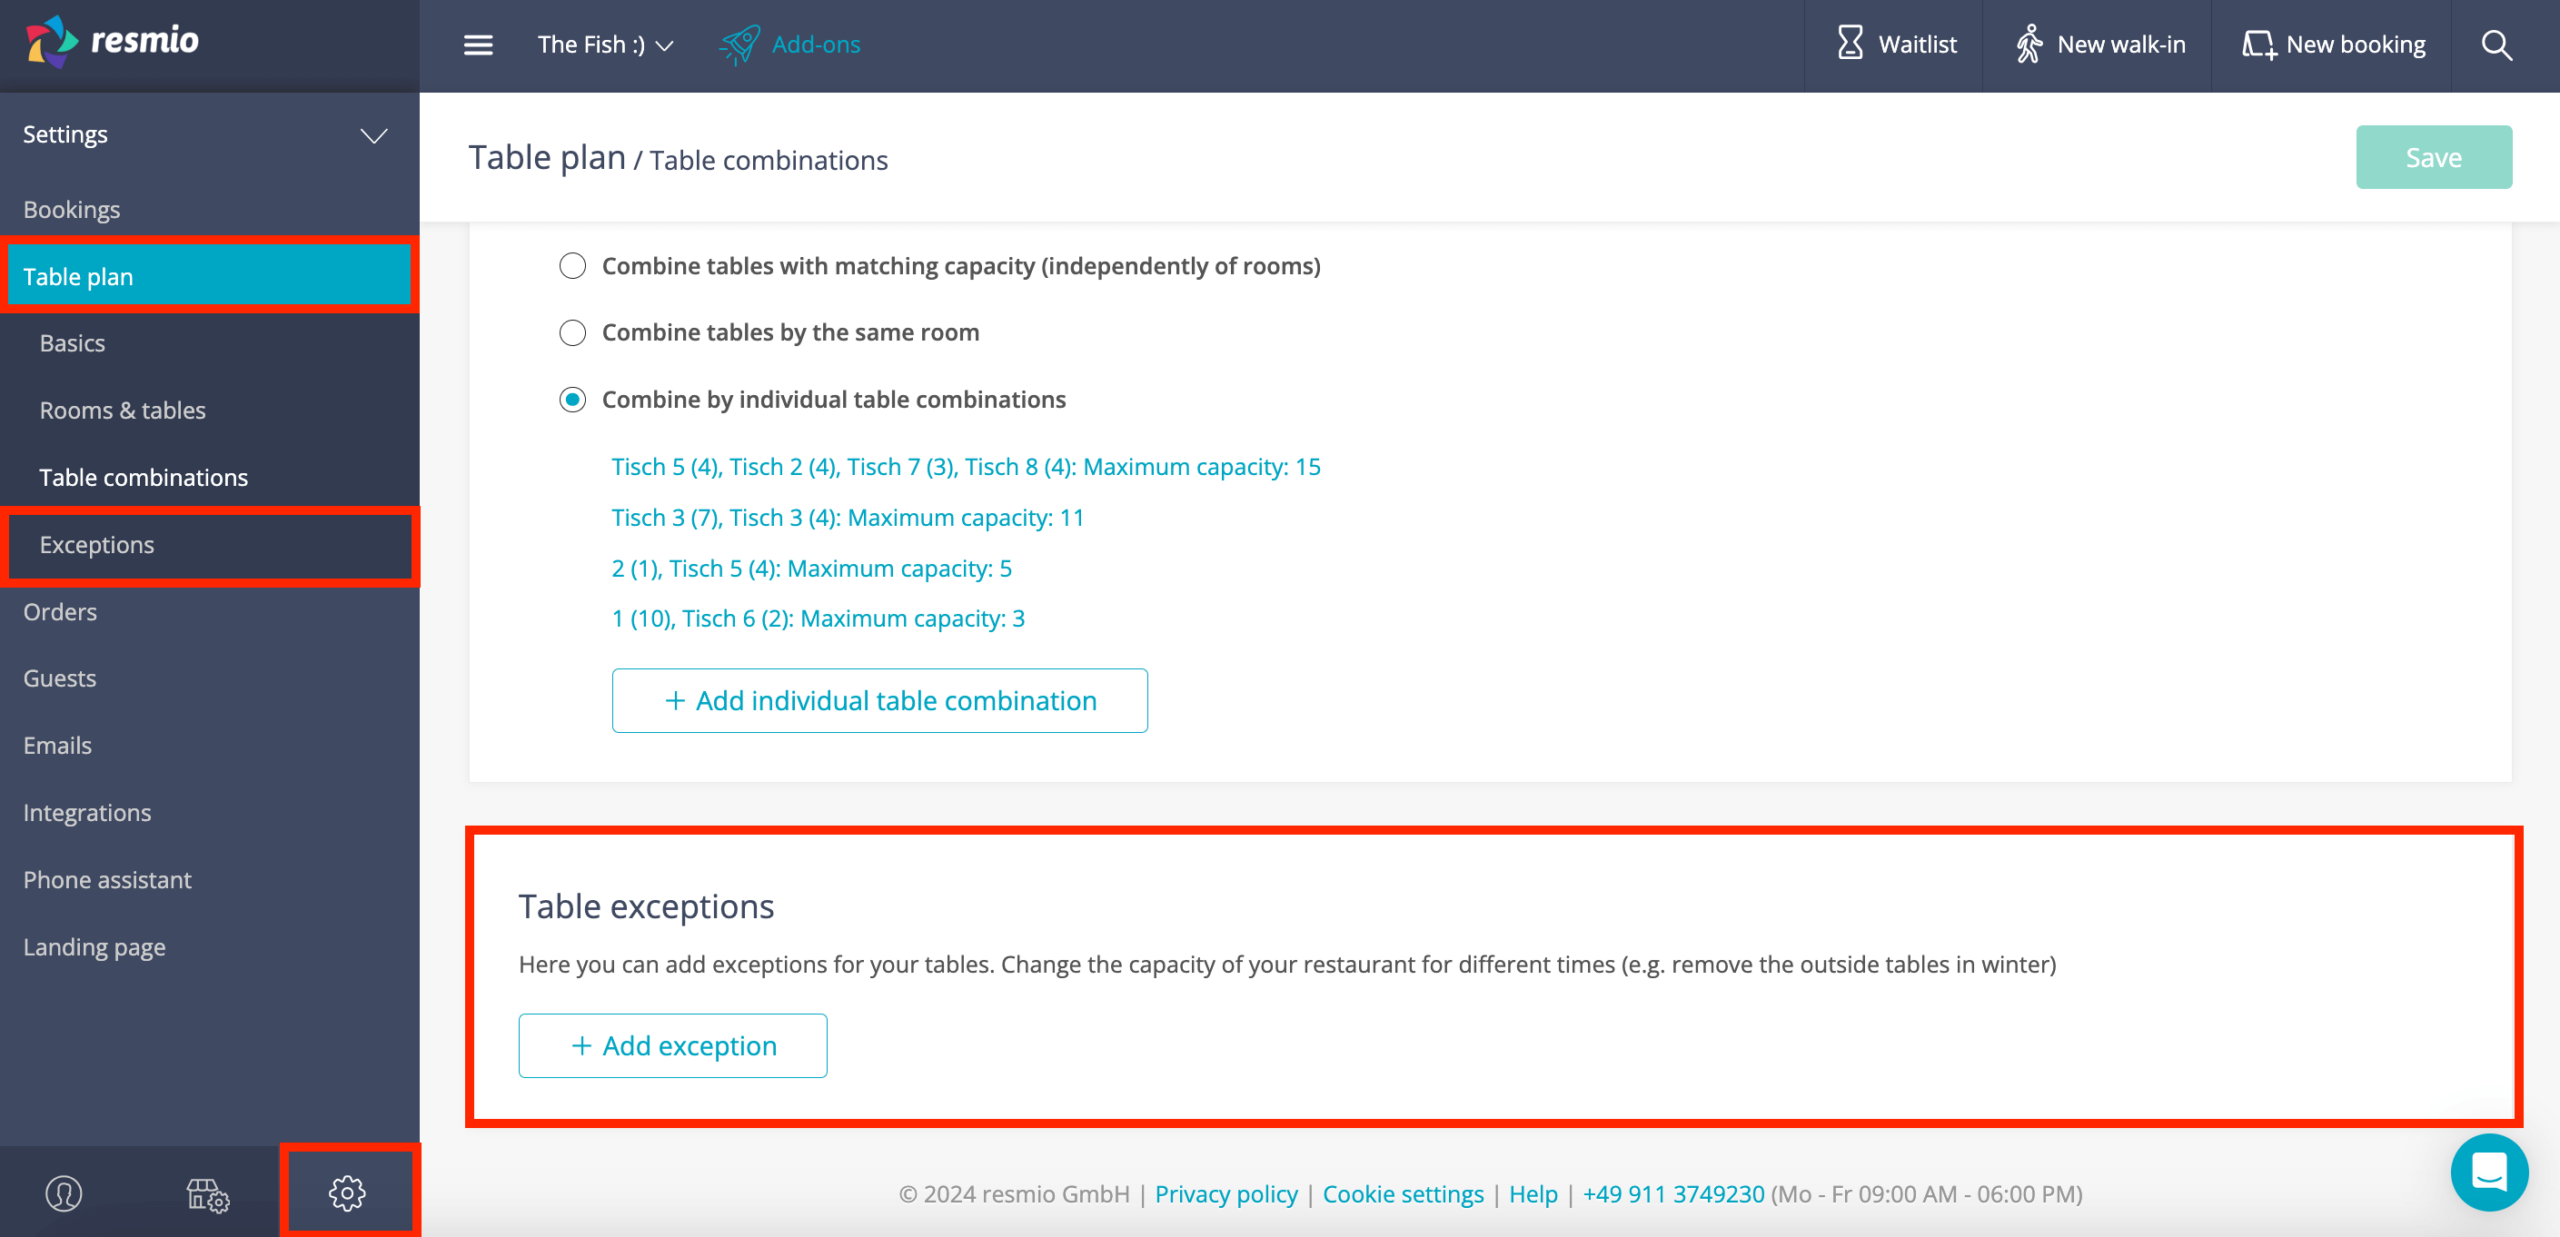
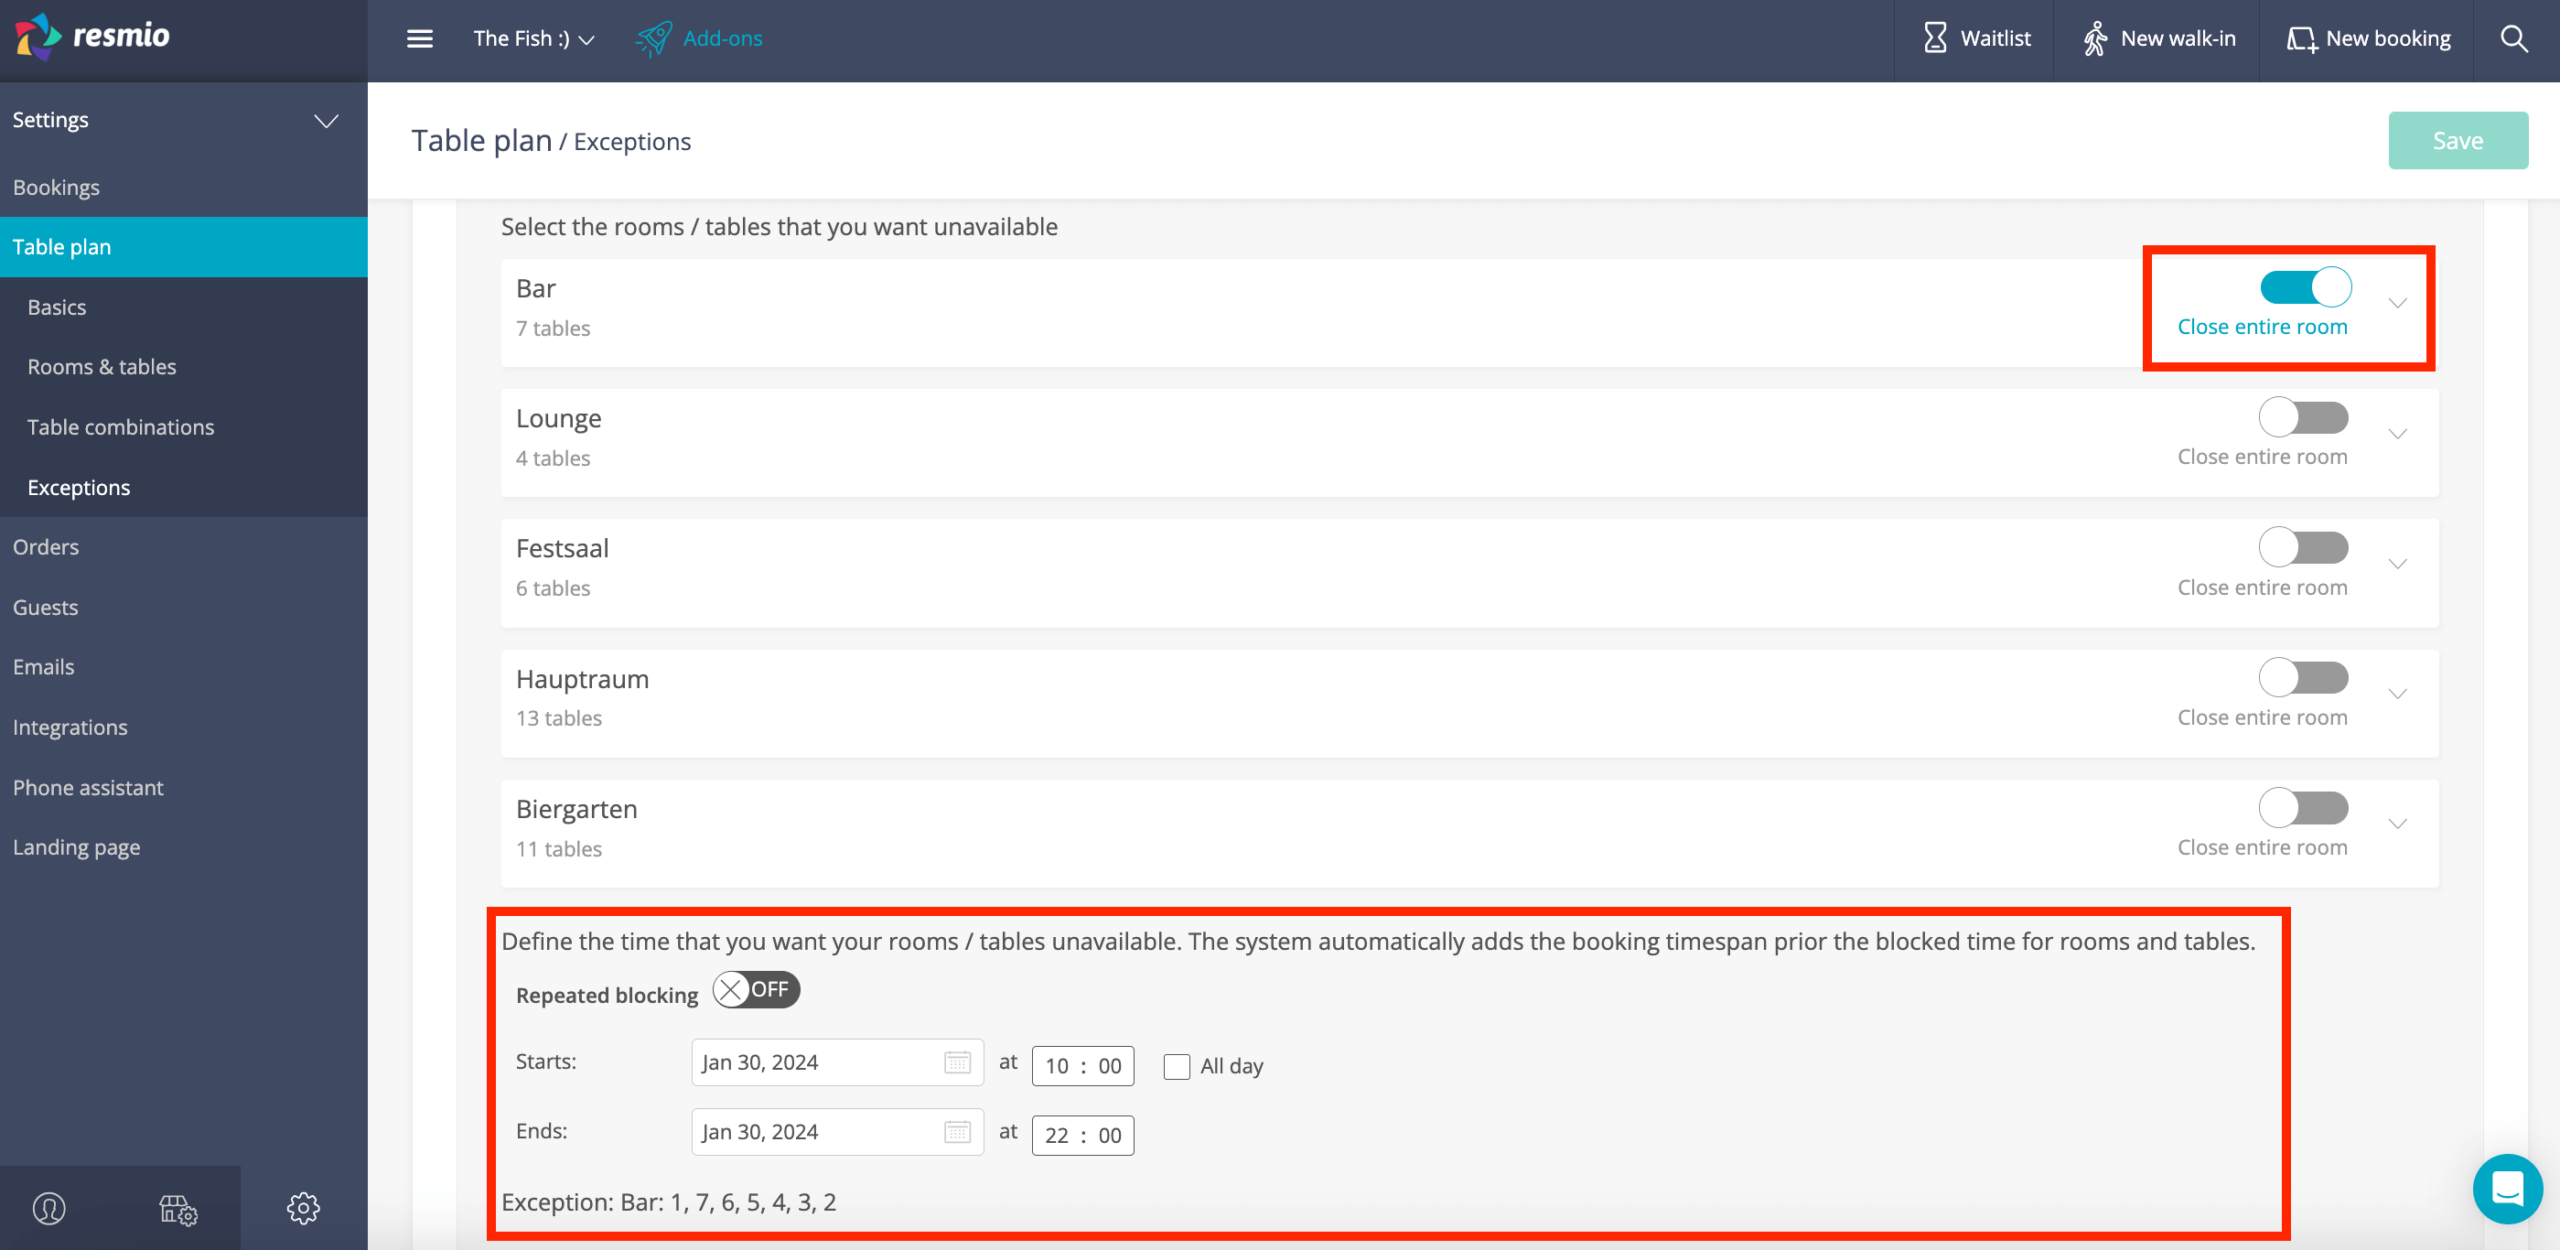
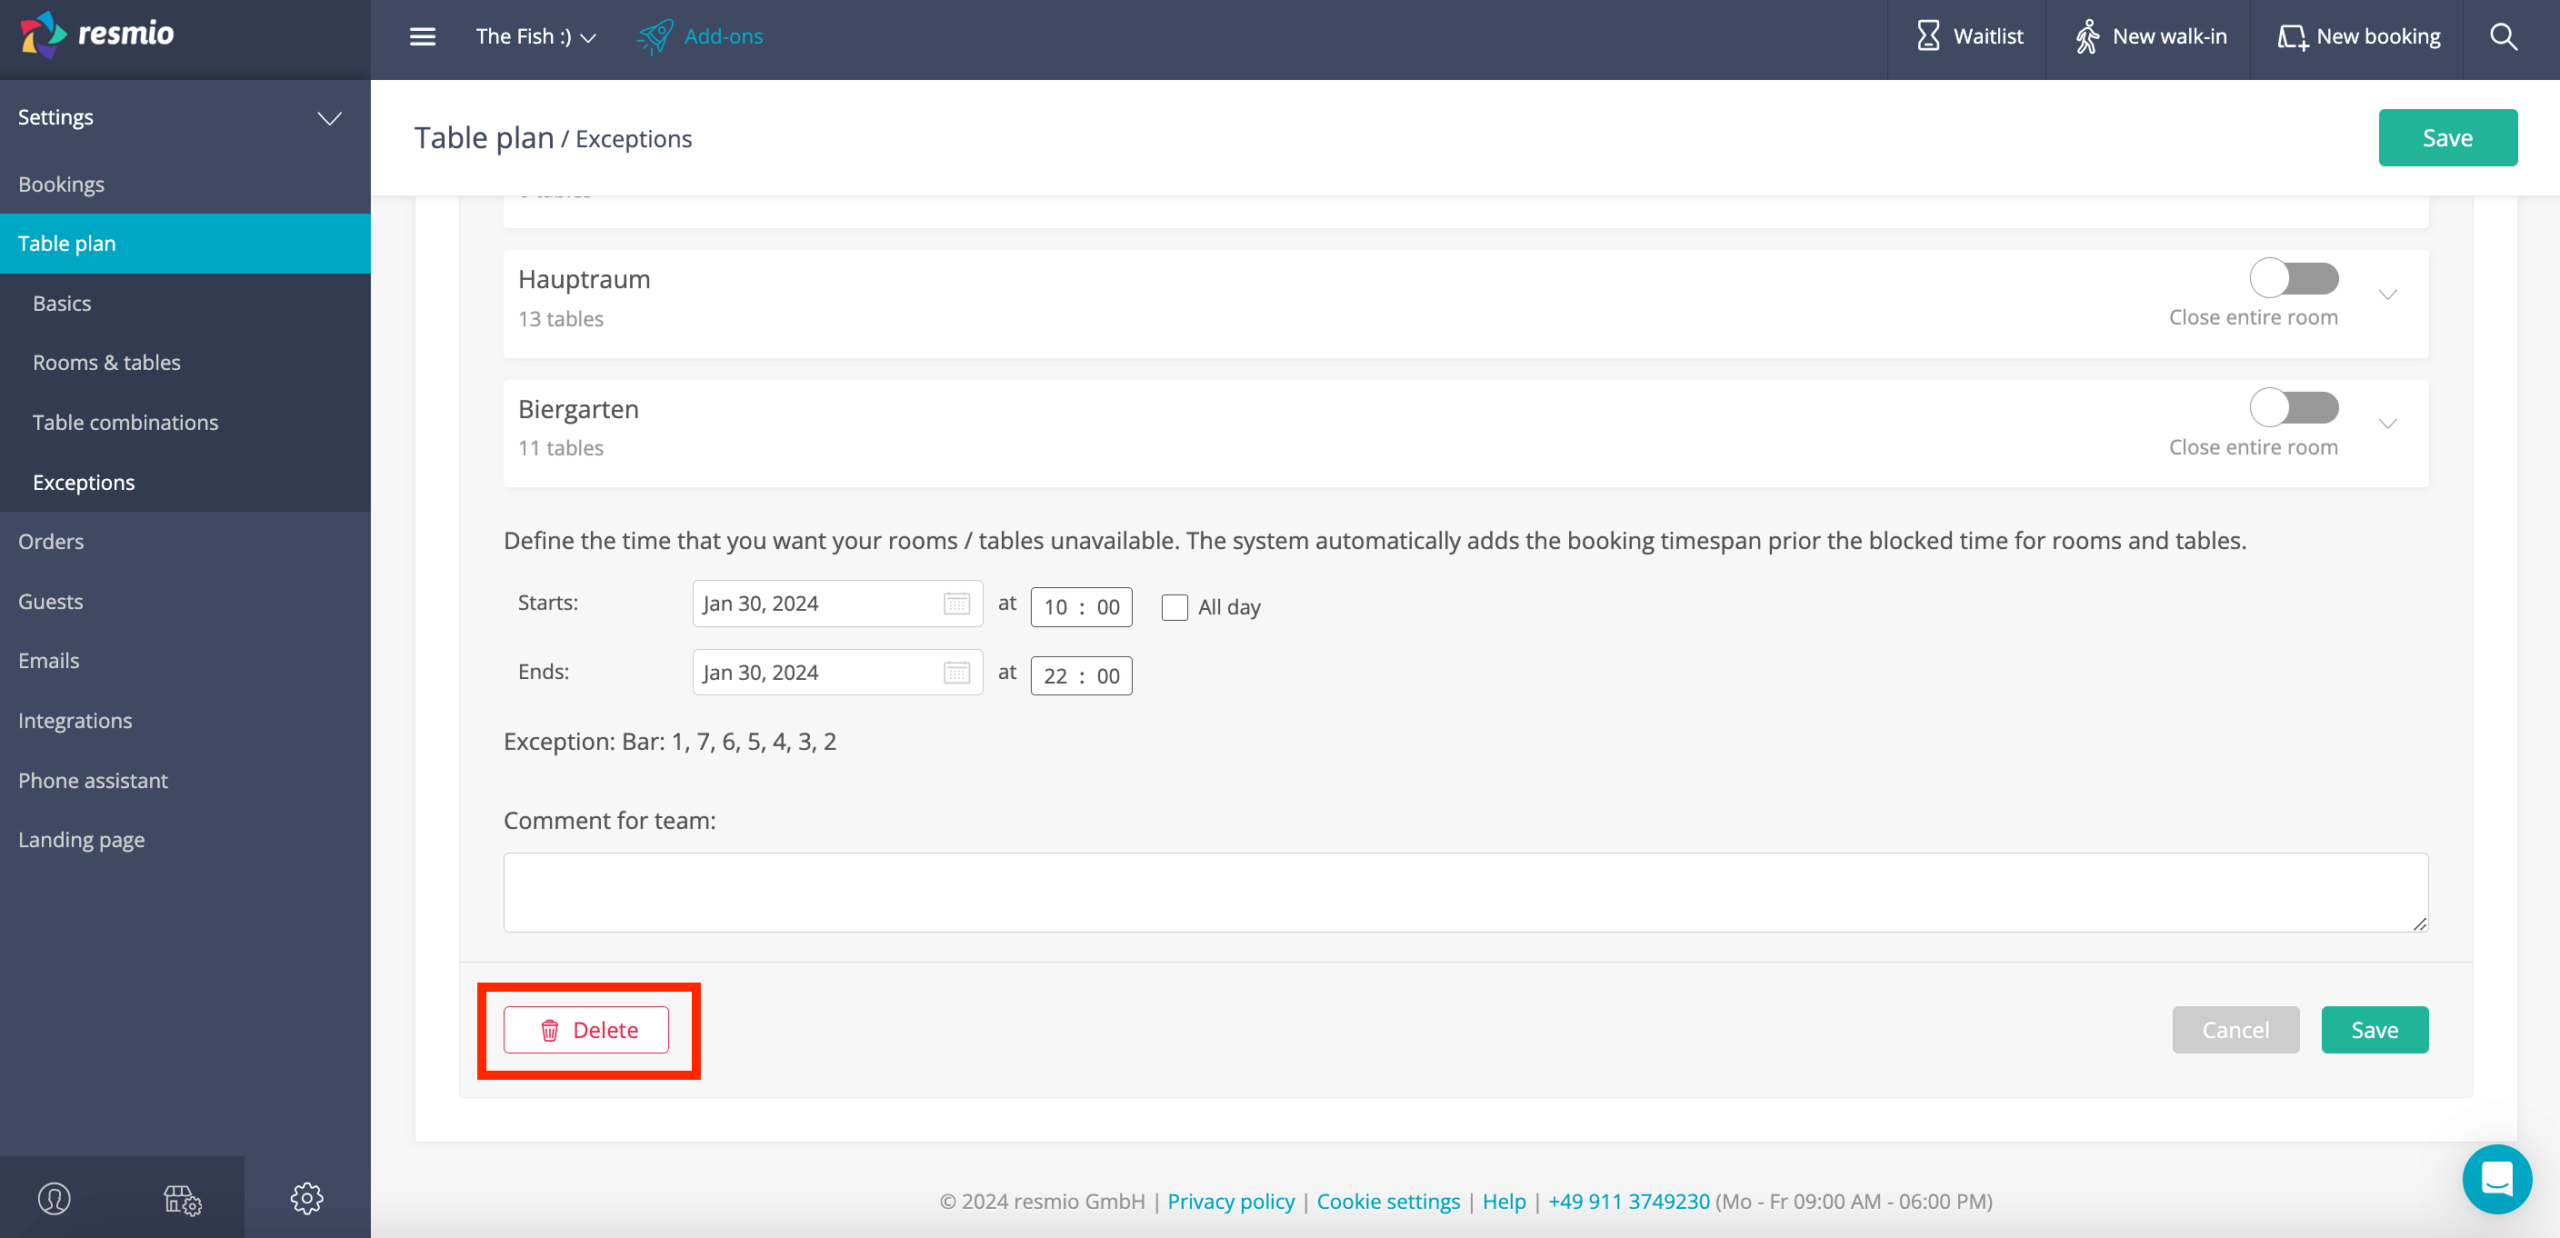
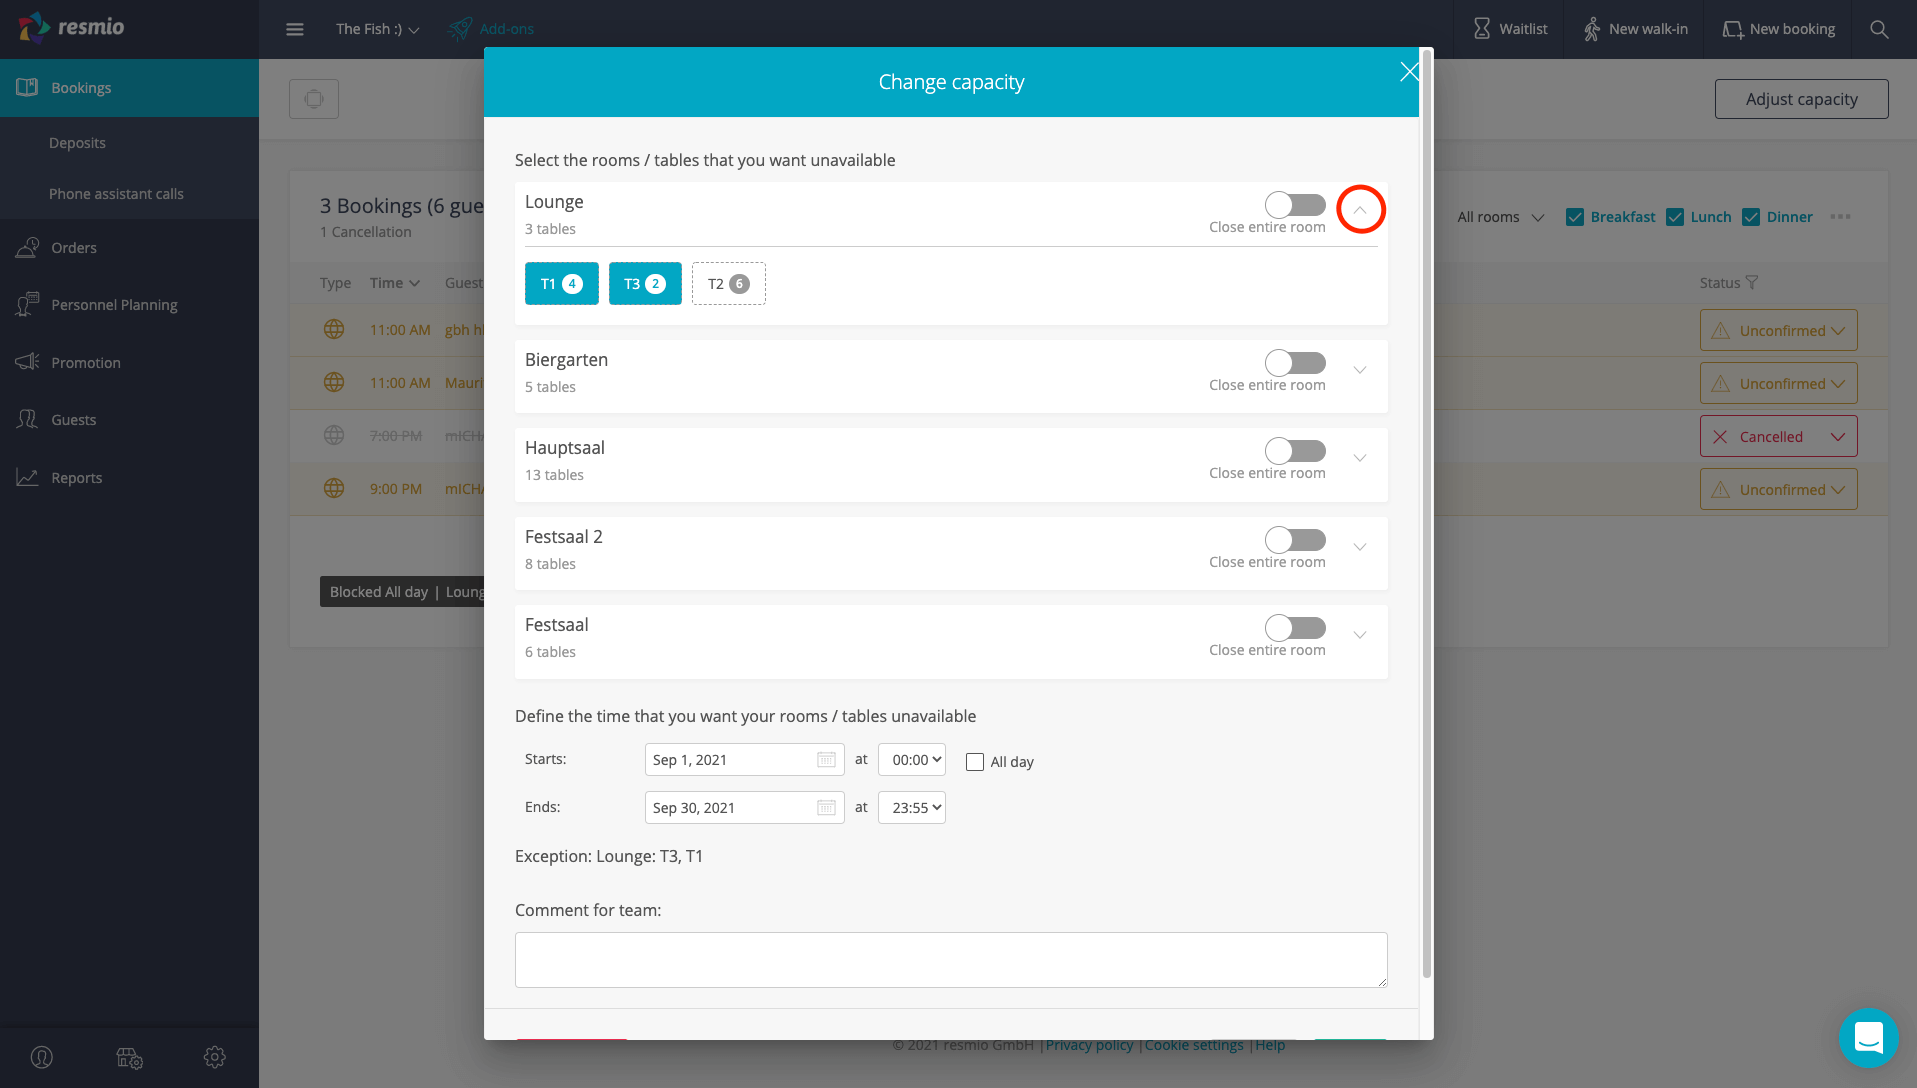
- Under “Settings” > “Table plan” > “Table exceptions” you can set exceptions in terms of availability of your tables. Just click on “+ Add Exception” and a drop down menu with all your created rooms will open.
- Now you can block a complete room (e.g. the terrace in winter) using the “Block entire room” slider.
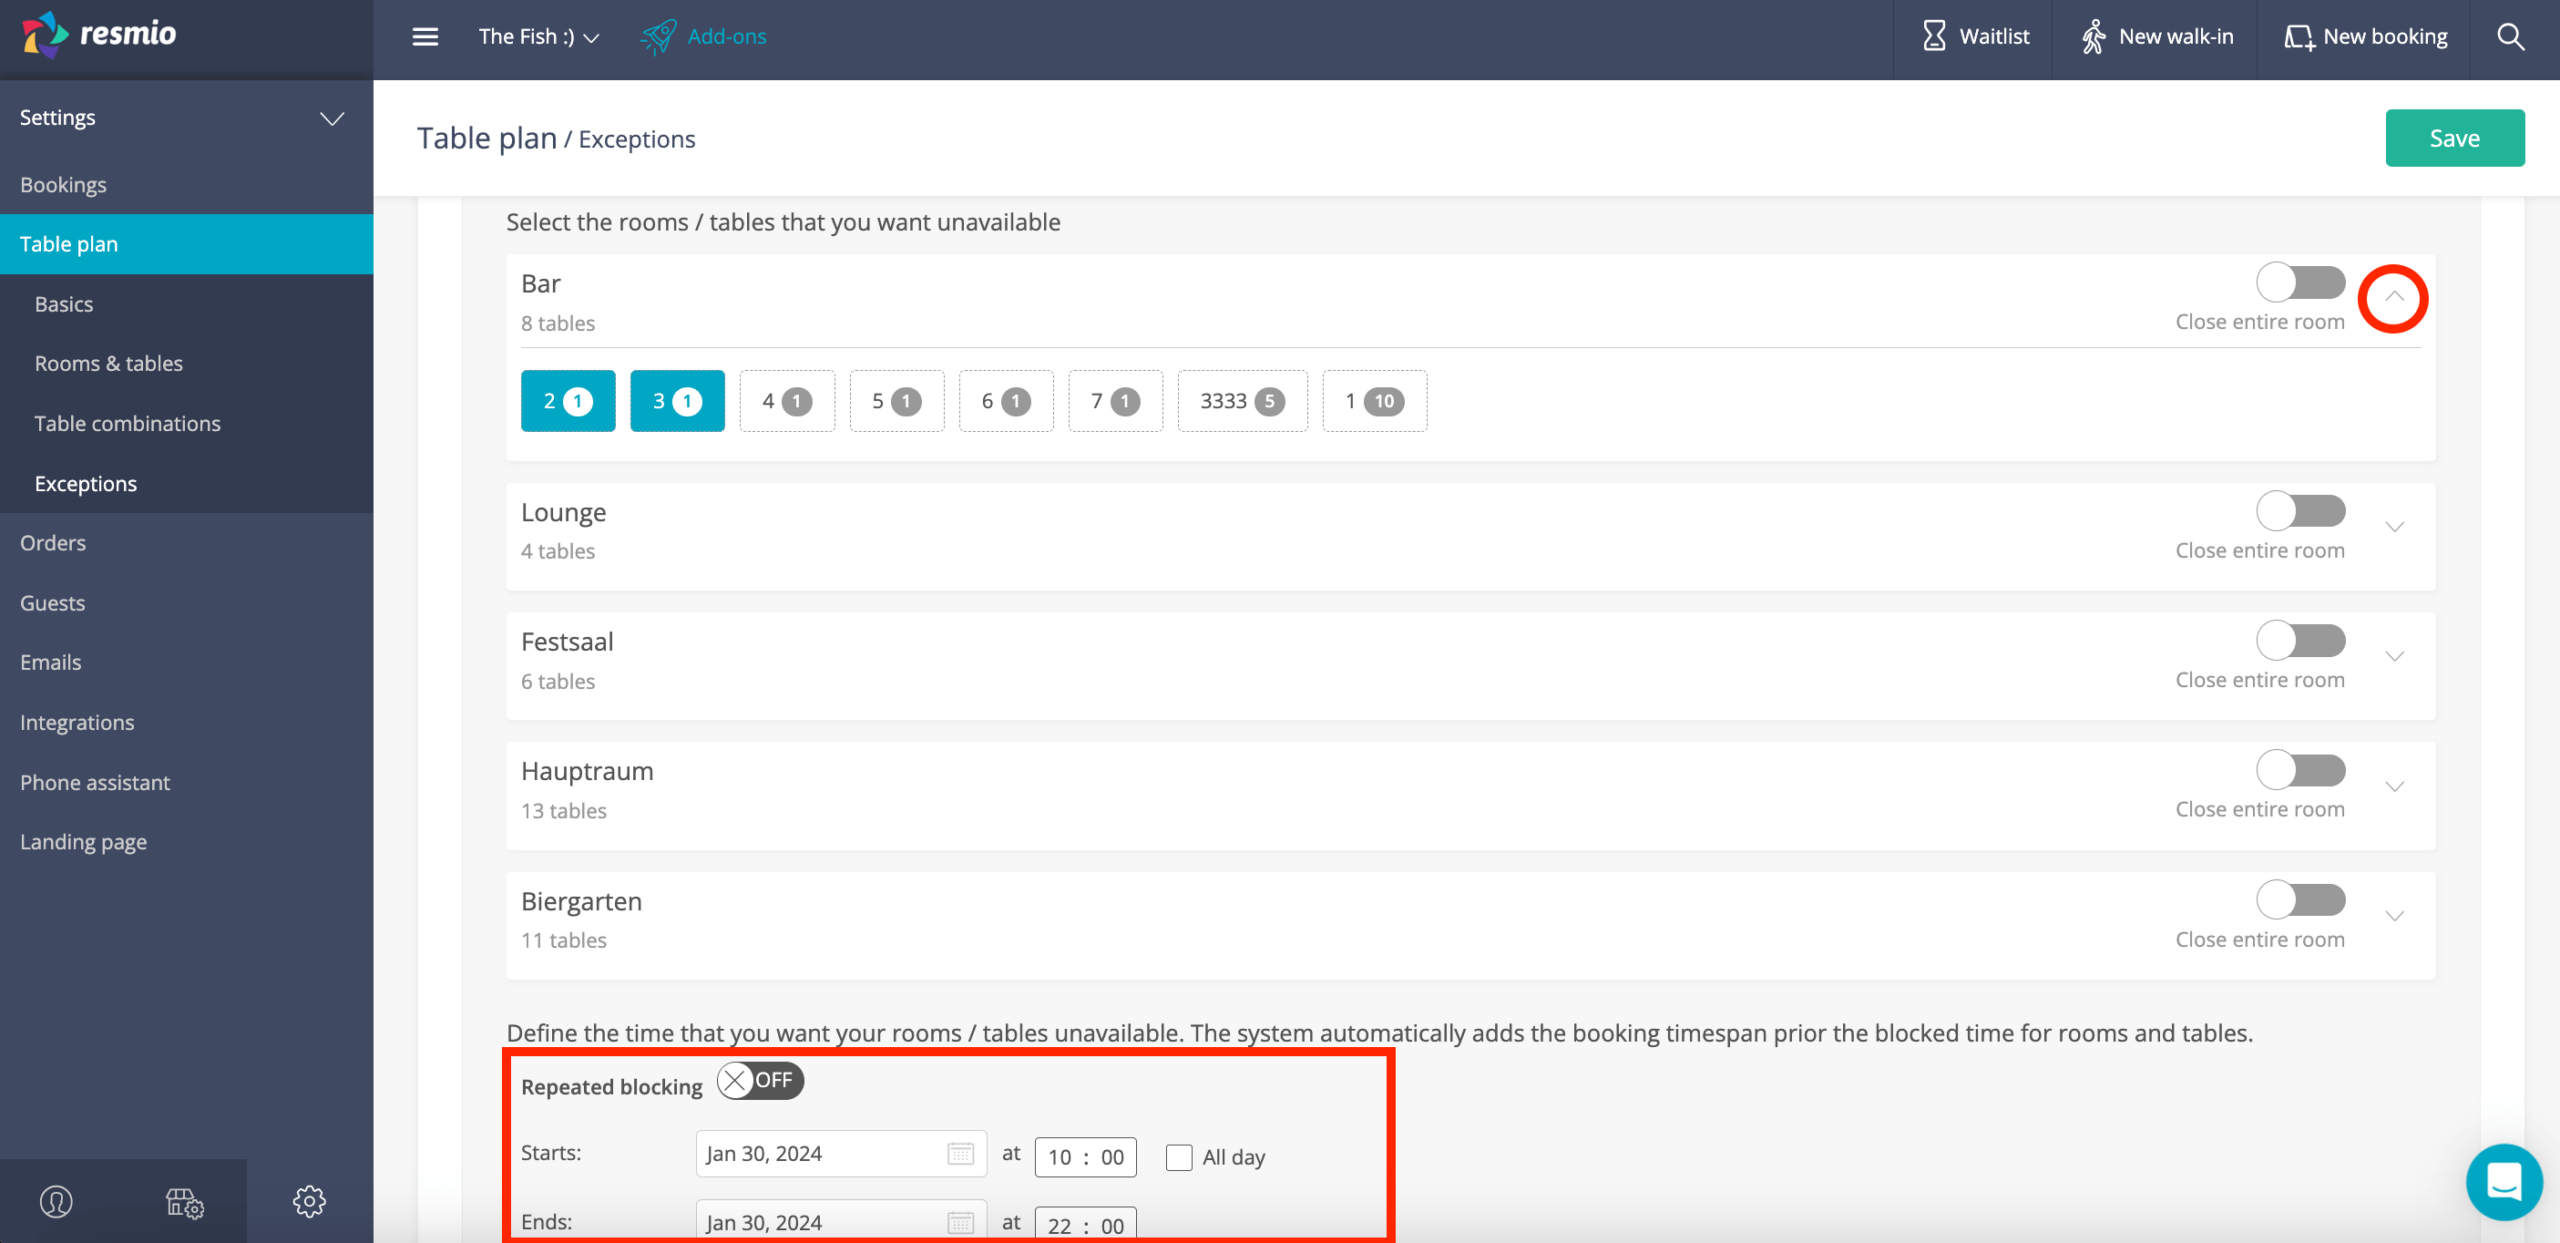
- Alternatively you can also block only individual tables by clicking on the arrow on the far right of the display of the individual room. In turn the view of the individual tables of that room opens. By clicking on the individual table, it will be blocked.
- In addition, you can, regardless of whether you block a complete room or only individual tables, specify how long the tables or rooms should be blocked under the selection of rooms. You can also specify whether the blocking should be repeated at certain times.
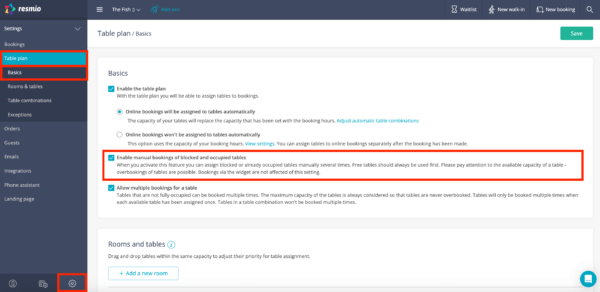
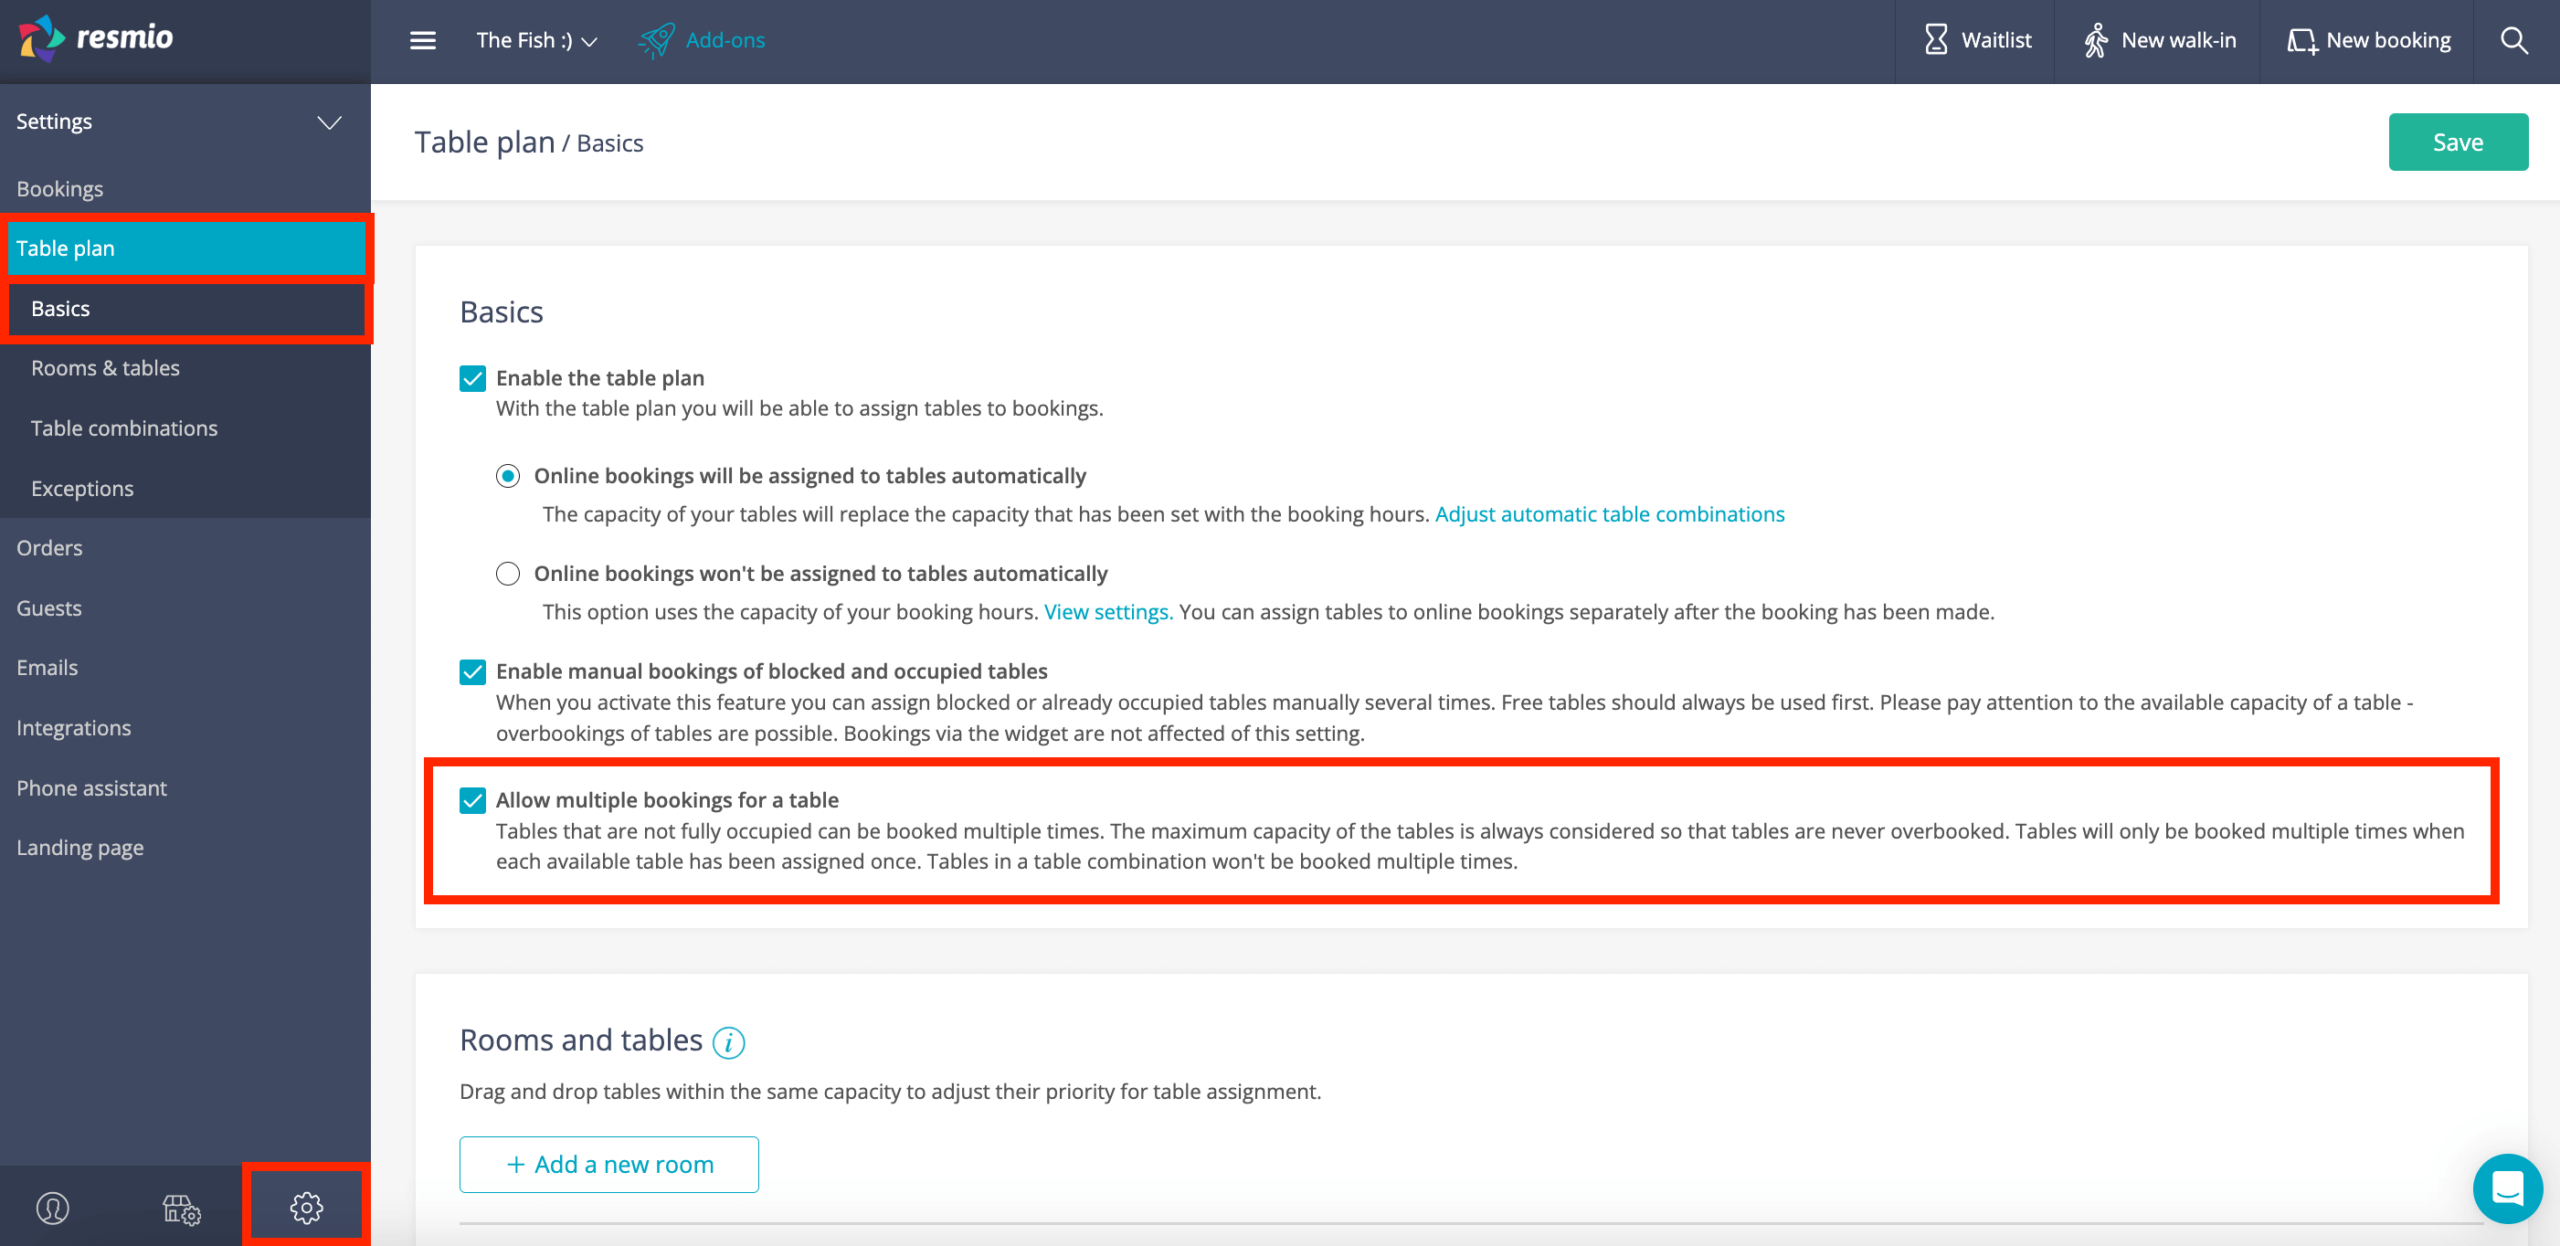
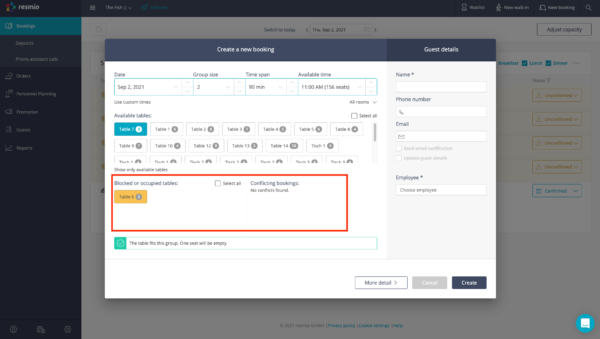
Under![]() “Settings” > “Table plan” > ”Basics” you can check “Enable manual bookings of blocked and occupied tables”. With this setting you specify that you can manually assign locked or already occupied tables multiple times.
“Settings” > “Table plan” > ”Basics” you can check “Enable manual bookings of blocked and occupied tables”. With this setting you specify that you can manually assign locked or already occupied tables multiple times.
Please note that you always should use free tables first. You should also always check the free capacity of a table as with this setting overbooking is possible. Bookings via the widget are not affected by this setting.
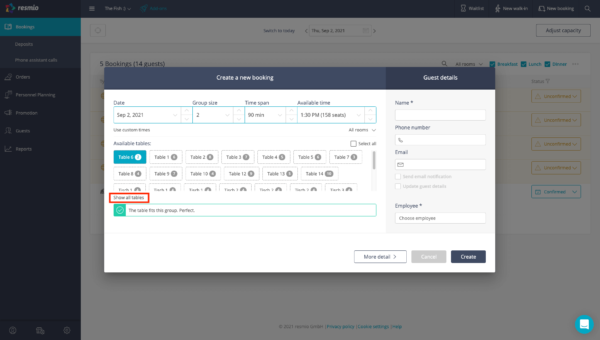
When you create or edit a booking the available tables are still displayed first. If you want to see all tables meaning also the blocked and occupied tables click on “Show all tables”.
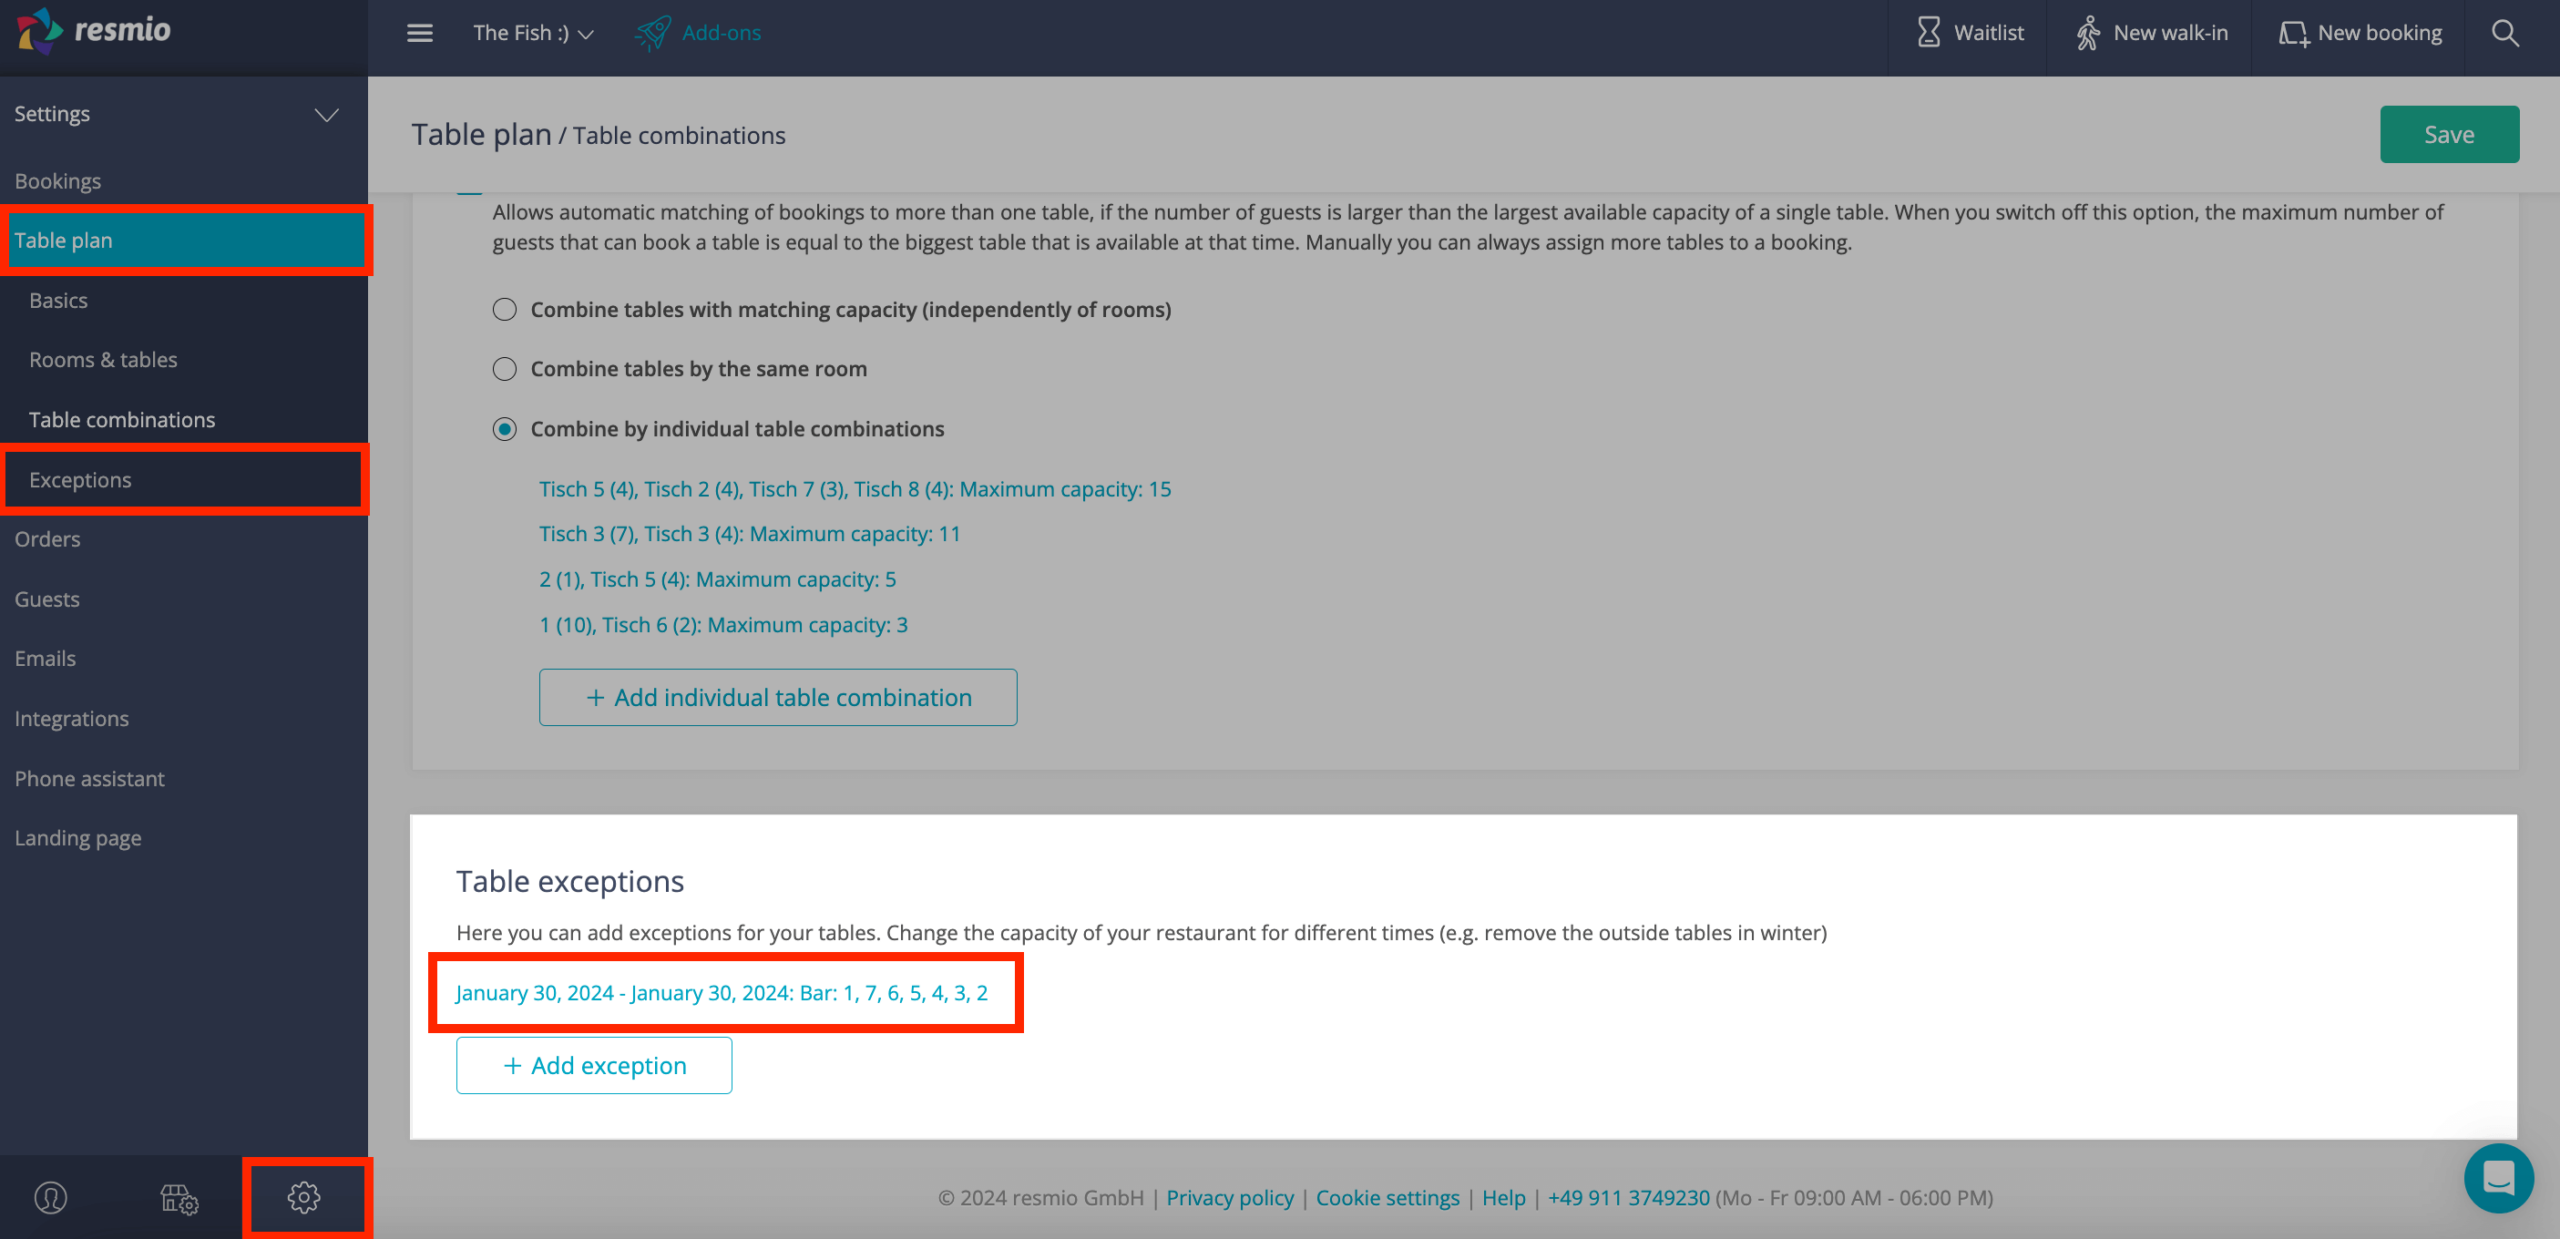
To unblock blocked tables or change something about the block, you have two options.
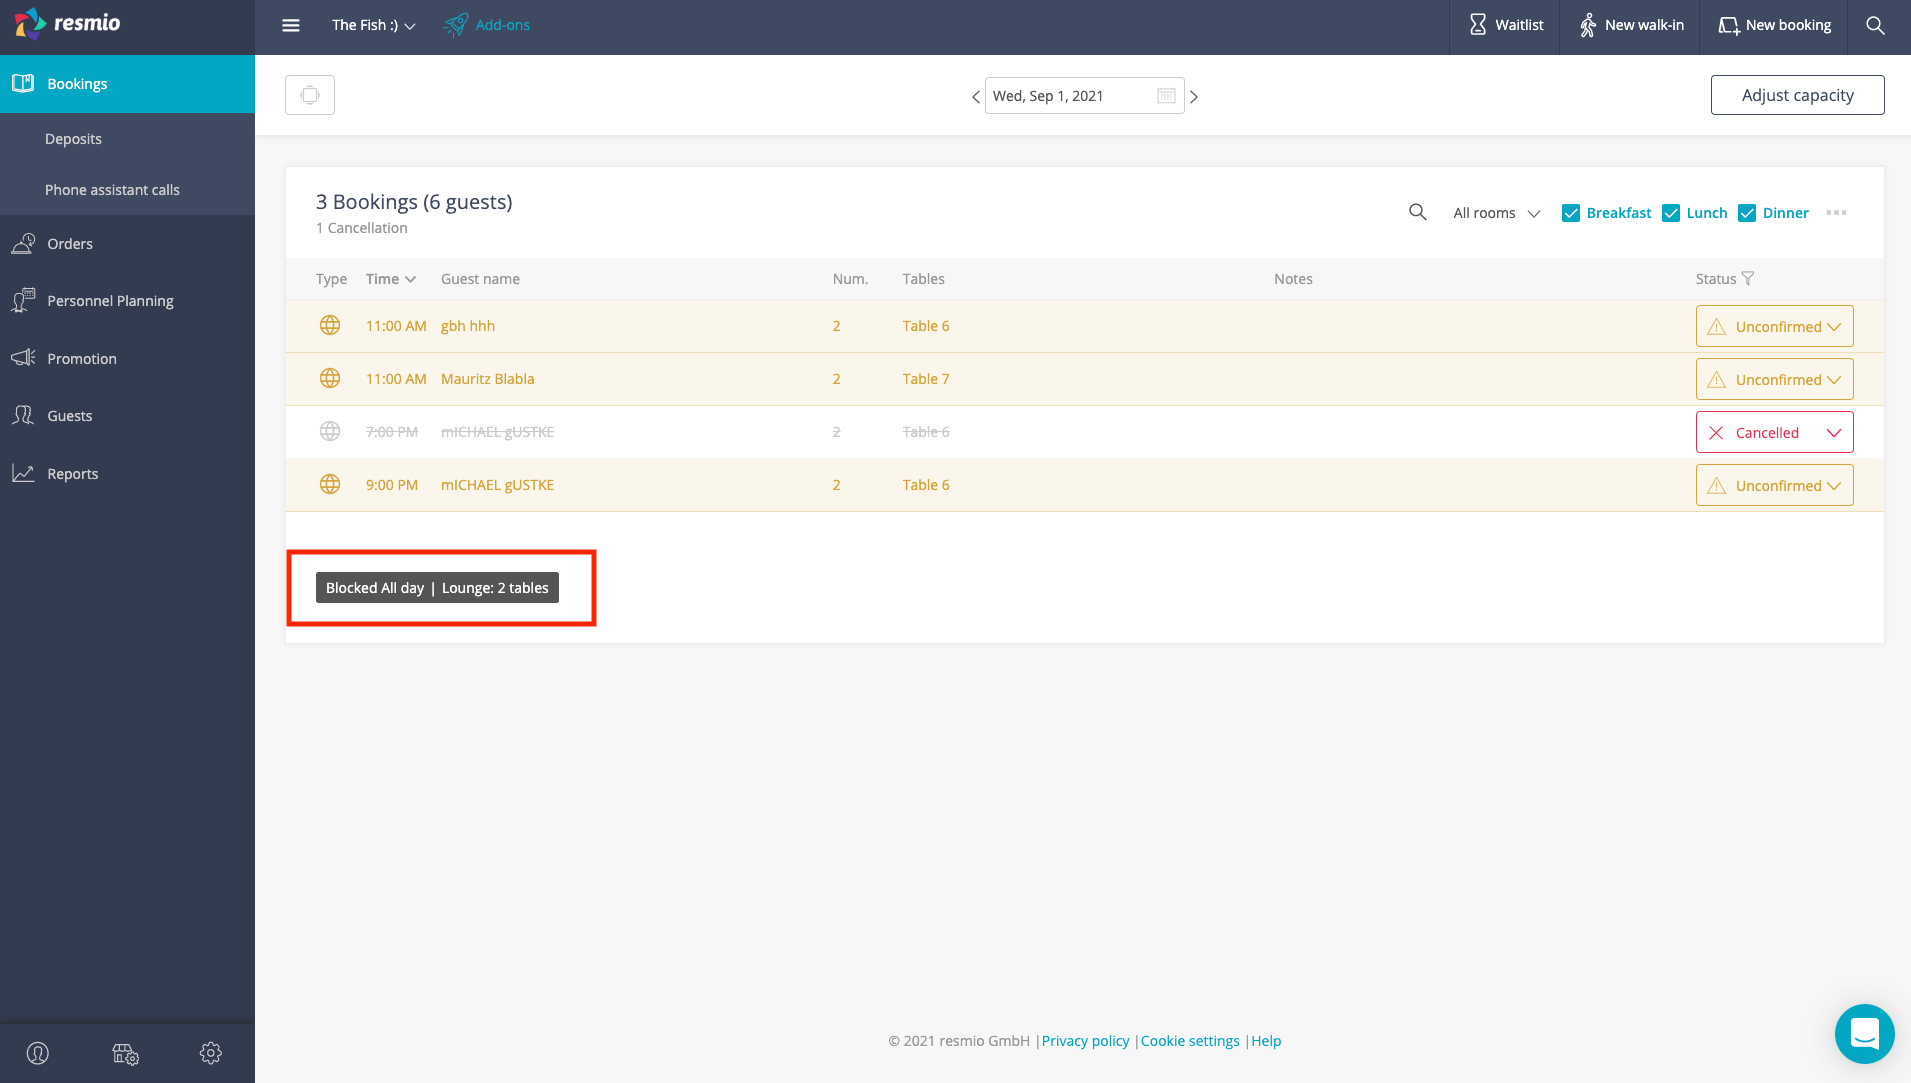
- Select “Settings” > “Table plan” > “Table exceptions” on the relevant exception highlighted in blue. The drop-down menu will open showing you an overview of the tables and blocks. At the bottom you can either use the “Delete” button to remove the entire block or you can make changes (e.g. add more tables or rooms to the block or change the date).
- Alternatively you can click on “Bookings” in the left column at the top. There you find the current table exceptions for the day at the very bottom of your booking overview. Here you can also easily click on the entry of the blocked tables, make changes in the dropdown menu or delete the entry entirely.
If you allow multiple bookings for a table, you can have tables reassigned if they still have free seats.
If, for example, a group of 5 people is seated at a table of 8, you can decide whether the free places at the table should be released again online. The 3 seats could then be booked again by guests.
However, they will only be filled when all other tables in your restaurant are occupied. This allows you to fill every single seat in your restaurant.
To activate the online multiple reservations, go to![]() “Settings” > “Table plan” > “Allow multiple bookings for a table ”
“Settings” > “Table plan” > “Allow multiple bookings for a table ”
Guests do not have access to the table plan.
This means that they cannot choose a table for themselves at any time or assign their reservation to a preferred table. Instead, you take care of this task. The main purpose of this is to ensure that you can optimally staff your restaurant and assign tables in the way that works best for you.
However, you can set that your guests can choose a room.
Set up room selection for guests
For this go to![]() “Settings” > “Bookings” > “Online bookings” and check the box “Allow your guests to choose a room“.
“Settings” > “Bookings” > “Online bookings” and check the box “Allow your guests to choose a room“.
If your guests do not have a preference, they can select “All” and resmio will pick the appropriate table.
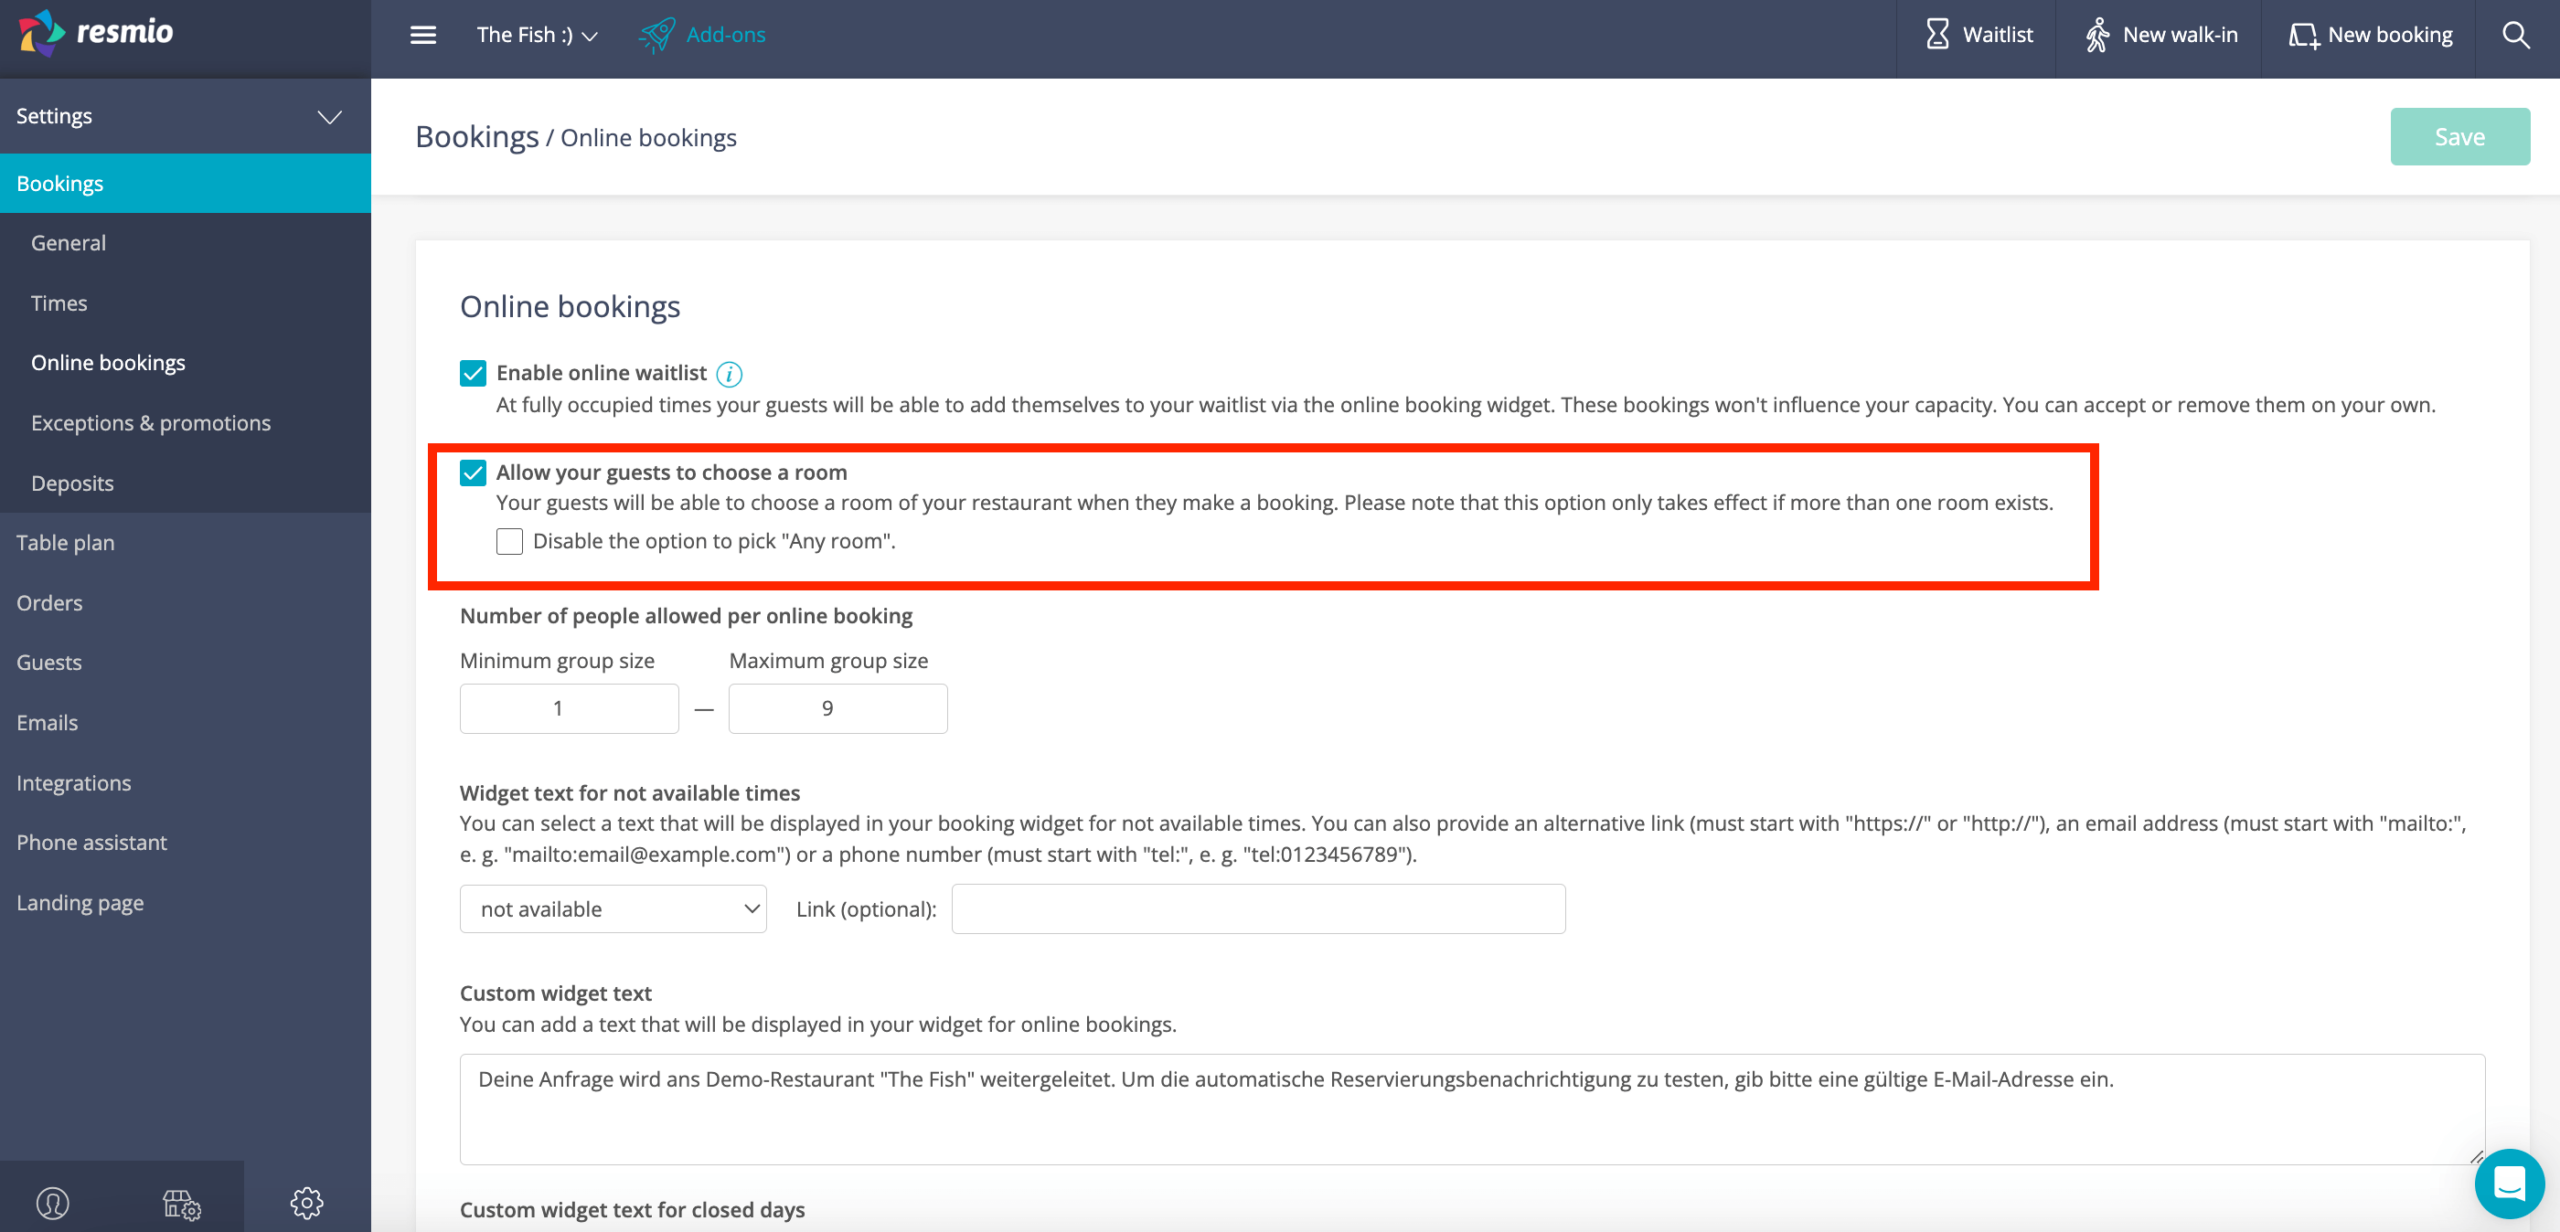
The requirement for this is that your table plan is activated and the tables are assigned automatically.
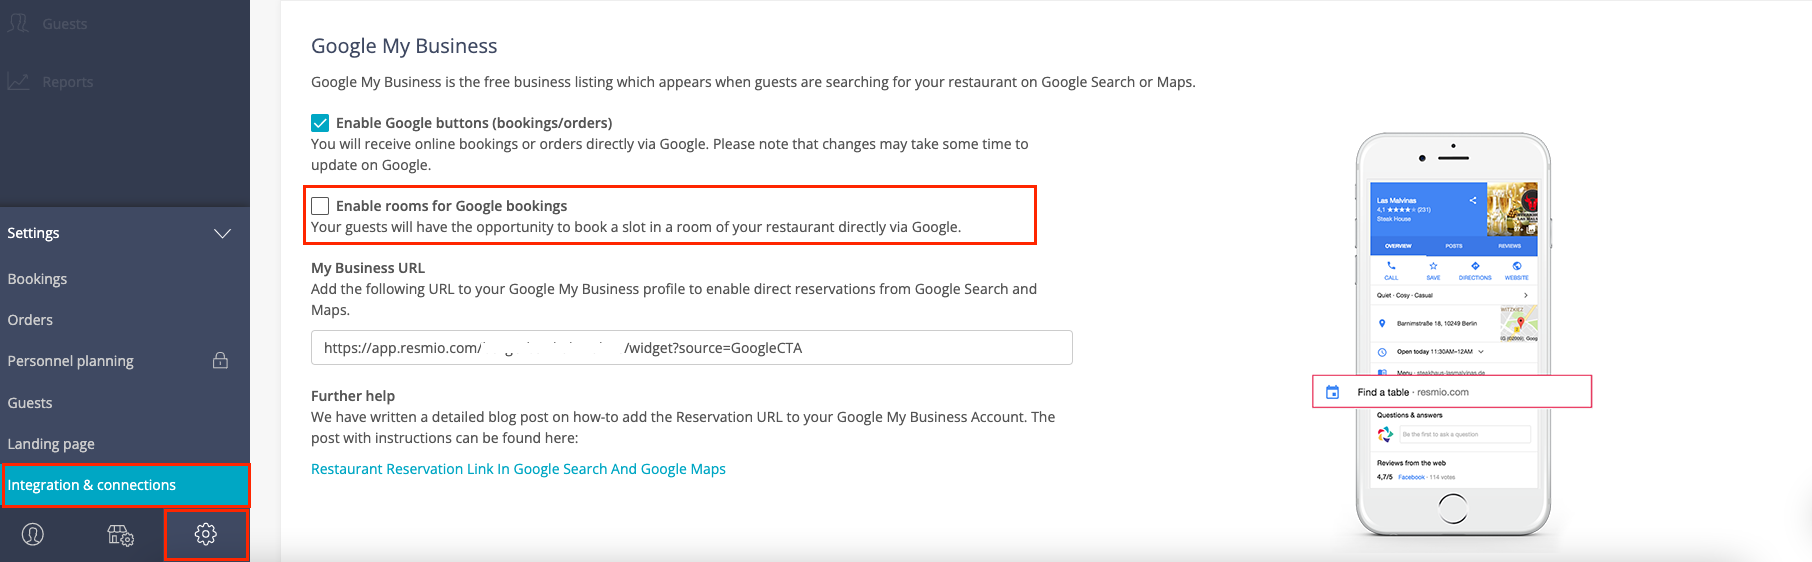
To do this, go to![]() “Settings” >“Integrations” > “Social platforms“. There you can define that the different rooms are displayed.
“Settings” >“Integrations” > “Social platforms“. There you can define that the different rooms are displayed.
If you don’t have a Google button yet, please contact our support team.


