Guest and Feedback Managment
Table of Contents
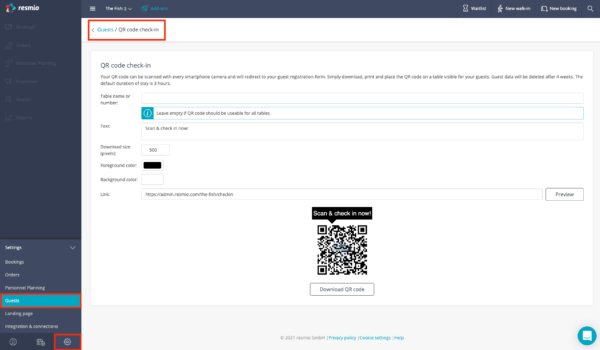
You can import already existing customer data into resmio. This requires that the data records are formatted in spreadsheet format (.csv). Below you will find a tutorial as well as a sample file for download.
- Open your list of contacts in Microsoft Excel, Google Tables or another spreadsheet program.
- Please make sure that your table is formatted correctly. To import guest data, the columns must be titled correctly and all in lower cases. Mandatory columns for guest data import:
- name
Optional columns:
- phone
- street
- city
- zip
- notes
- Next go to
 “Guests” > the arrow net to “Add guest” > “Import” in your resmio account.
 - Now you can upload your existing contacts and send your newsletter to all guests if you would like.

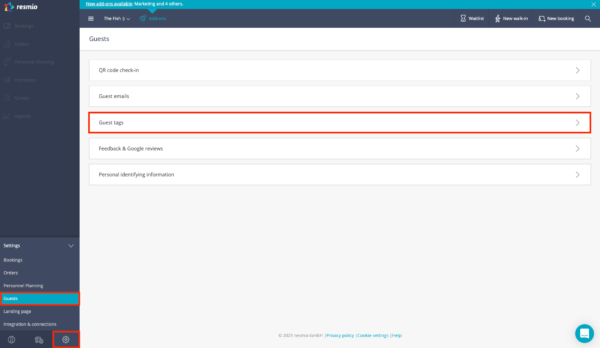
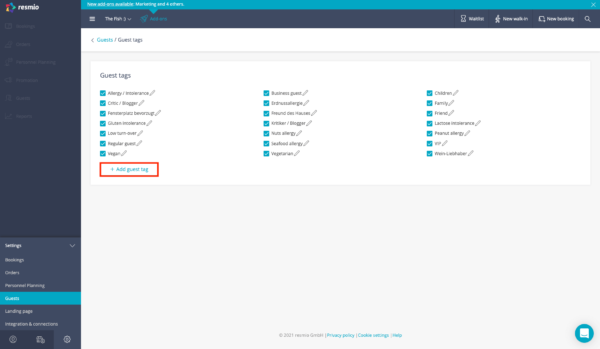
Guest tags are a great way to segment guests, such as by relevance (VIP) or preferences in terms of seating, food and beverage.
- Under“Settings” > “Guests” > “Automation“ > “Guest tags” you can define guest tags, which you can then assign to your guests if desired.
- As soon as you add a new guest to your guest database all guest tags that you have previously set will be available.
- You can also add tags to existing guests later on.
Tags assigned to guests are visible to all employees in the booking overview, for example.
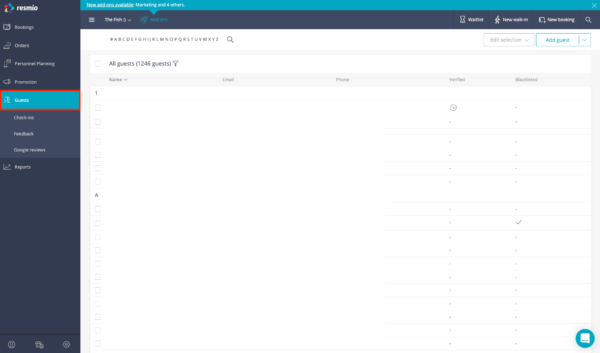
In your webapp you can view all your saved guest data on the left hand side under ![]() “Guests“. Clicking on a guest opens a detailed view with all the information stored about this guest. At the top right you can change or expand the data using the “Edit” button.
“Guests“. Clicking on a guest opens a detailed view with all the information stored about this guest. At the top right you can change or expand the data using the “Edit” button.
You have the possibility to block certain guests (e.g. because they did not show up without cancellation too often) directly in your guest database so that they can no longer book online.
- Select “Guests“ and search for the corresponding guest using the search field. Then click on the guest or guest file and select “Edit” > “Block”.
- The next time the guest tries to make a booking with this saved email address, he will receive a message saying that the booking is not possible.
With automatic rules, you can adjust various system operations more individually to your restaurant business. In this way, you can save a lot of time in your daily business, as previously manually performed tasks can be automated.
This feature is especially interesting for experienced users.
- You can set automatic rules under “Settings” > “Guests” > “Automation“ > “Automatic rules”, and enable / disable them in this section.
Several rules can be active at the same time.
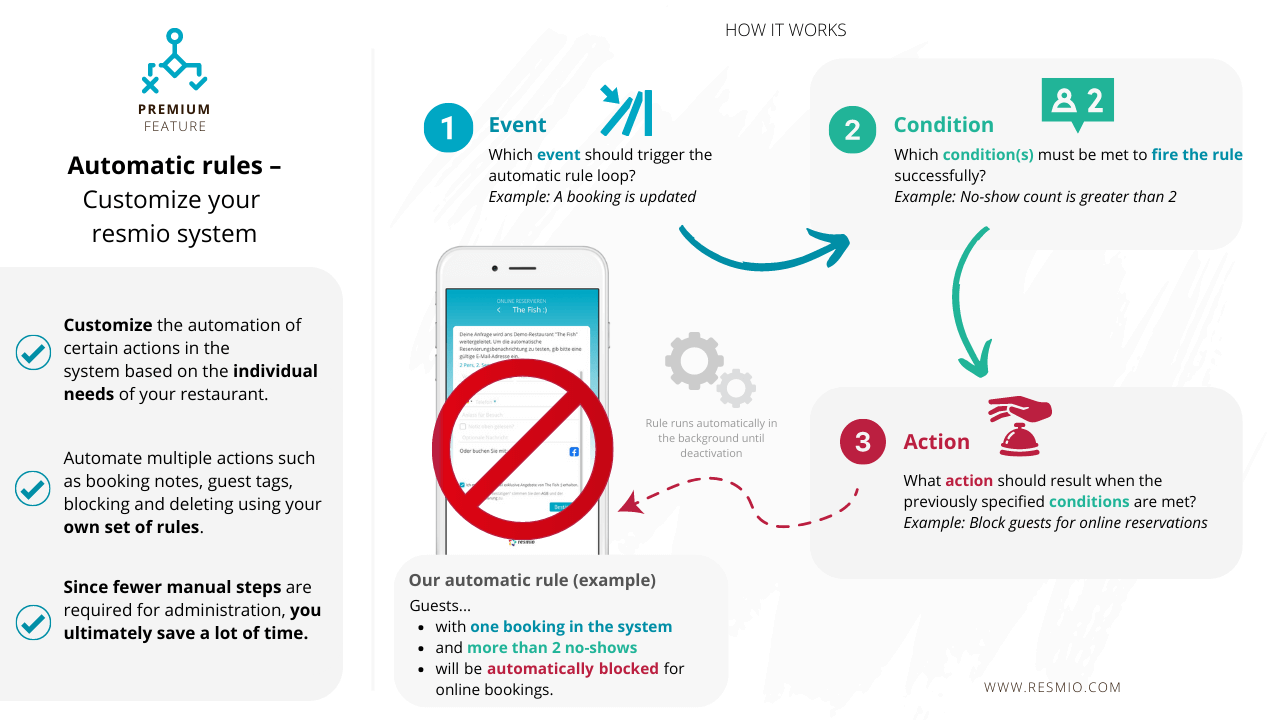
Automatic rules follow a simple logic: an event trigger automatically kicks in a specific action when one or more conditions are met.
Some ideas for automatic rules that you can implement in your restaurant can be seen below. We plan to expand the scope of selectable system operations in the future.
With this rule set, guests are automatically assigned a guest tag based on their visits / orders / feedback. The guest tag can be viewed by your staff in the reservation overview and then enables, for example, the easy identification of regular guests.
Bookings
- Event: Booking is updated
- Condition: Visits count greater than 10
- Action: Add guest tag – VIP
Orders
- Event: Order is updated
- Condition: Orders count greater than 5
- Action: Add guest tag – “Delivery regular”
Feedback
- Event: Feedback left
- Condition: Feedback generally poor
- Action: Add guest tag – “Critic”
You can have the system automatically add guest notes as well as notes directly to bookings. Corresponding notes can support the service staff in their daily business.
Bookings
- Event: Booking is updated
- Condition: Cancellation count greater than 3
- Action: Add guest note – Beware, high cancellation rate!
Feedback
- Event: Feedback left
- Condition: Feedback generally positive
- Action: Add booking note “Offer 1x free beer”.
In some circumstances, it can be helpful to block unwelcome guests from placing online reservations or to have guest data automatically deleted from the system.
Block guests
- Event: Booking is updated
- Condition: No-show count greater than 2
- Action: Block guest (+ if necessary add additional guest note for reference when adding a manual table reservation via phone)
Remove guests from the system
- Event: Booking is updated
- Condition: Booking creation date before date XX.YY.ZZZZ
- Action: Delete guest
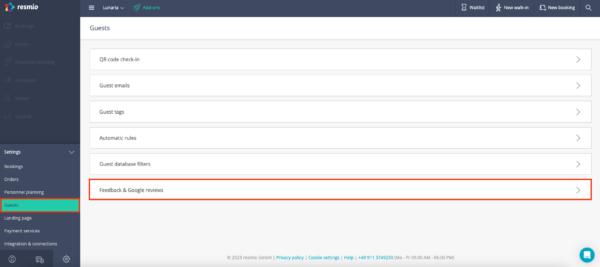
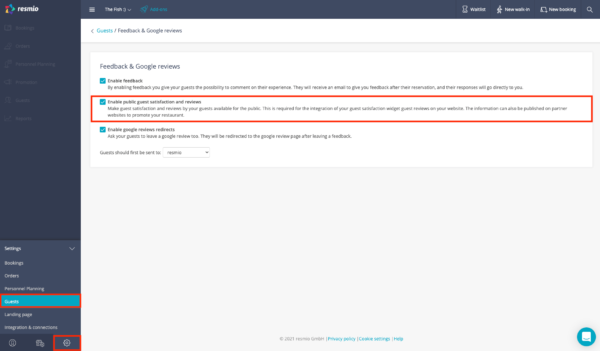
Positive guest reviews are the best advertisement for your restaurant. resmio allows you to easily generate additional customer reviews and advertise them on your website via widgets!
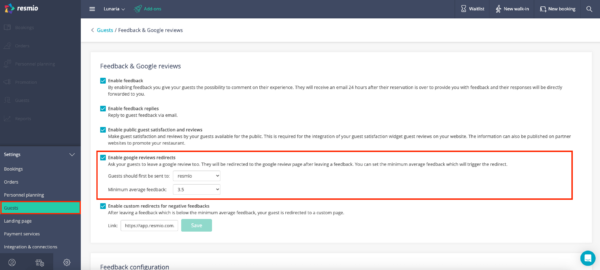
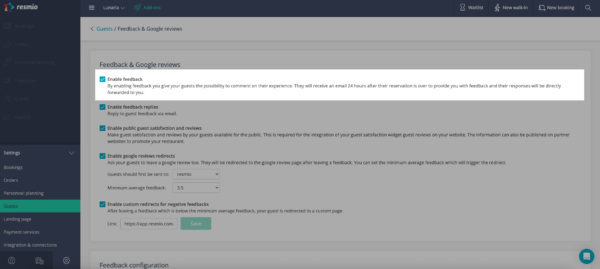
- Under “Settings” > “Guests” > “Feedback“ > “Feedback & Google reviews” you can activate the feedback feature and adjust settings for it.
- If you check the “Enable Feedback” box your guests will automatically receive an email asking them to leave feedback.
- When your guests leave feedback you will also directly receive the response back.
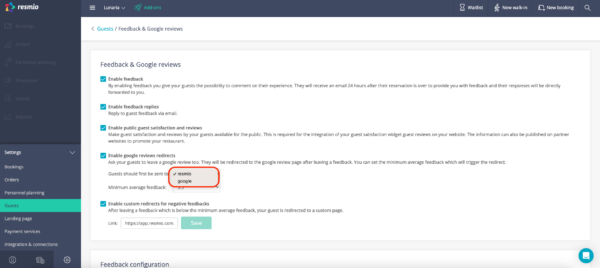
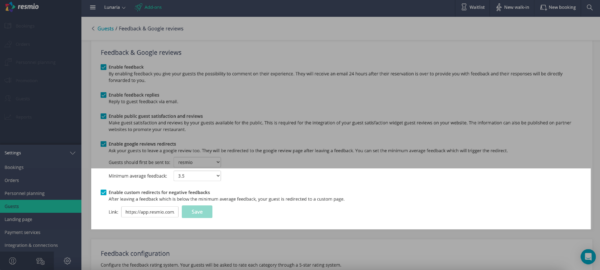
You can get feedback both in your resmio account and on Google.
- Under “Settings” > “Guests” > “Feedback“ > “Feedback & Google reviews”, you can direct your guests to your Google Business profile by checking “Enable google review redirects“.
There are two different options avaiable:
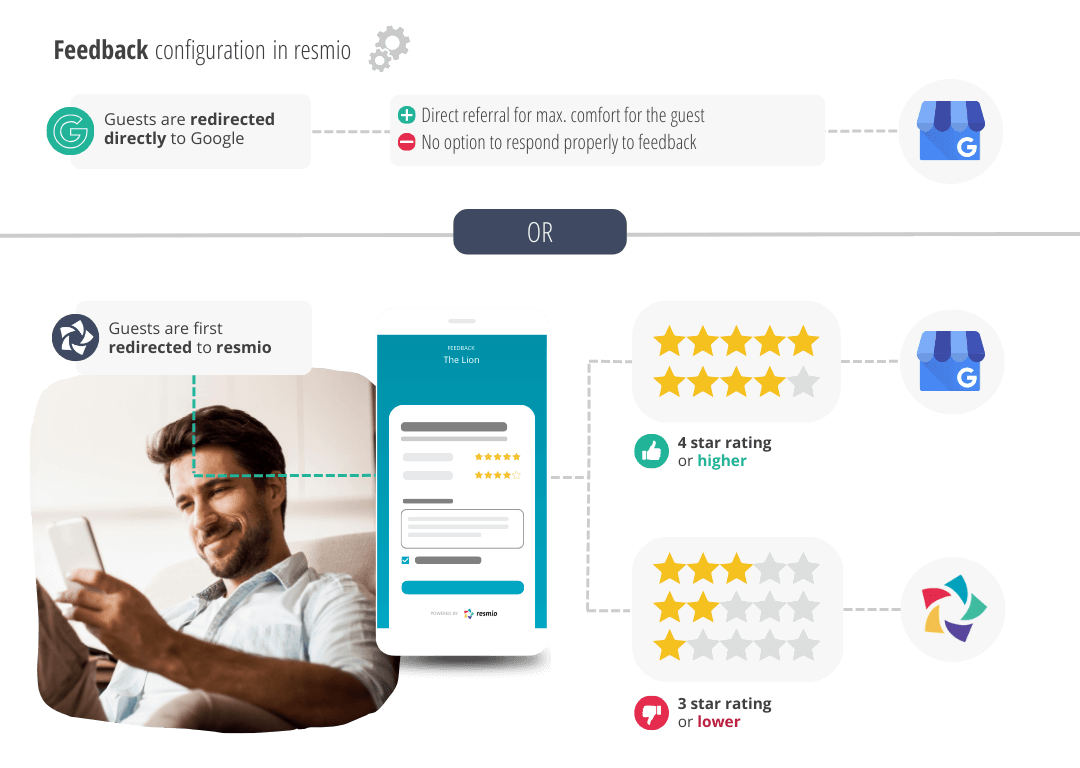
Forwarding to Google activated and guests are first directed to resmio.
In this case, the guests give a rating at resmio and are then redirected to Google to give a rating there as well.
The advantage of this is that you can specify that only guests with a good rating are forwarded to Google. You can set the number of stars from which you want to forward the rating under “Minimum average feedback:“.
Forwarding to Google activated and guests are first directed to Google.
In this case, guests will be redirected to Google immediately and will not post a review in your resmio portal first. So the guests only have to write one review.
However, this way you can’t talk to the guest about their feedback beforehand.
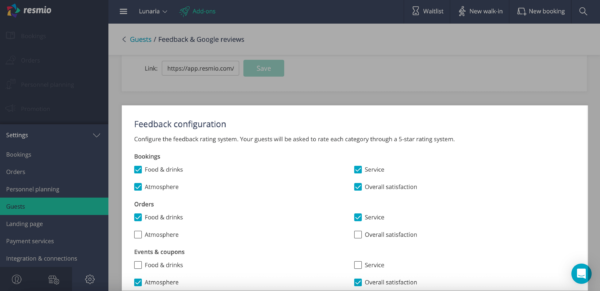
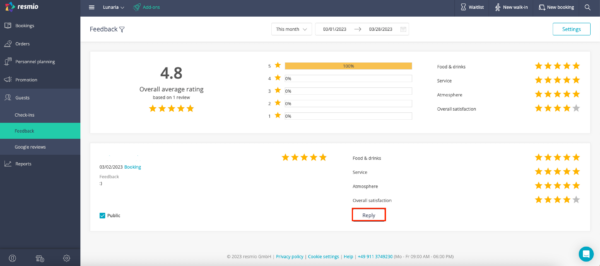
There are four different categories that your guests can rate:
- Food & Drinks
- Service
- Atmosphere
- Overall satisfaction
You can specify which ones your guests should rate individually under ![]() “Settings” > “Guests” > “Feedback” > “Feedback configuration”.
“Settings” > “Guests” > “Feedback” > “Feedback configuration”.
On the left side under ![]() “Guests” > “Feedback“ you can find the reviews that your guests have left in resmio. You can filter the reviews by time period and by the number of stars.
“Guests” > “Feedback“ you can find the reviews that your guests have left in resmio. You can filter the reviews by time period and by the number of stars.
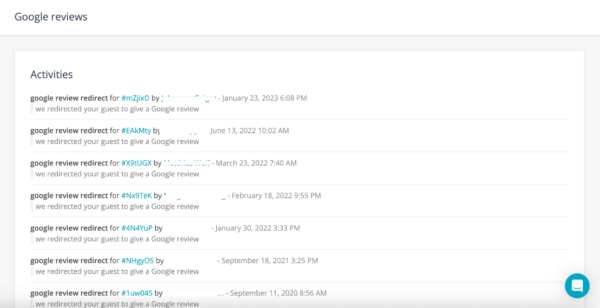
Under ![]() “Guests” > “Google Reviews“ you can see how many of your guests have been referred to Google. The feedbacks themselves can be found on your Google Business Profile.
“Guests” > “Google Reviews“ you can see how many of your guests have been referred to Google. The feedbacks themselves can be found on your Google Business Profile.

Under![]() “Settings” > “Integration & connections” > “Feedback widget & reputation badge” you find the HTML code for the feedback widget & reputation badge. Just copy the desired code and integrate it on your website or for example send it to your web developer for integration.
“Settings” > “Integration & connections” > “Feedback widget & reputation badge” you find the HTML code for the feedback widget & reputation badge. Just copy the desired code and integrate it on your website or for example send it to your web developer for integration.
Please note that you need to check “Enable public guest satisfaction and reviews” under ![]() “Settings” > “Guests” > “Feedback & Google reviews” first so that the widget can be published.
“Settings” > “Guests” > “Feedback & Google reviews” first so that the widget can be published.

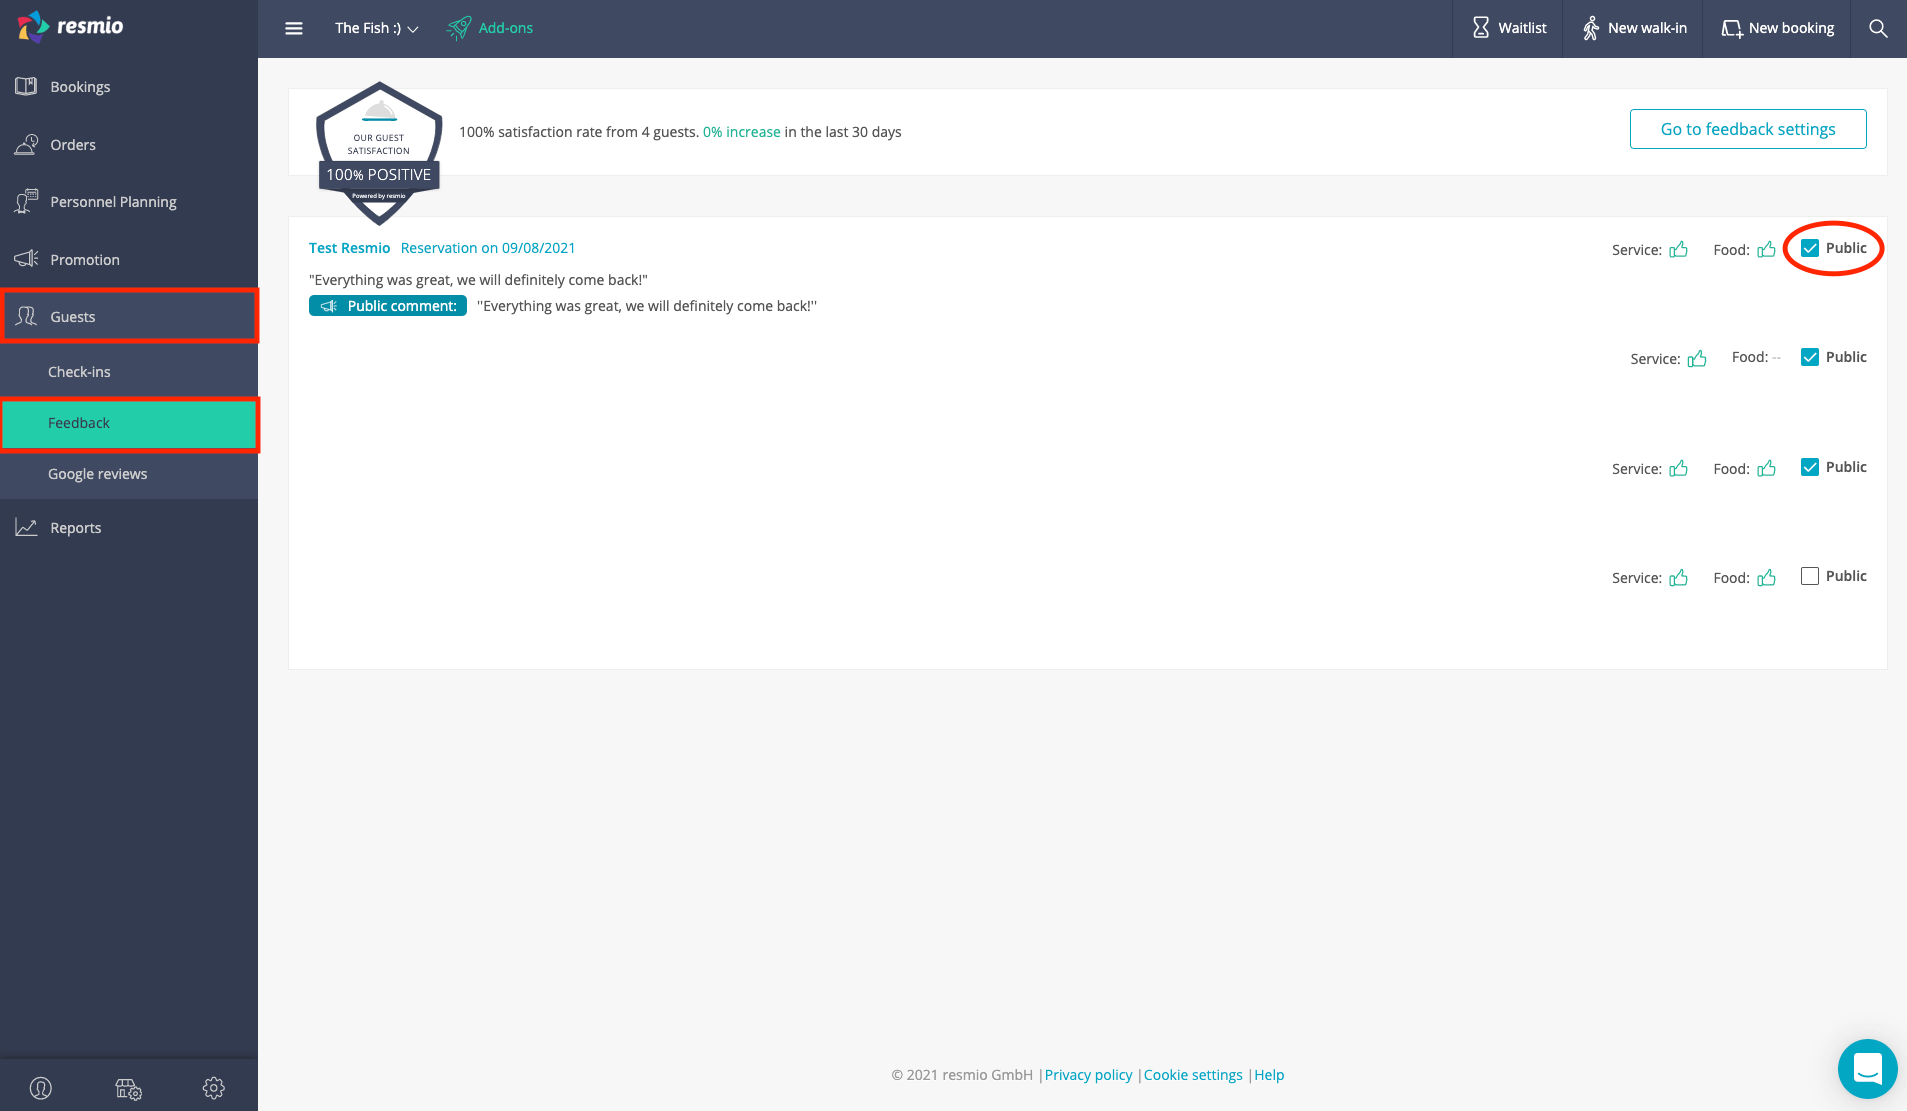
An overview of all guest reviews submitted via resmio can be found in your system under ![]() “Guests” > “Feedback“.
“Guests” > “Feedback“.
- Basically when submitting their feedback, guests are asked whether they agree to their comments being made public.
- With his consent for publication, however, you can decide for yourself once again whether the comment should be publicly viewable in your feedback widget or not.
- Check or uncheck the “Public” box next to the comment of the guest below “Guests” > “Feedback“.
- All ratings are included in the satisfaction rate (percentage of guest satisfaction) no ratings can be excluded here as this would otherwise distort the result.
In the feedback overview under ![]() “Guests” >“Feedback“ you can reply directly to the reviews of your guests by email. Your answer is not public, so it will not be displayed in the feedback widget.
“Guests” >“Feedback“ you can reply directly to the reviews of your guests by email. Your answer is not public, so it will not be displayed in the feedback widget.
If guests leave negative feedback, you can automatically redirect them to a page you specify during the application process.
- You can set the link for this in “Settings” > “Guests” > “Feedback” > “Feedback & Google reviews” > “Enable custom redirects for negative feedback”.


