iPad App „resmio Tables”

Table of contents
Booking
There are several ways to create a new booking:
First option:
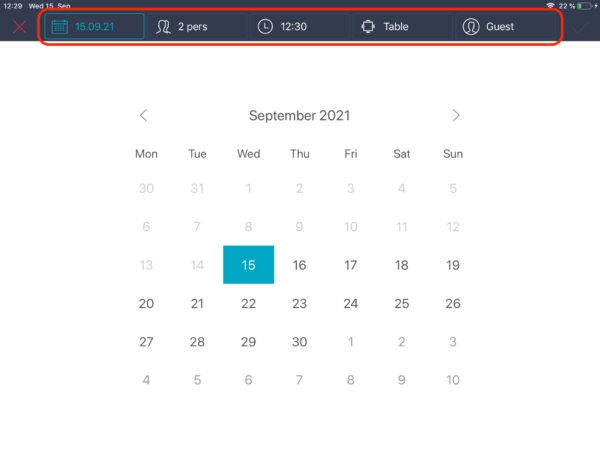
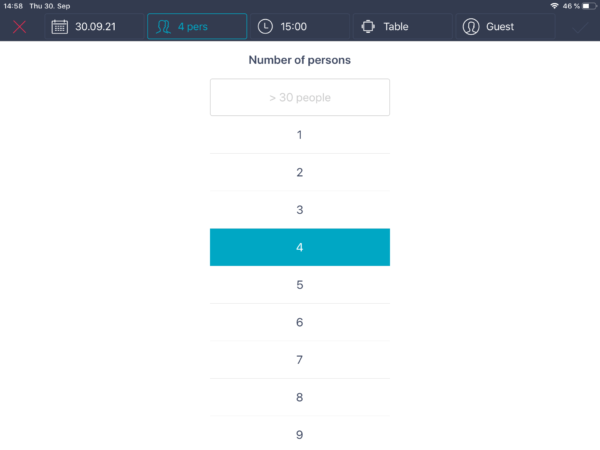
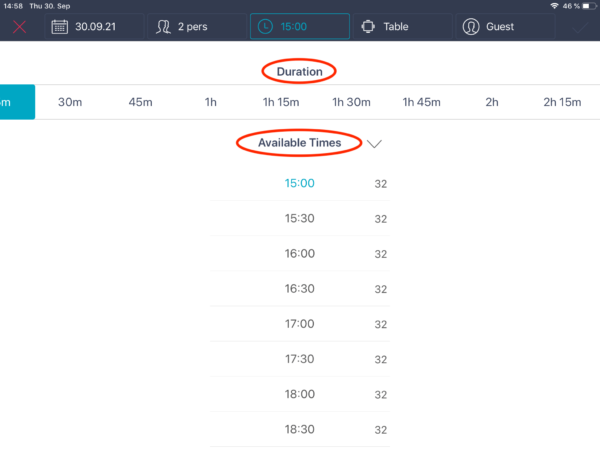
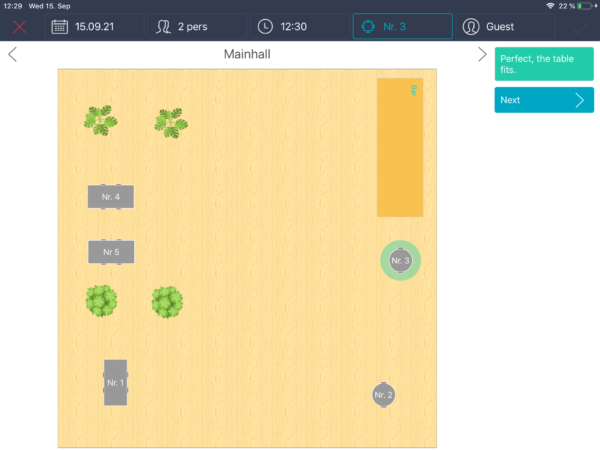
- You can click on the “+” symbol (booking) or the ” little walking man” (walk-in). The booking (+ icon) opens a new window where you can enter the date, the number of people, the time, the table and the guest data.
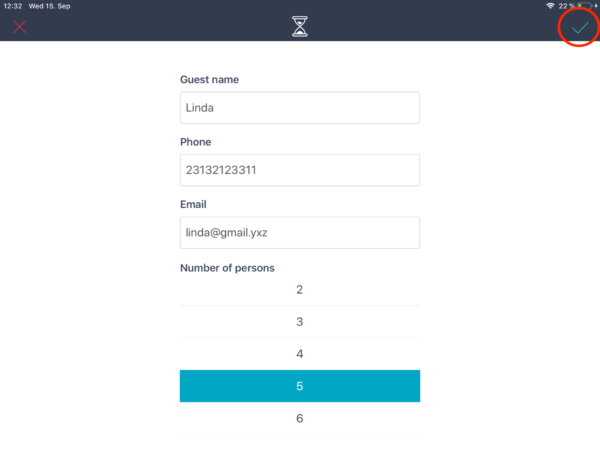
- You can switch between the individual tabs at the top and go back if you need to change something. When everything is entered, you can click on the checkmark at the top right to save it.
- When selecting the “little walking man” (walk-in) a bar opens which can be used to enter the guest name and the number of people. At the right hand side you can select a suitable table on the table plan. To save the entry for the walk-in you have to select “create”at the top left.
Second option:
- Select a table directly on your table plan and then click on the “+” symbol or the “little walking man”. In this case the table is already set and you only have to enter the number of guests and the guest data. Apart from that everythings works exactly the same way as explained in the first option.
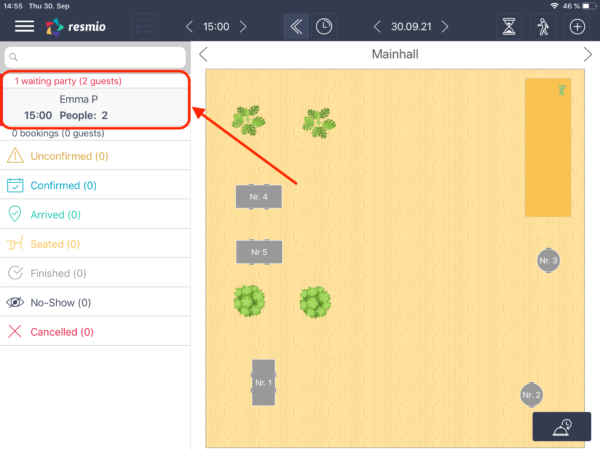
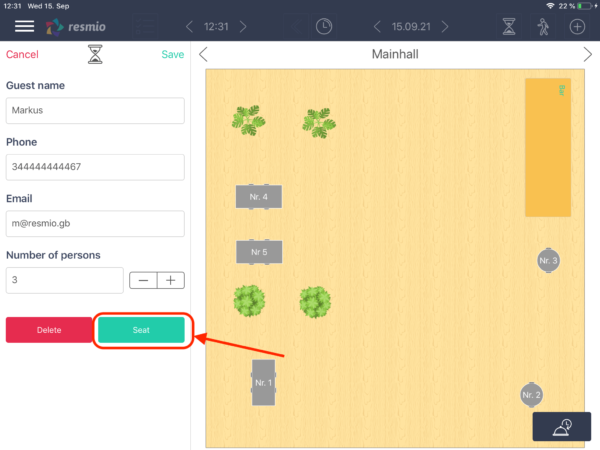
If you do have space in your restaurant, click on the group which is currently still on your waitlist and you now want to place. Then you can select “Seat” and convert the waitlist entry into a booking. To assign a table, select the suitable table on your table plan by tapping on it. Remember to adjust the time to when the booking actually takes place and then save it.
If you do not have any more seats available you can delete the waitlist entry and your guests will automatically receive a cancellation notification via email.
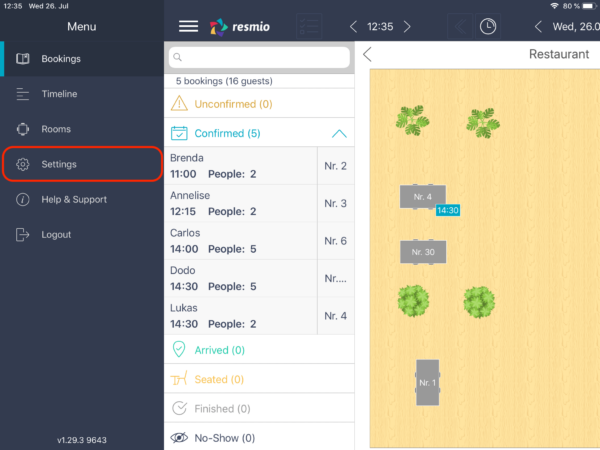
- When you have logged into the iPad app, you are immediately in the booking overview with the table plan. On the left side you can see the overview with all bookings.
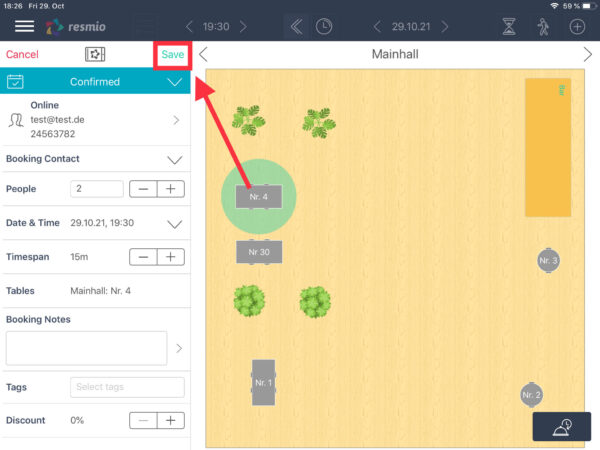
- Select the booking you want to edit. Afterwards a window with the booking details opens. There you can edit all the details and save them in the upper right corner.
- If you want to add a reservation tag, all your tags will appear above the keyboard and you can choose the appropriate one.
- To change the status of a booking click on the arrow next to the current status. Then the menu will open and you can select a new status.
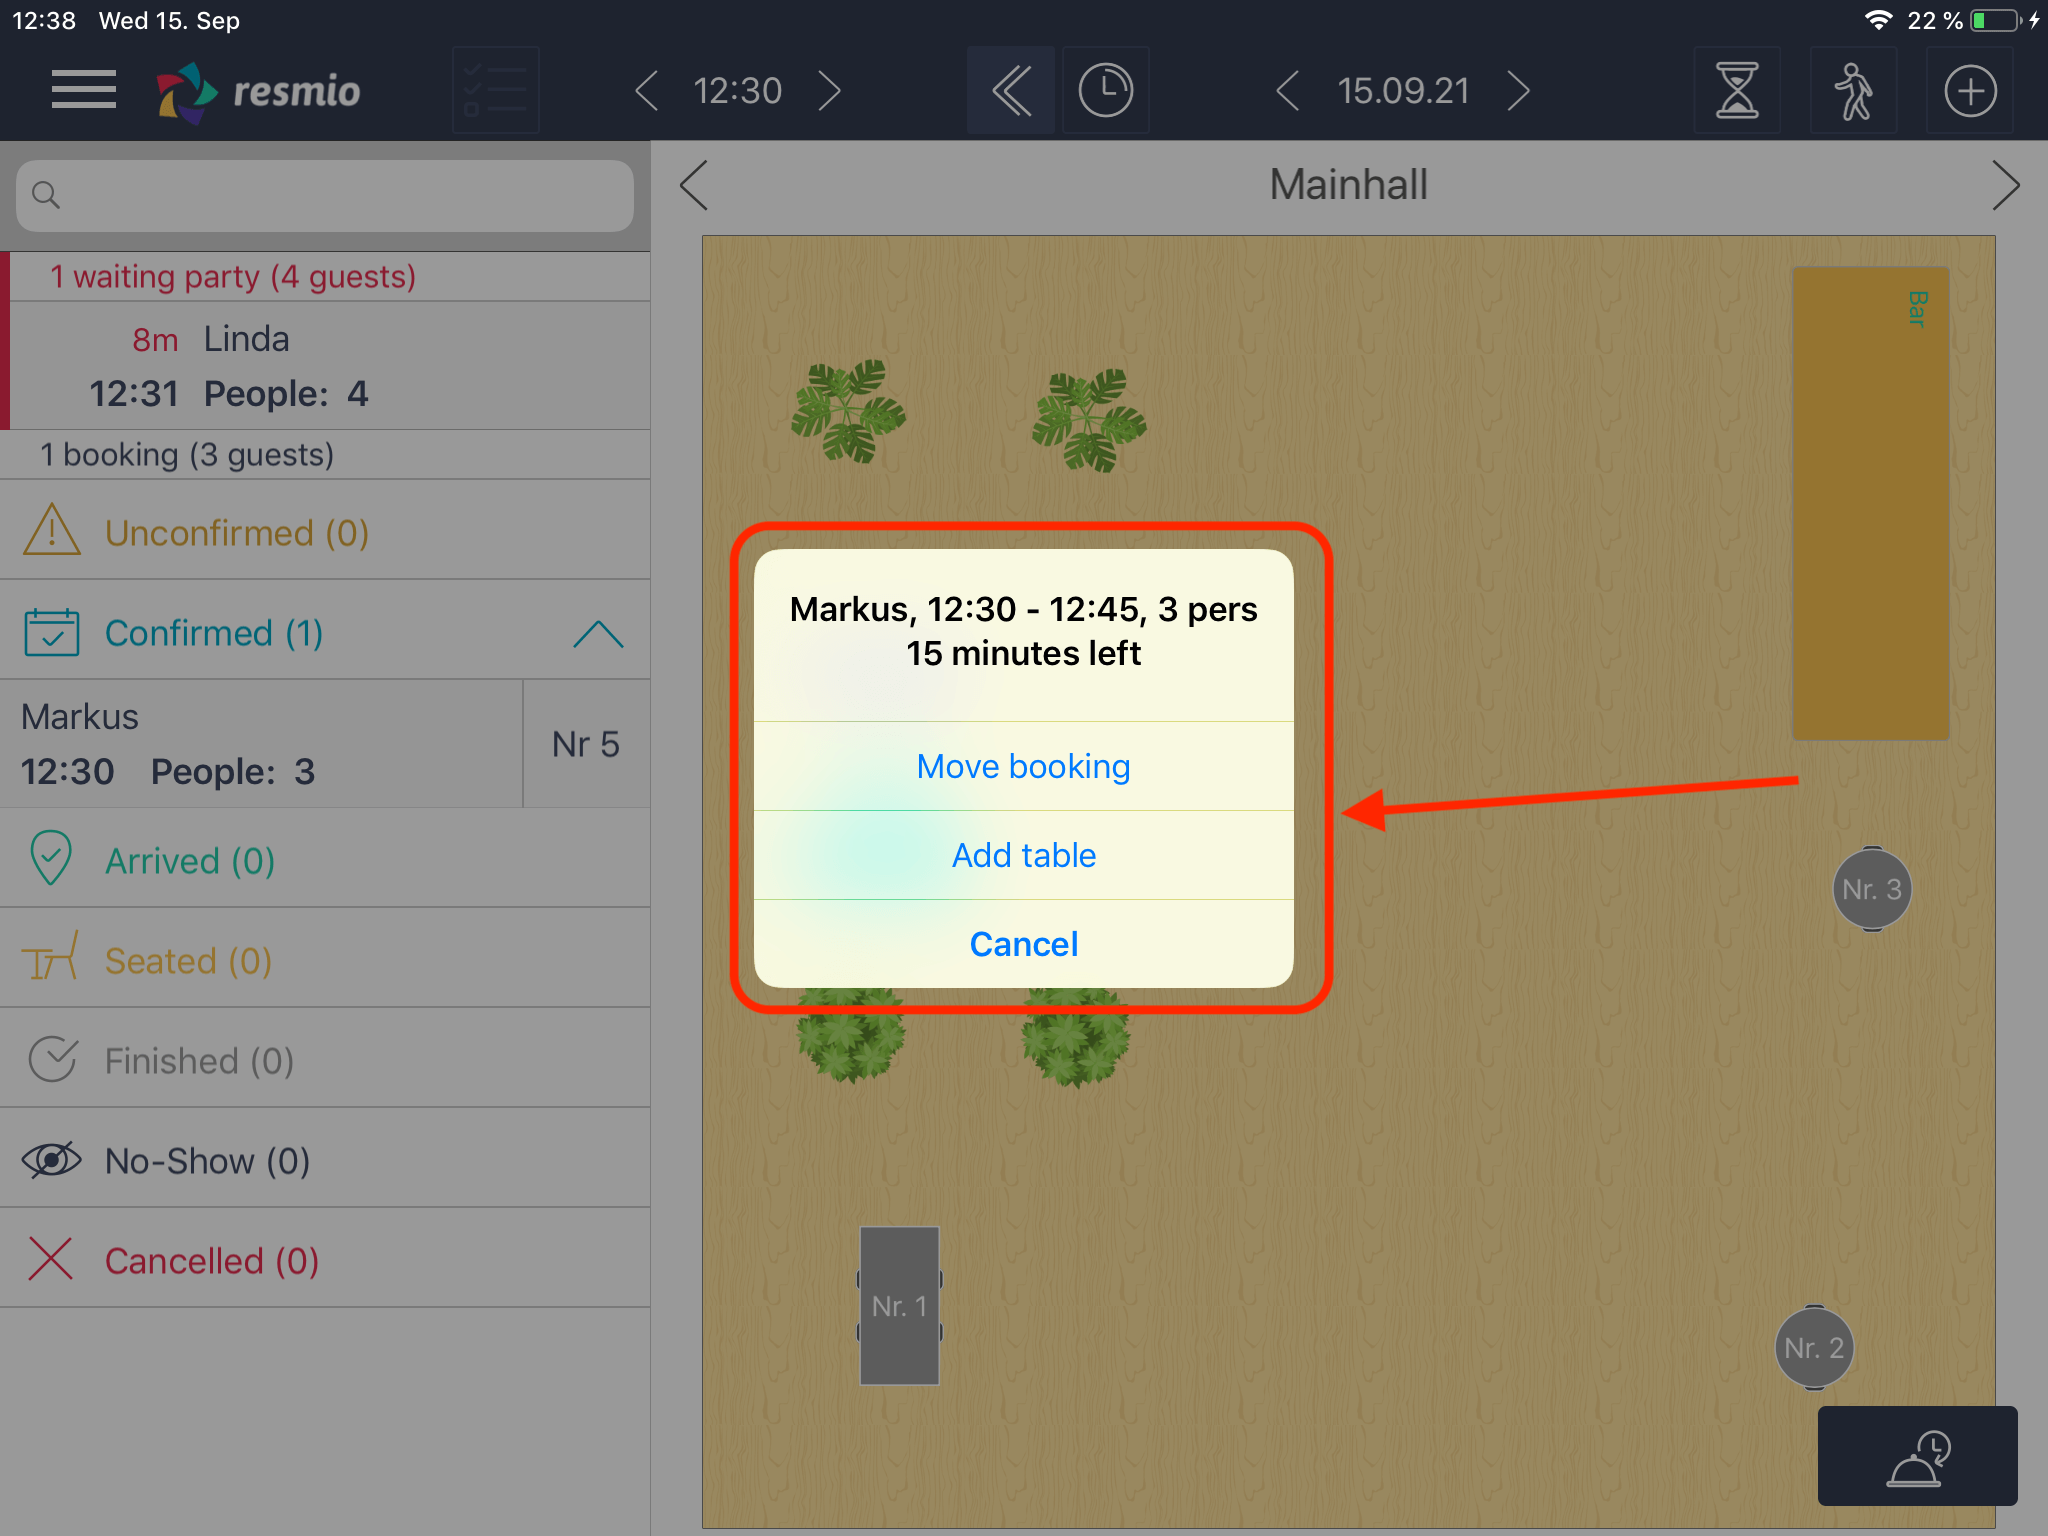
Select the booking in your booking overview and keep holding it to then drag it to the new table. After that you can decide whether to add the table to the booking or shift the booking.
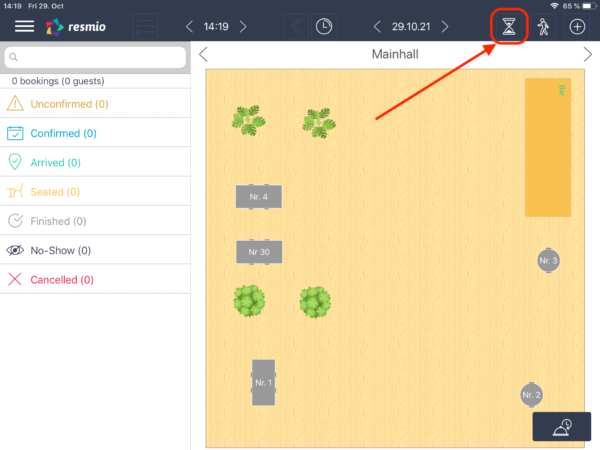
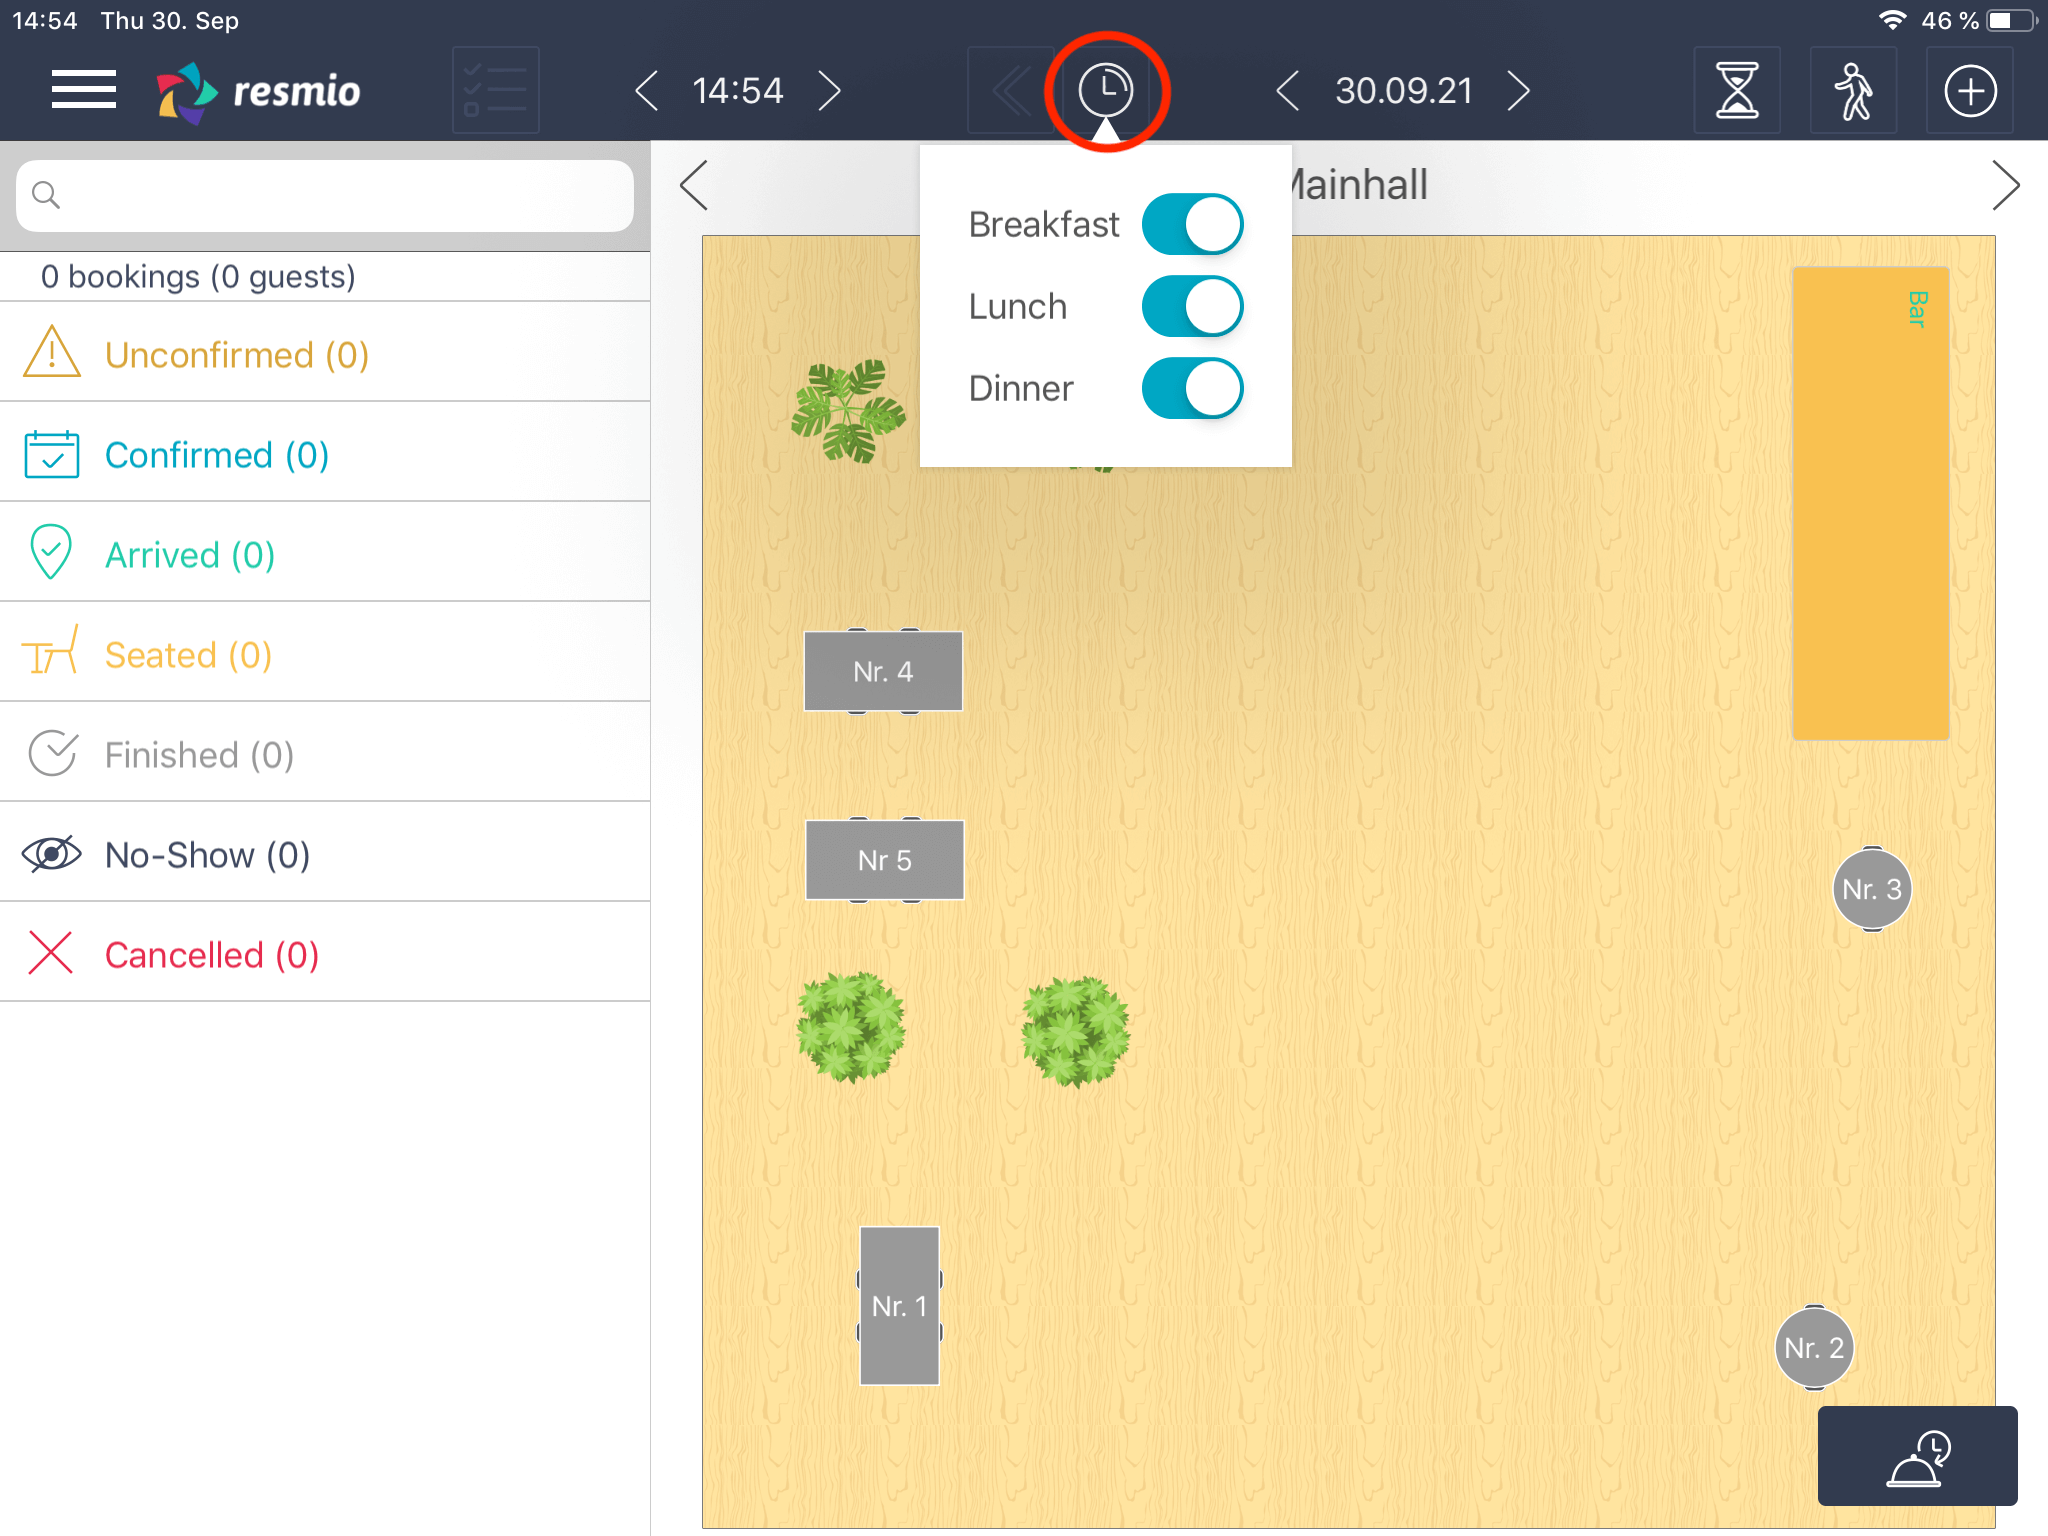
In the browser version of resmio you can define specific time periods for the categories breakfast, lunch, dinner under “Settings” > “Bookings” > “Booking times & capacities”.
In the iPad app, you can then filter the bookings by these categories. To do this, click on the clock symbol in the center of the editing bar. Then only certain time periods will be displayed.
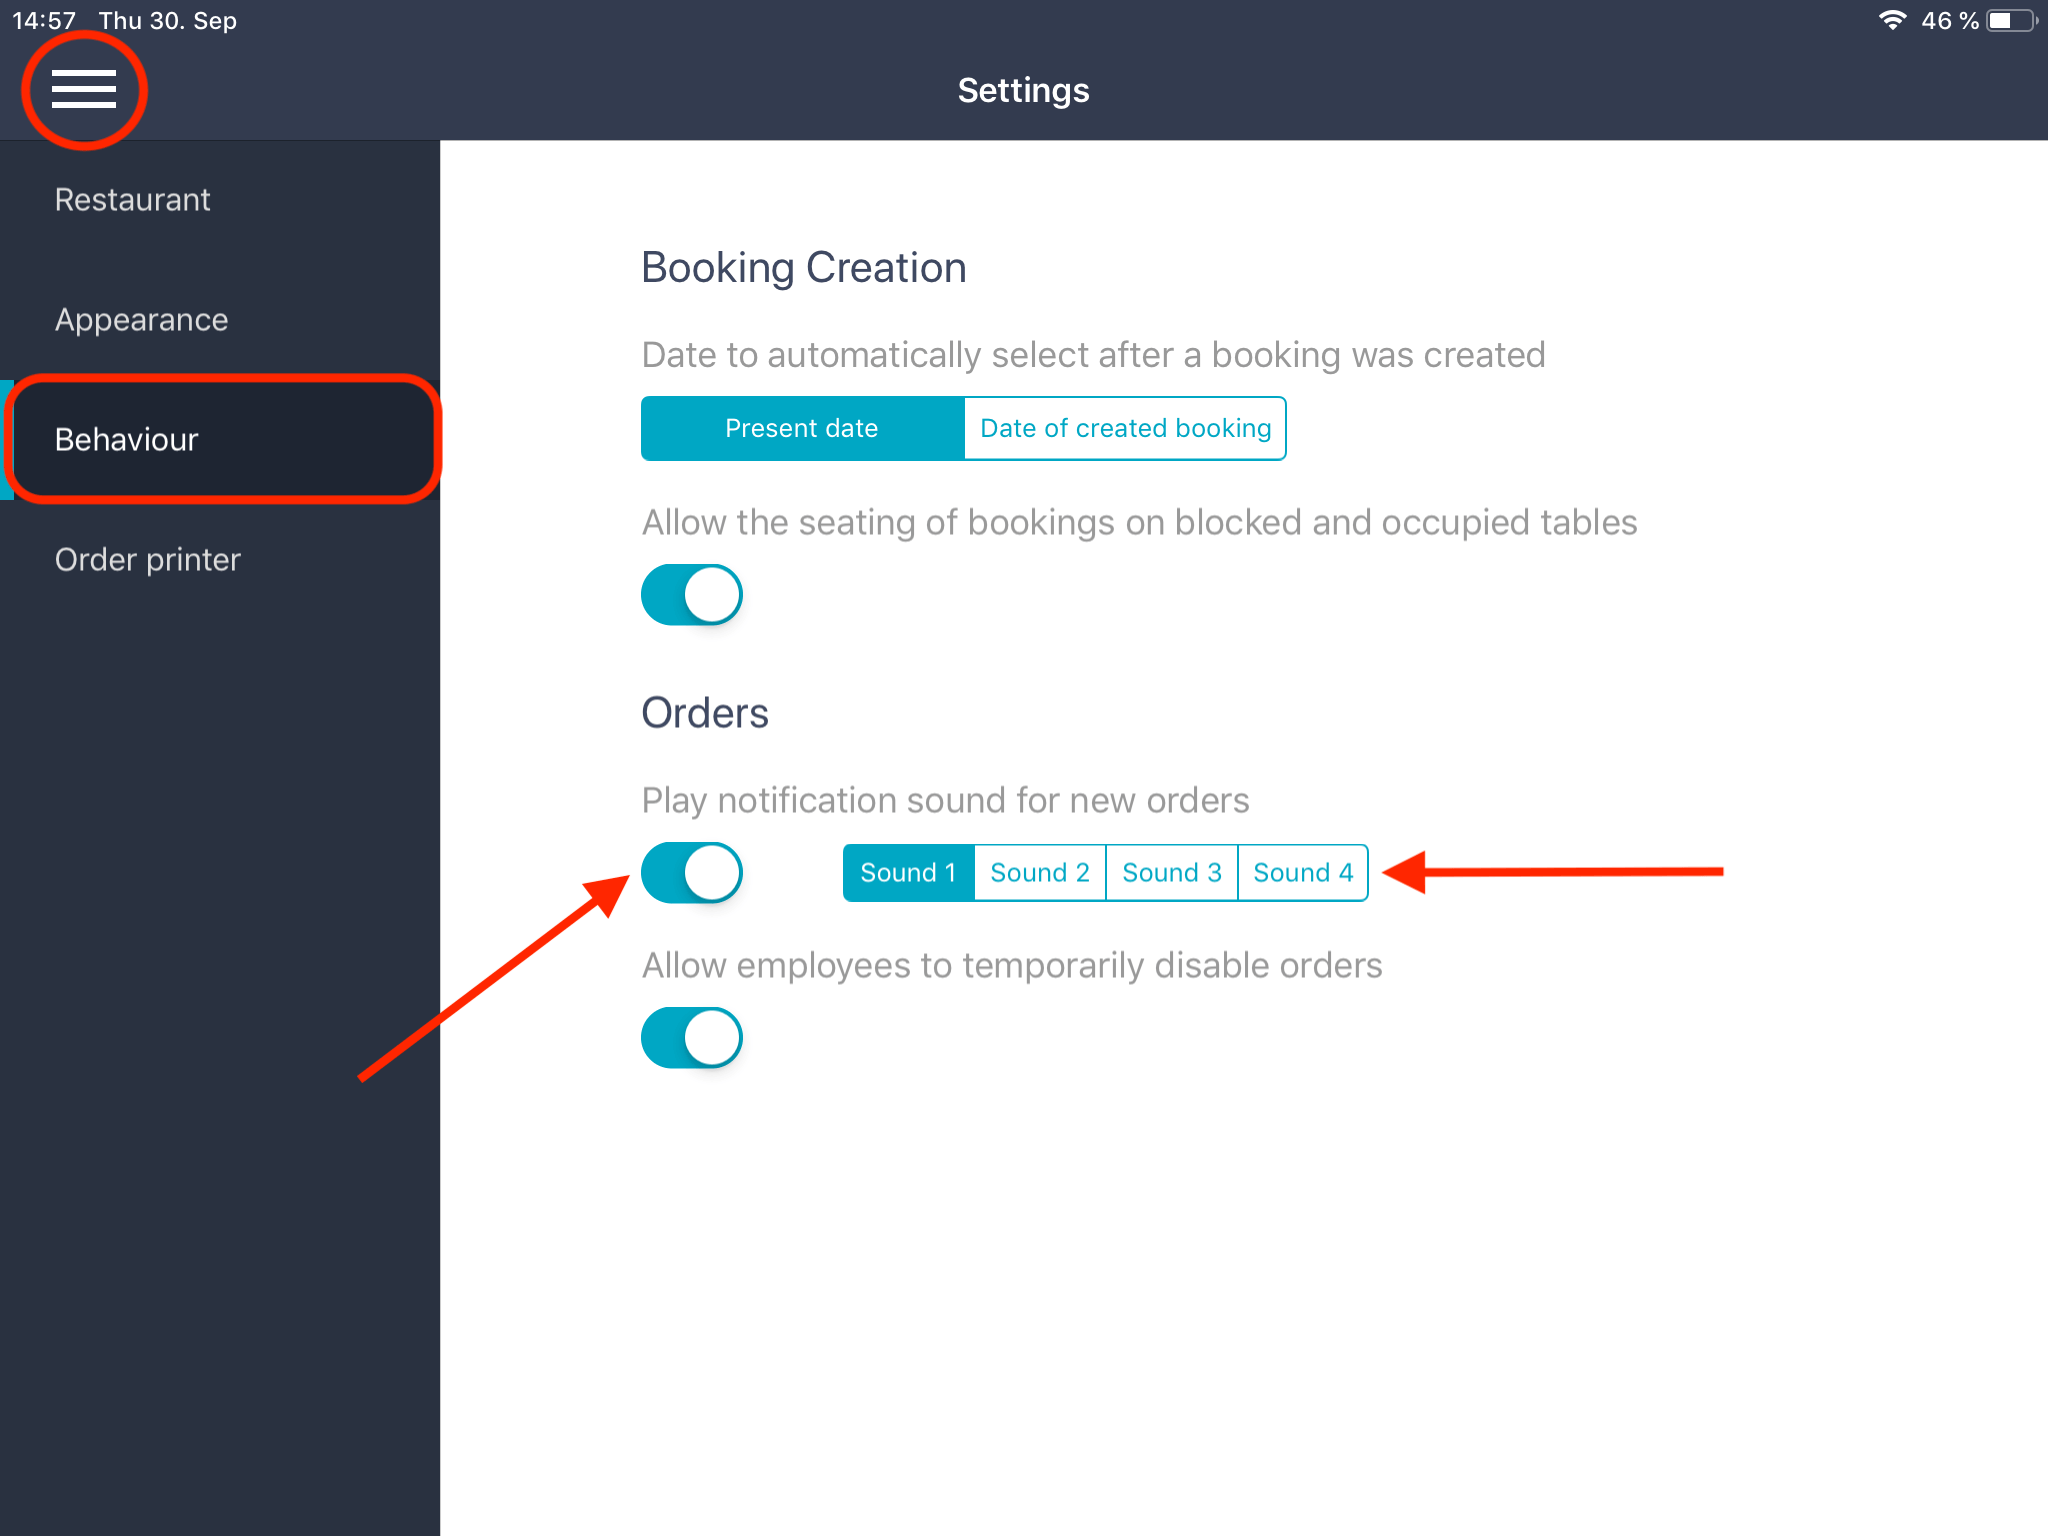
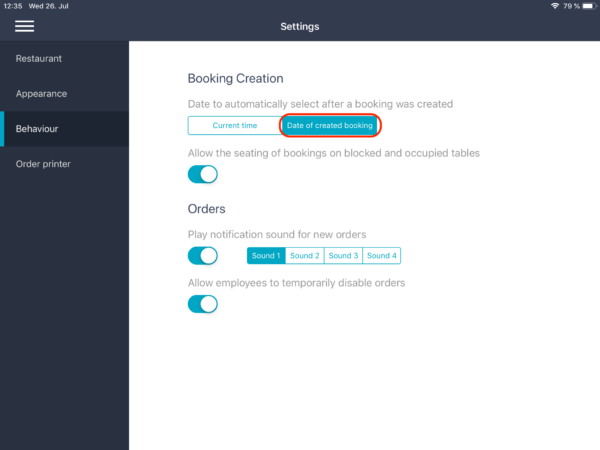
You can choose under the Burger menu (the three horizontal lines) > “Settings” >“Behavior” > “Date to automatically select a booking was created” whether the date will jump back to today or stay with the date of the created booking.
Select “Date of created booking” to stay at the date in the future.
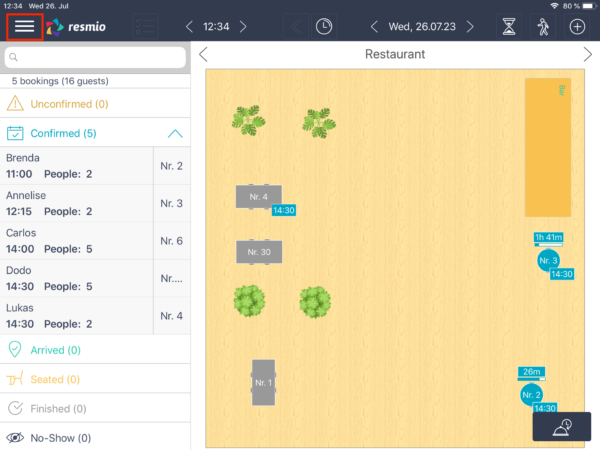
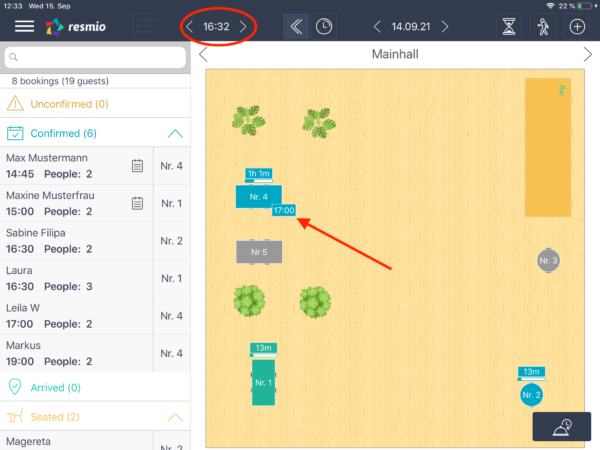
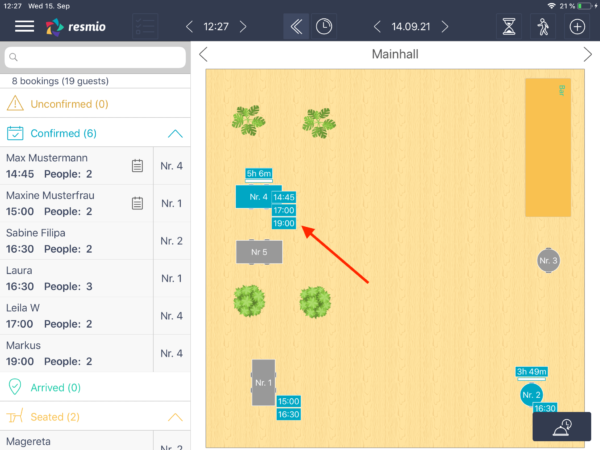
Depending on which time is selected/shown at the top of the edit bar, different bookings will be displayed, as only a certain number of bookings are shown.
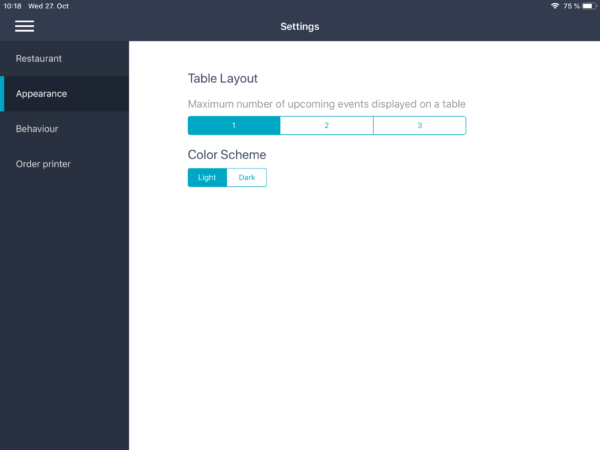
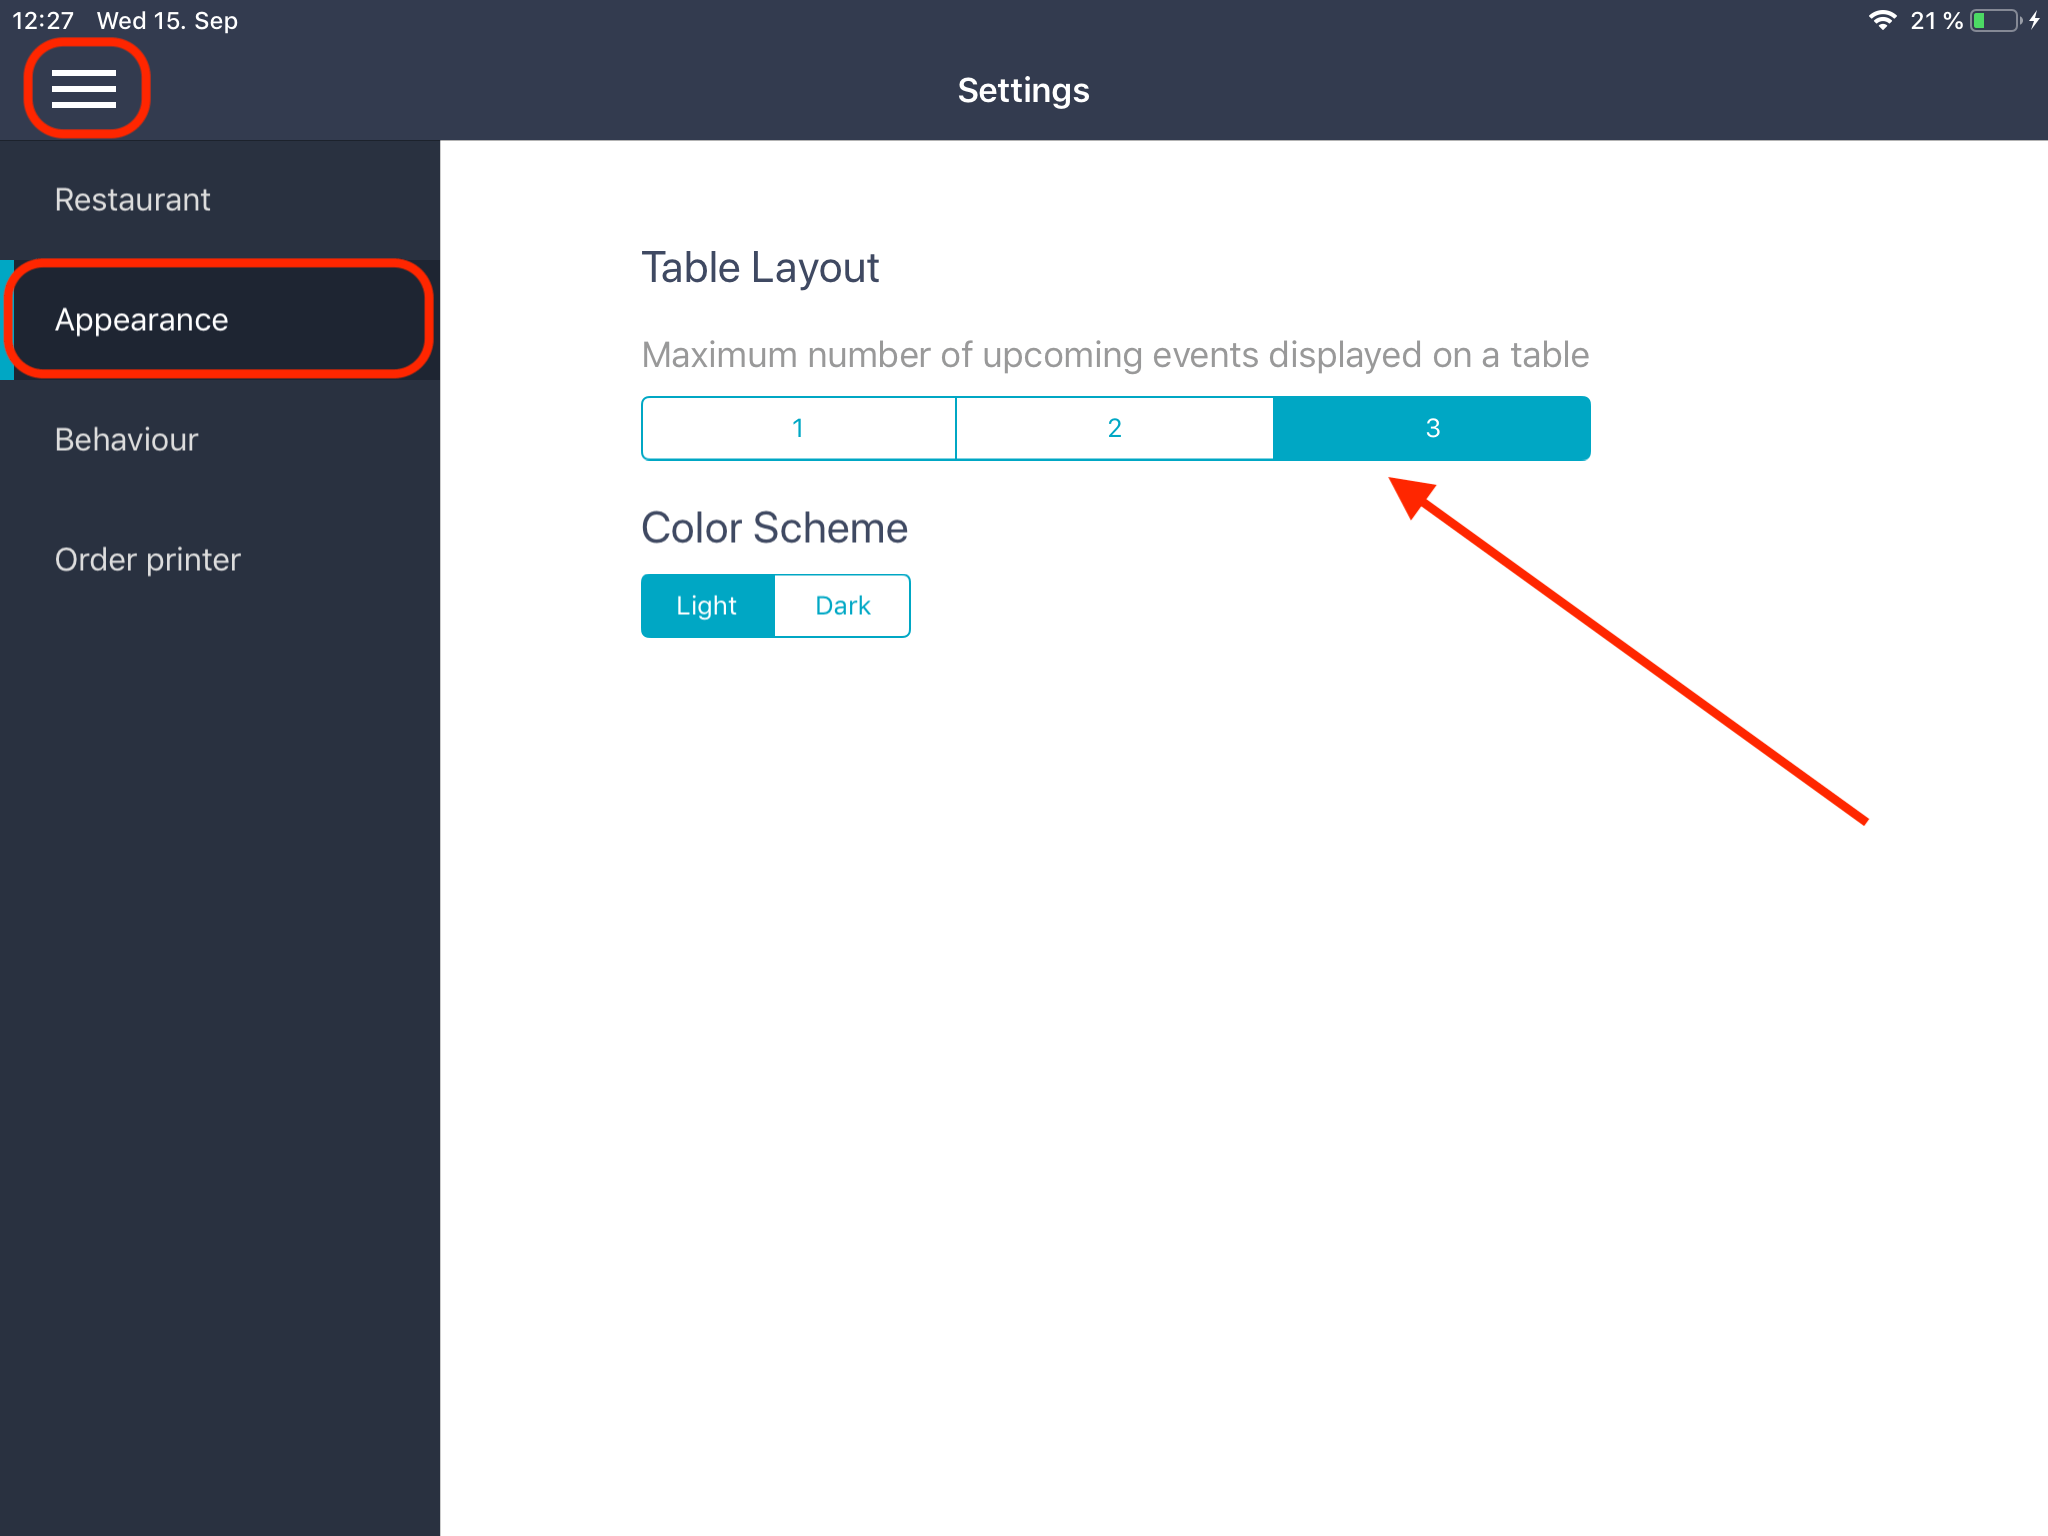
In the settings you can define how many future bookings are displayed at once. To do this, go to the Burger menu (the three horizontal lines) > “Settings” > “Appearance”. In the “Table Layout” you can decide whether only one or up to three bookings are displayed in advance.
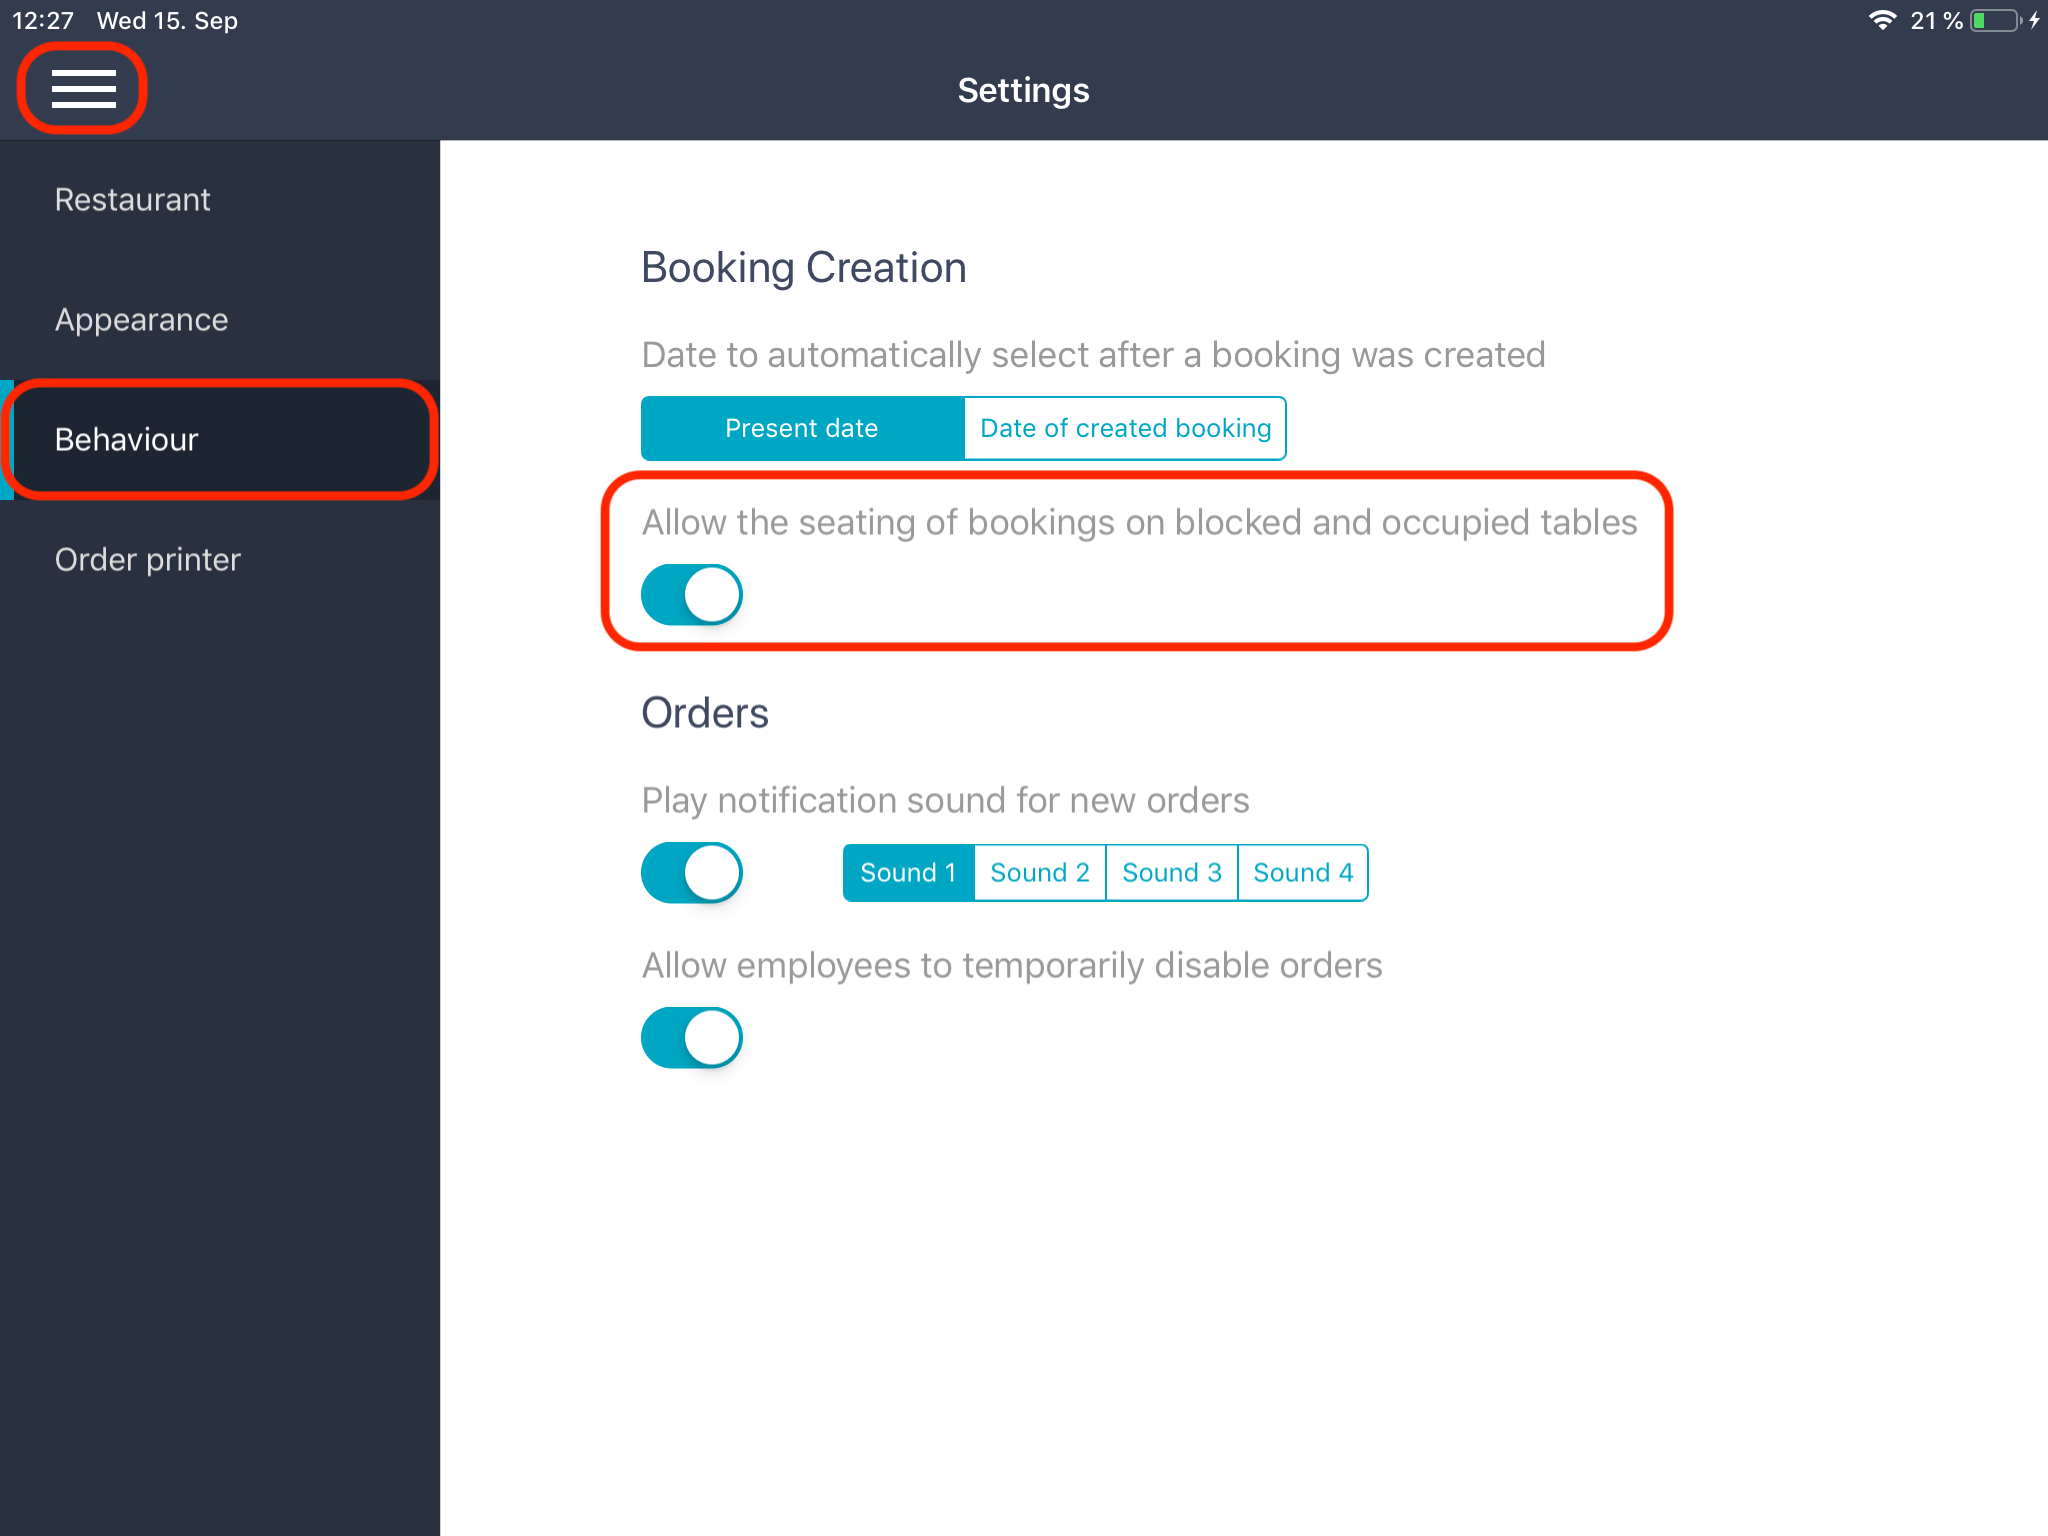
Open the menu by clicking on the burger menu in the upper left corner (the three horizontal lines). Then go to “Settings” > “Behaviour” and change the slider at “Allow the seating of bookings on blocked and occupied tables” to blue/active.
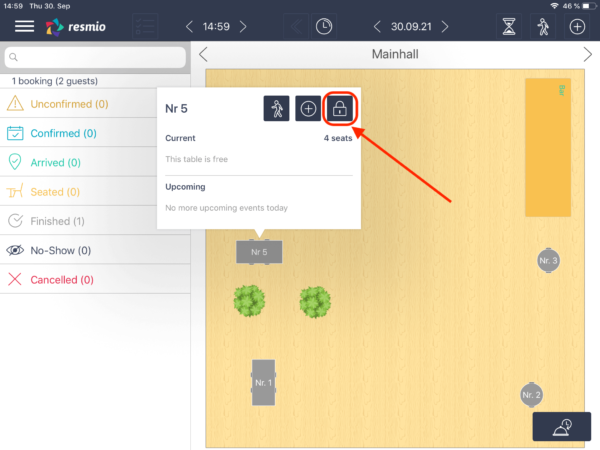
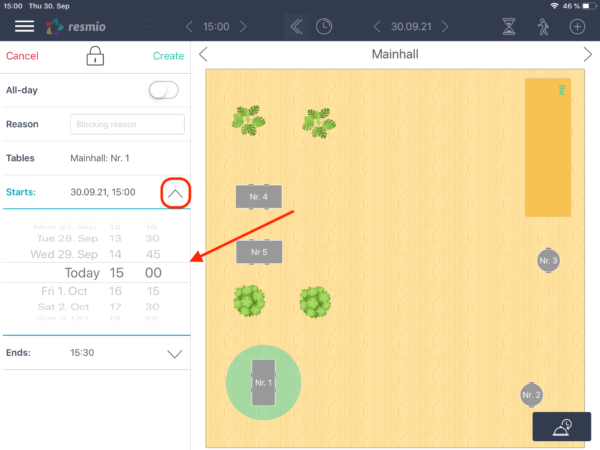
- Select the table you want to block from the table plan. Then click on the lock icon.
- On the left side a menu will open where you can set whether the table should be locked for the whole day or for a certain period of time.
- If you want the table to be blocked for the whole day, click on the “All-day” slider, if it is blue, it is active. If you want the table to be blocked for a certain period of time, select the period using “Starts” and “Ends”. There you can also block the table for several days.
- All employees can see the “Blocking reason” when they click on the blocked table. There you can also see how long the table is blocked.
Please note: You can only block individual tables in the iPad app. If you want to block the whole room or several rooms, you have to go to the webapp (the browser application). This setting can be made under “Settings” > “Bookings” > “Table plan” > “Table exceptions“.
- Click on the blocked table in the table plan and then on the red highlighted block.
- Then a menu will open on the left where you can edit the block. There you can adjust the time as desired or remove the slider at “All-day”. Then click on “Save” at the top.
- To remove the lock, you can also select “Delete” at the bottom.
Please note: In the iPad app, you can only unlock individual tables. If you want to unlock a whole room or multiple rooms, you have to go to the web app (the browser application) to do it. This setting can be made under “Settings” > “Bookings” > “Table plan” > “Table exceptions”.
Please note: You can only block individual tables in the iPad app. If you want to block the whole room or several rooms, you have to go to the webapp (the browser application). This setting can be made under “Settings” > “Bookings” > “Table plan” > “Table exceptions“.

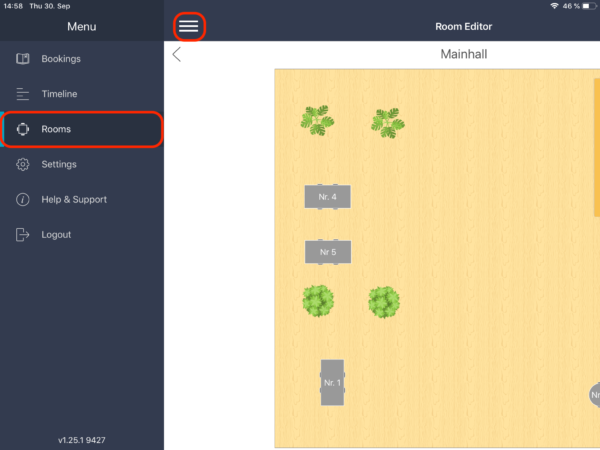
Open the menu by clicking on the burger menu in the upper left corner (the three horizontal lines) and then go to “Rooms”. Then you will get an overview of all your plans and you can choose the room you want to edit by clicking on the arrows on the side. On the top right you can either click on “New” to create a new room or on “Edit” to change something in an existing room.
As soon as you click on one of the two options, an edit bar will open at the top.
The edit bar:
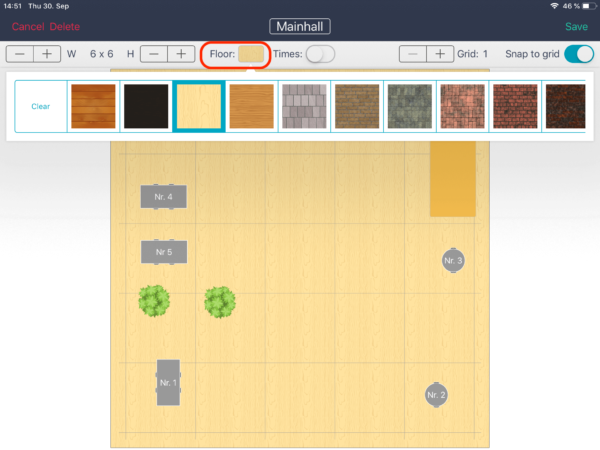
- On the far left you can adjust the width (W) and height (H) of the room using “-“ and “+”.
- If you click on the “Floor” all design options will open and you can choose one by clicking on it.
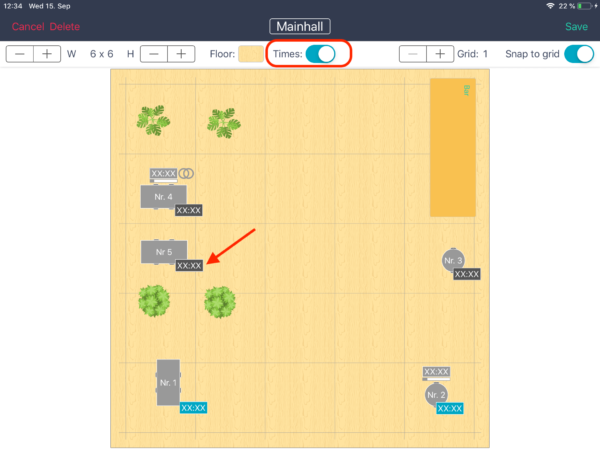
- With the slider “Times” you can display example bookings and better adjust the distance between the tables.
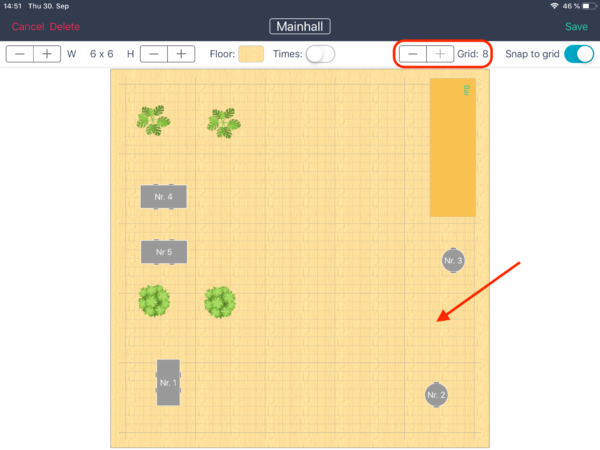
- With the “Grid” you can increase the lines you can use to align the tables.
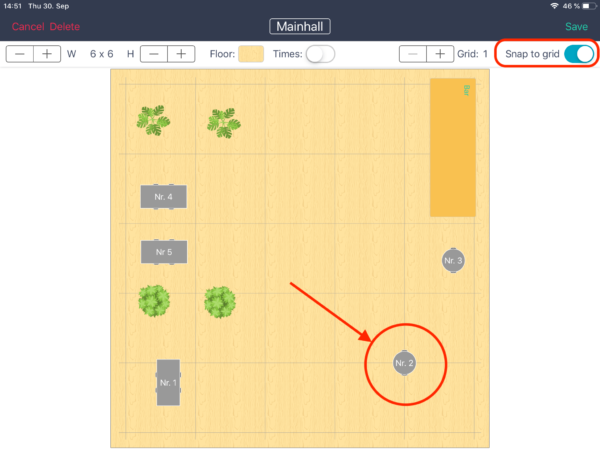
- If the “Snap to grid” slider is active (blue), the tables can only be placed on one of the crossed grid lines. If the slider is off, the tables can be placed freely in the room.

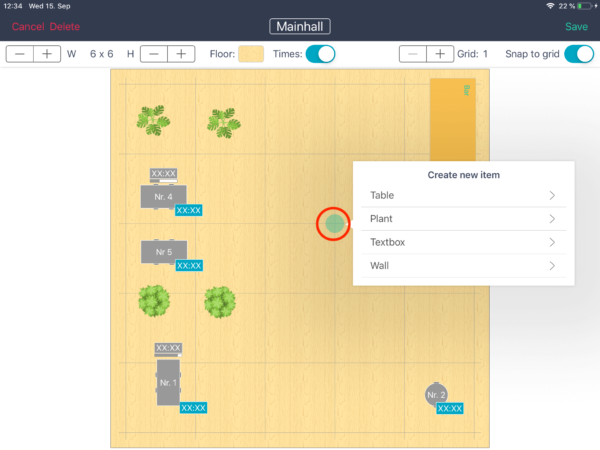
Add a new element:
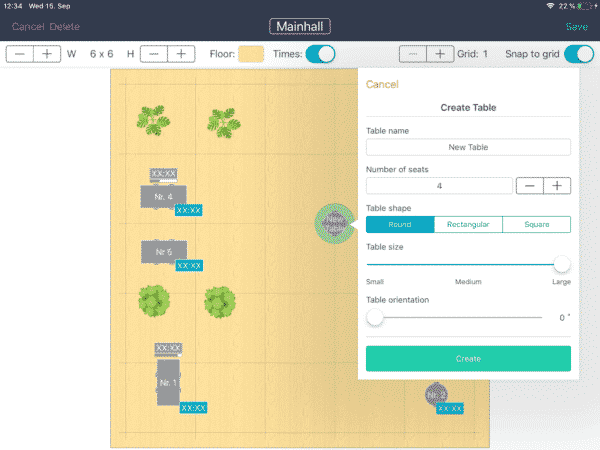
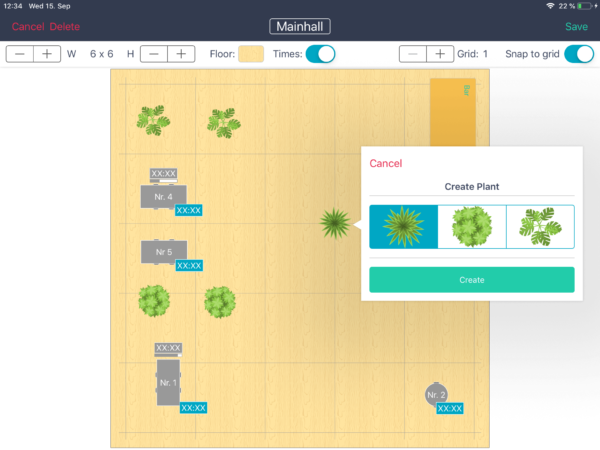
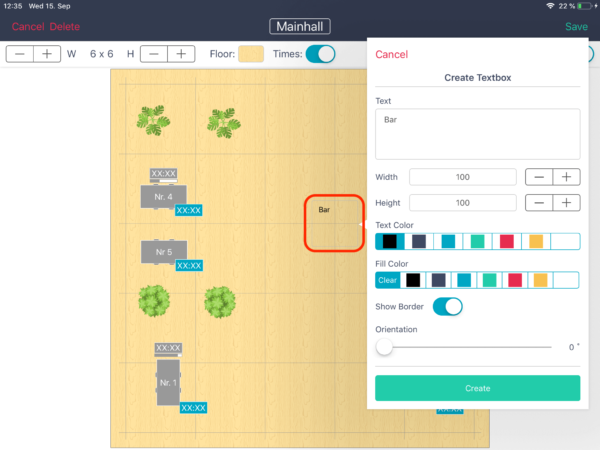
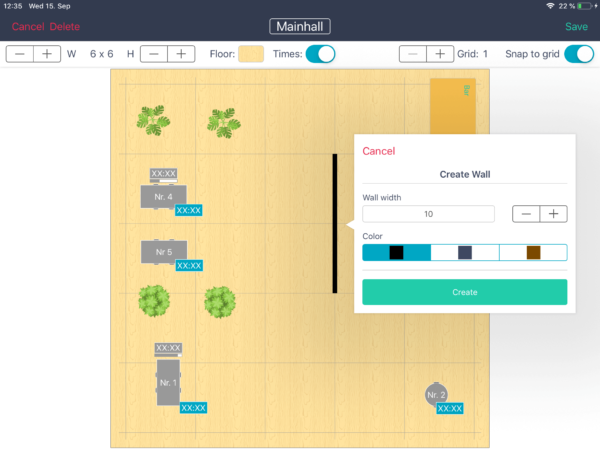
To place a new object on the plan, click on a grid cross. Then you can choose whether you want to create a new table, plant, text box or wall.
- Table: When you create a table, you can specify the name and the capacity (number of seats), as well as the table shape, size and orientation. If you want to edit an already created table, just click on the corresponding table, then the just described menu will open.
- Plant: You can select one of three plants by clicking on it.
- Text box: First set the text and then the size of the box. You can also set the text color, fill color and orientation.
- Wall: You can set the color and width before you click “create”. After you have created the wall, you can set the length by tapping the end of the wall with your finger and dragging it longer or shorter. You can also adjust the orientation of the wall by dragging the end of the wall in the desired direction.
Move objects:
To move something on the table plan, click on the object with your finger and move it to the desired position while holding it.
Please note: If “Snap to grid” is active in the edit bar, you can only move objects to the intersections of the grid.
When you are satisfied with the look of the room, don’t forget to click “Save” in the upper right corner.

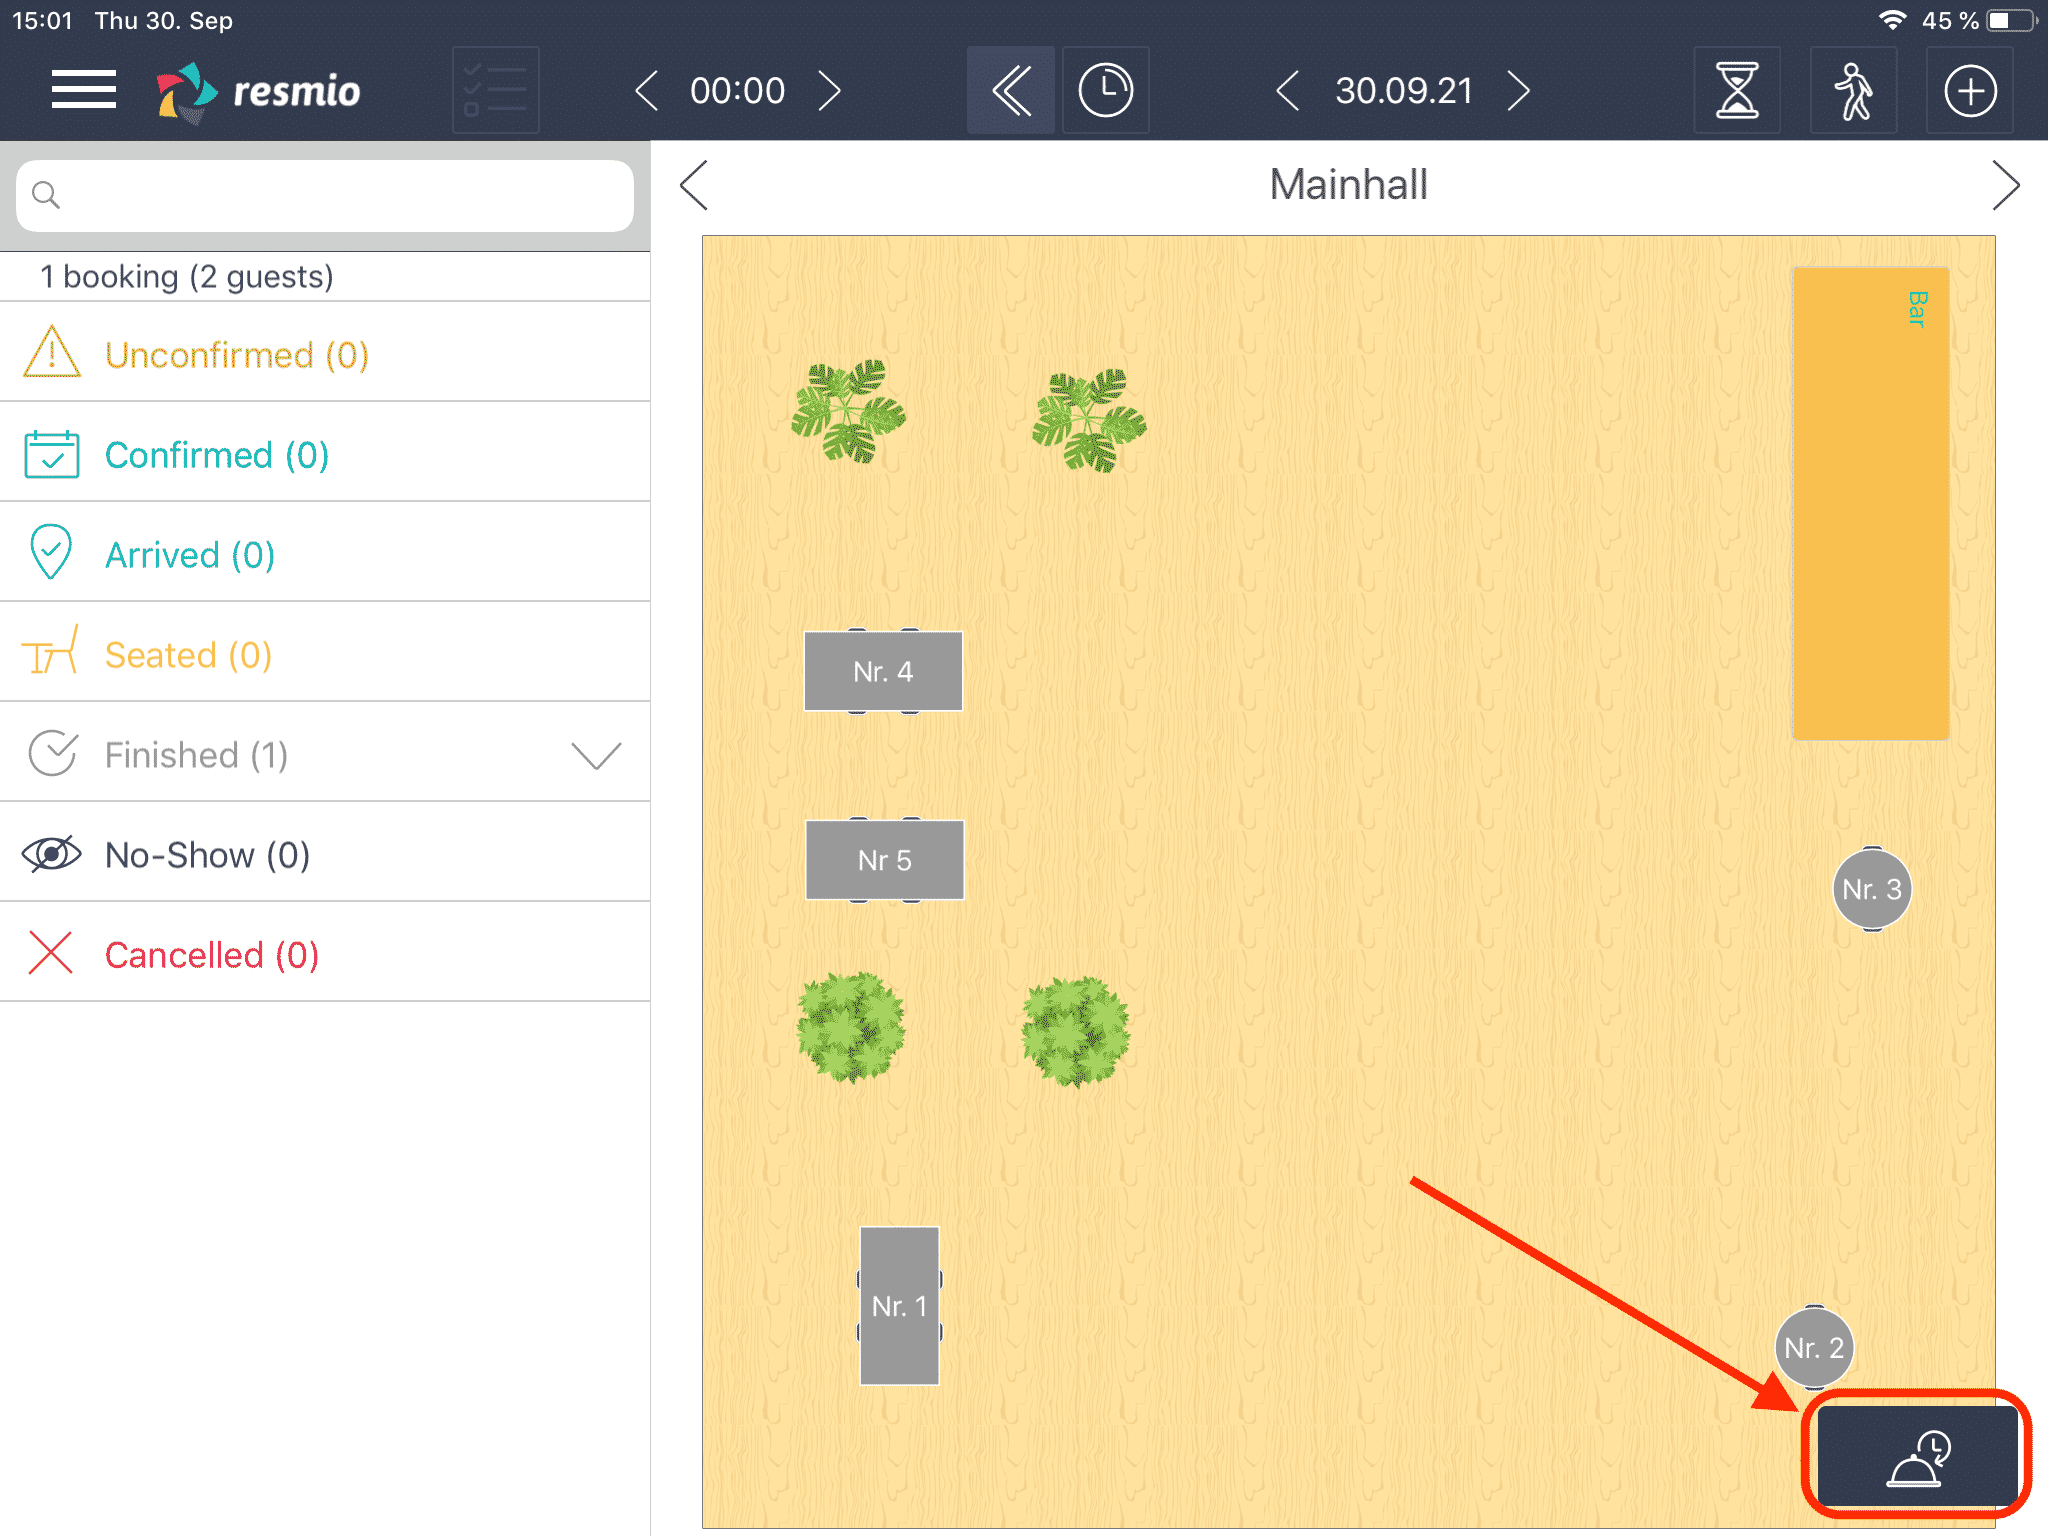
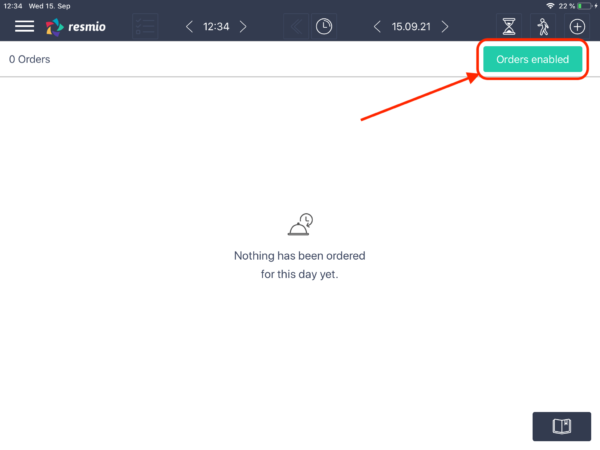
When you log in to resmio tables you are automatically in the booking overview. In the lower left corner there is an icon with a cloche. If you click on it you will get to your order overview.
To switch back to the bookings, click on the book icon in the lower left corner.

Open the menu by clicking on the burger menu in the upper left corner (the three horizontal lines). Then go to “Settings” > “Behaviour” and change the slider at “Play notification sound for new orders” to blue/active. Then you can choose one of four different sounds.
Click on the burger menu in the upper left corner (the three horizontal lines). Then go to “Settings” > “Order printer” and set the model of your Epson printer. In the first box you will see all available printers. Click on your printer to connect it to resmio.

Click on the burger menu in the upper left corner (the three horizontal lines) > “Settings” > “Appearance”. There you can set how many upcoming bookings are displayed next to the tables and change the color scheme.

