Set up Deposits
Table of contents
Set up
Under “Settings” > “Bookings” > “Deposits“ you have the possibility to define if and under which conditions you want to charge fees for bookings or cancellations. If you check the “Enable deposits for bookings” box, guests will only be able to book a table if they pay a deposit. You can set up the amount directly at “Deposit amount”.
The guests have the option to pay by credit card, cash or PayPal. For this you have to make the appropriate settings under “Settings” > “Integrations” > “Payment providers“.
For guests who book by phone, you can still enter your bank account details under“Settings” > “Bookings” > “Deposits“ > “Your bank account for deposits”. Guests will then receive this information by email to make the deposit.
After you have set up the amount under “Settings” > “Bookings” > “Deposits“ > “Deposit amount”, you can again differentiate whether you want to charge the amount per booking or per guest. Just select “per booking” or “per guest” in the drop-down menu next to the deposit amount.
If you select “per booking”, the system will charge the specified amount per reservation, no matter how large the group is.
If you have chosen the option “per guest”, the system calculates the predefined amount per person. The larger the group, the higher the deposit amount.
Depending on the payment provider, you can determine when the deposit is debited.
Payments via the payment provider Stripe:
Here you have the choice. Under“Settings” > “Bookings” > “Deposits“ > “Deposit options“, you can specify whether the credit card data should only be saved for the time being or whether it should be debited immediately.
If you select “Charge if needed“, the data will only be saved. If a guest does not show up, you can debit the money.
If you select “Charge immediately“, the deposit will be debited when the booking is created. When the guest arrives, the money must be offset against the invoice or charged back.
Payments via the payment provider PayPal:
The money is debited immediately when the booking is created. The status of the deposit is always debited.
When the guests arrive, the money must be settled with the bill or charged back.
Under “Settings” > “Bookings” > “Deposits“ > “Enable deposits only at these times” you can specify that you do not always charge deposits but only at defined times (e.g. during rush hours). If you want to allow your guests to cancel up to a certain time without a fee, you can specify the minimum amount of time before they must cancel in order for the deposit not to be retained. Simply check “Enable cancellations without fees” and then add the desired number of days as a lead time before the booking where guests can still cancel without a fee.
Under “Settings” > “Bookings” > “Deposits“ > “Enable deposits for exact dates” you can specify that you do not always charge deposits but only on certain days/periods of time (for example during Christmas).
Select the checkbox next to “Enable deposits for exact dates” and click on “+ Add booking date” to define the time span for your deposits and then “Save”. Afterwards you can press the same button once again to add further dates.
If you don’t want to charge deposits for all guests but only for groups above a certain size, you can set this up as well. Under “Settings” > “Bookings” > “Deposits“ you simply tick the checkbox next to “Enable deposits above a certain group size” and add the desired minimum number of people for groups you want to charge deposits for. Then deposits are automatically charged only for bookings of groups which have at least the specified number of people or more.
If you click on “Bookings” on the left hand side of your webapp, you will find the “Deposits“ tab directly below it. When you enabled the deposit feature you can check which reservations you have received deposits for below this section.
- Under “Type” you can see the payment method which the guest used to make the deposit (e.g. credit card)
- Under “Amount & deposit status” you can see the sum of the deposit is and if it has already been refunded or if you have retained it.
- The “Booking” column indicates which booking the deposit refers to.
Via the symbol at the top right you can export an overview of the deposits for a certain time as a csv-file.
Even if you have activated the deposit, you can still accept reservations by phone. Enter the data as usual and then click on continue. A second window will appear.
- In this window you can indicate whether the guests have already paid the deposit (e.g. if they make a booking on site) or whether the deposit is still outstanding.
- If the payment is still pending, the reservation will be saved with the status “Unconfirmed”. The guest will receive an email where he can pay either online by button or by bank transfer.
- If the guest pays online, the reservation will automatically change to “Confirmed”.
- This is not possible with bank transfer. Check your account regularly and then change the status of the booking manually.
You have the possibility to define an individual text that will appear in your widget. The text entered is clearly visible to guests in the widget.
- Under
“Settings” > “Bookings” > “Deposits“ > “Individual deposit text for the widget” you can write a text yourself, in which you inform your guests about the deposit regulation. This text will be displayed directly in the widget during the online reservation.
- Under
“Settings” > “Bookings” > “Deposits“ > “Link to cancellation policy“, you can add a link from your website that explains how far in advance guests must cancel in order to avoid having to pay a deposit. This link will also appear in the confirmation email for the guest.
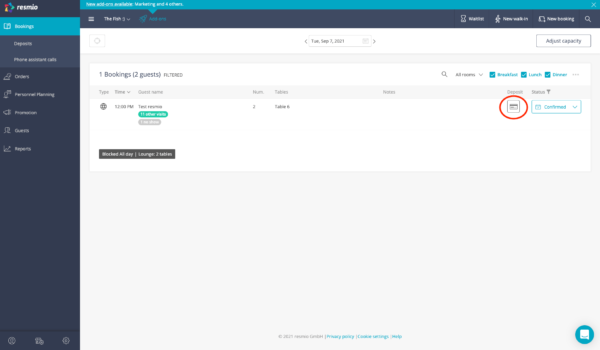
Click on the deposit symbol in the corresponding booking. There you can see when you have received the deposit and which payment method was used. In addition you can select whether you want to “retain”, “settle with bill” or “pay back” the deposit. Additionally you can directly transfer back the amount (or only part of it) via the “refund deposit” option.


