resmio » Help » Integration »
Integration of resmio in WordPress

An easy way to integrate resmio’s booking widget or booking button on your WordPress website without any programming knowledge is to install our plugin (you may need to have administrator rights). Please Note: If you can’t or don’t want to install plugins on your WordPress environment follow the alternative integration methods.
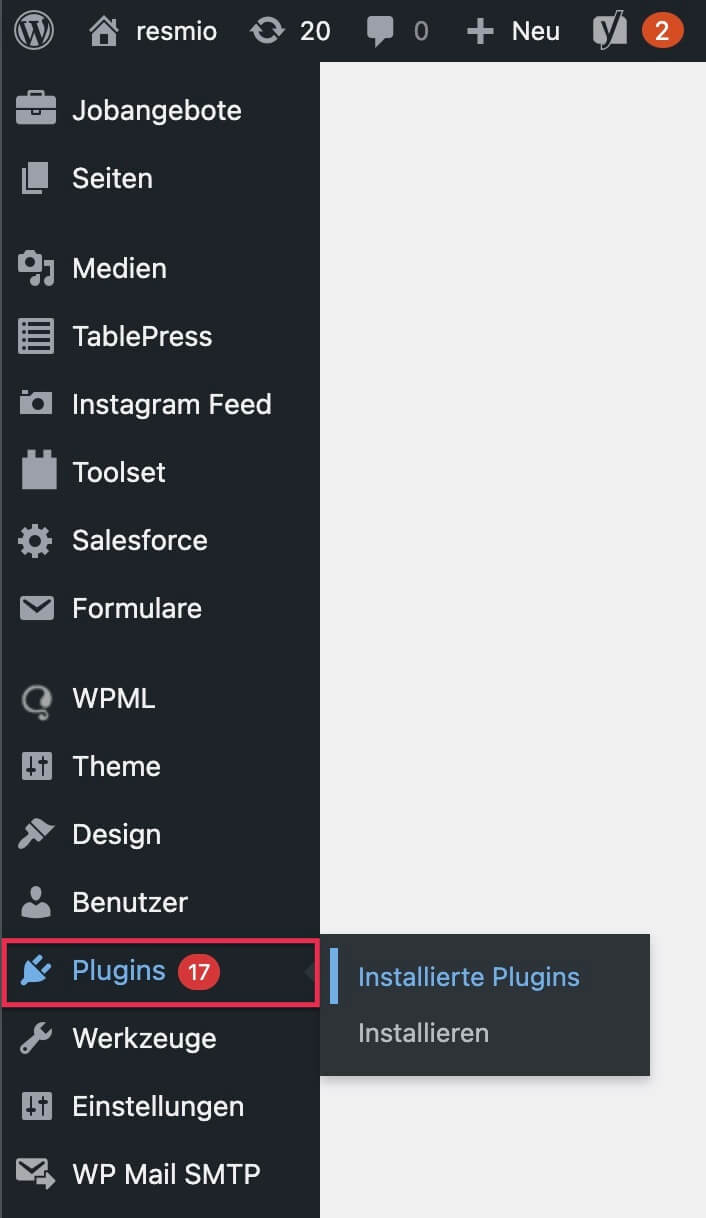
1. Log into your WordPress account with your login details and select “Plugins” > “Install”.
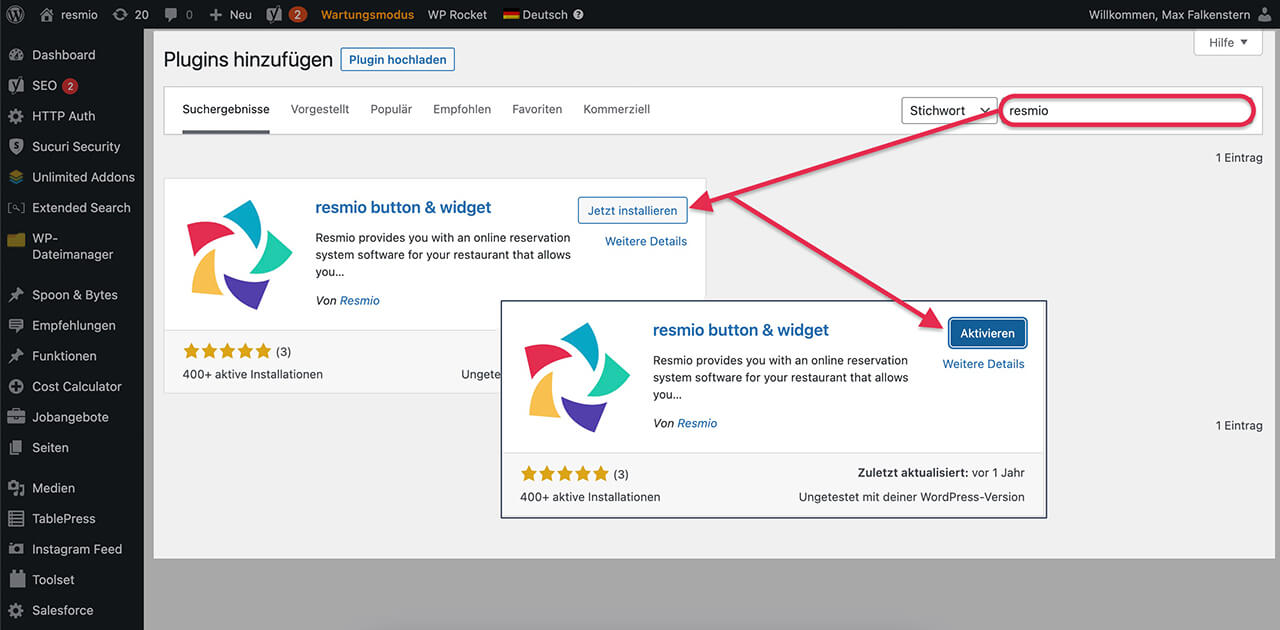
2. Enter the keyword “resmio” in the search box on the right. The plugin suggestion “resmio Button & Widget” will appear in the search results list.
- Click on “Install now” to start the installation process.
- Now you just have to activate the plugin “resmio Button & Widget” with one more click.
- Go to the menu on the left hand side in WordPress and select “Settings” > “resmio Button & Widget”.
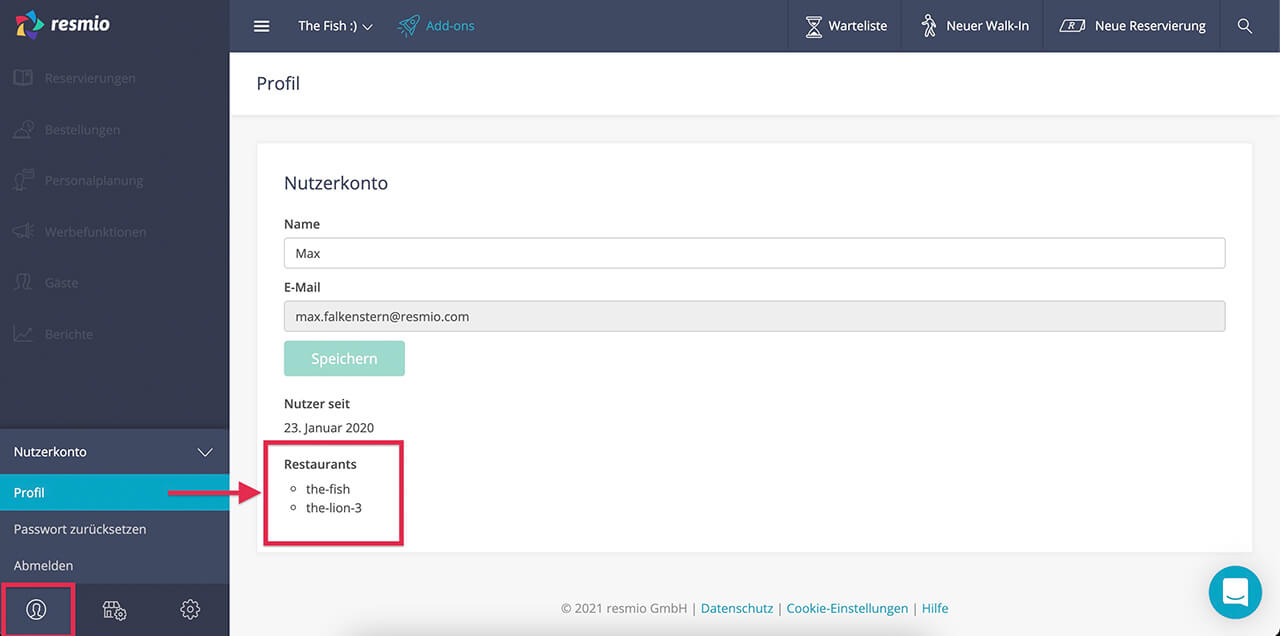
3. To connect to your resmio account, first switch to the webapp.
- Log in to your resmio account.
- Under
 “User account” (bottom left icon) > “Account” you will find your “Restaurant ID” at the bottom of the “Restaurants” section.
 - Go back to the WordPress page and copy the ID into the empty field.
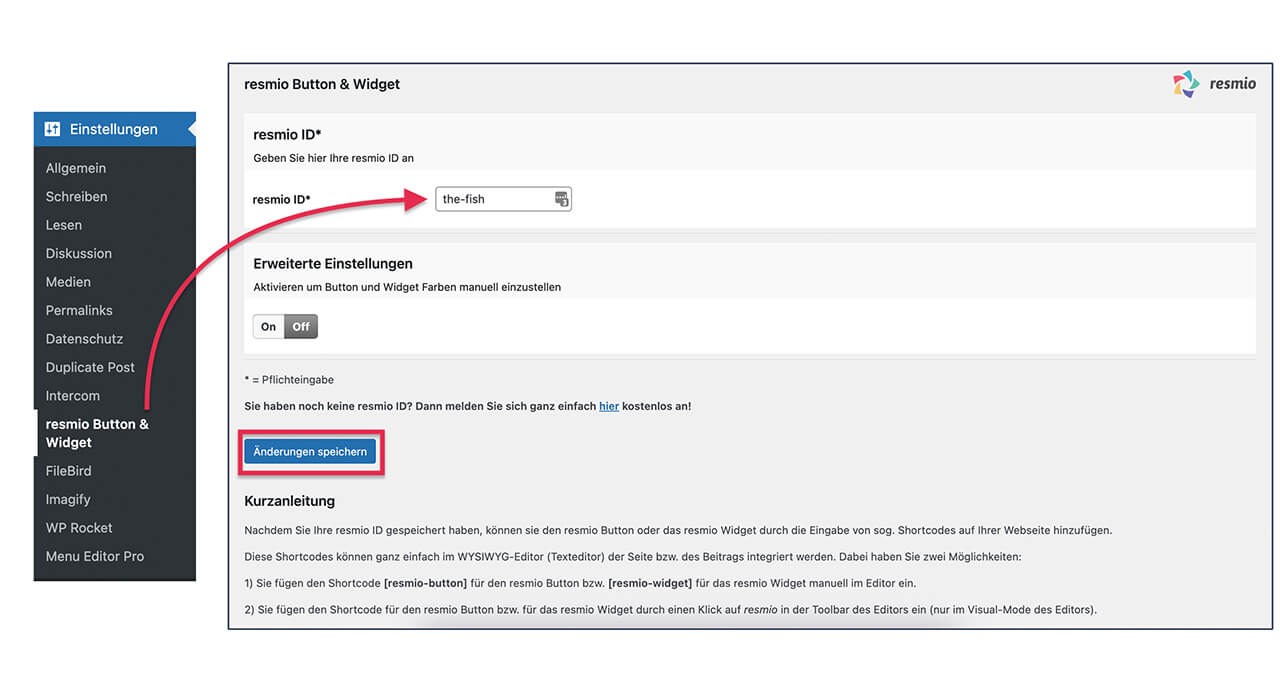
4.After you have saved the resmio ID you can add the resmio button or widget to your website by entering the shortcodes
[resmio-widget]
or
[resmio-button]
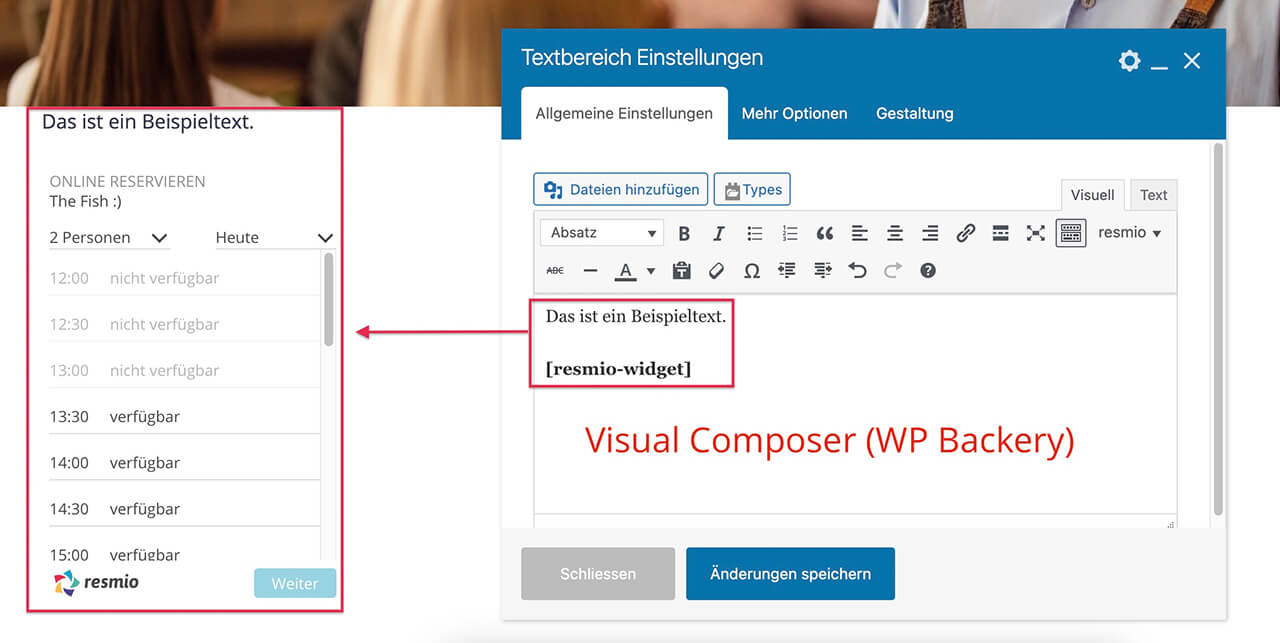
These shortcodes can be easily integrated on any page via the text editor of WordPress. It doesn’t matter if you still work with the classic editor, the modern Gutenberg editor or a so-called Visual Composer (e.g. Astra, Divi, Elementor or WP Backery).
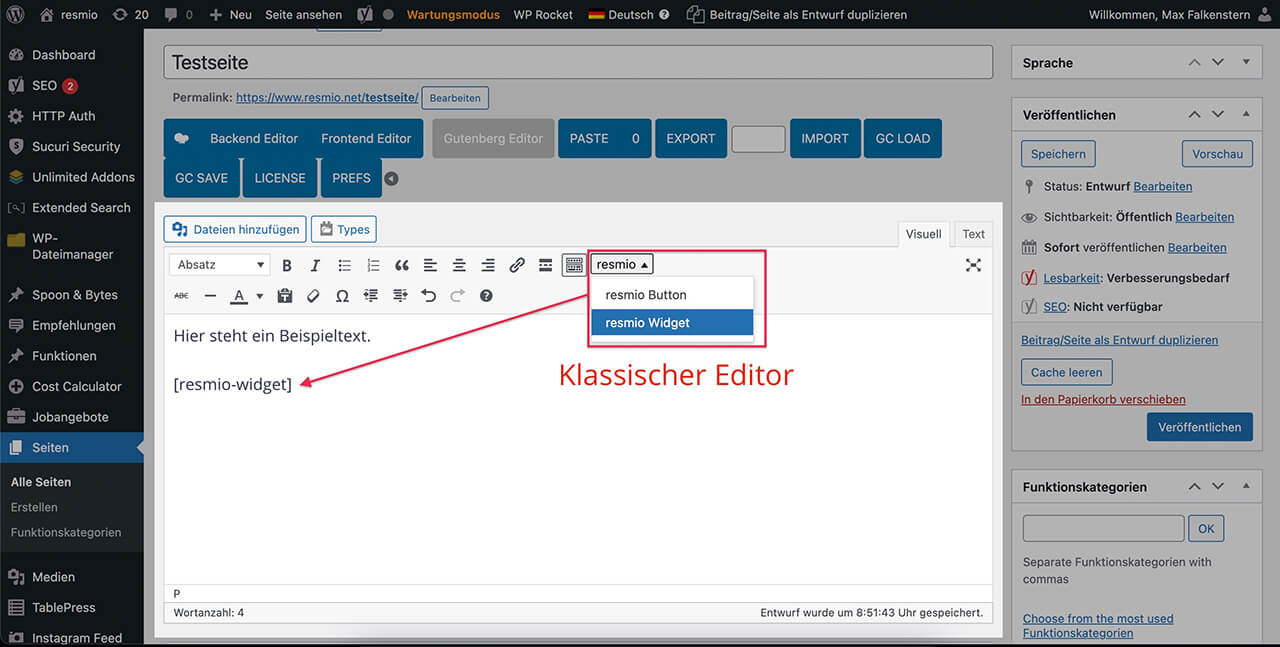
- You add the shortcode [resmio-button] for the resmio button or [resmio-widget] for the resmio widget manually in the editor.
- Alternatively you can insert the shortcode for the resmio button or for the resmio widget by clicking on resmio in the editor toolbar (only available in visual mode).
Examples:
A plugin installation is not an option for you? Then you can integrate the resmio online booking function via the integration of a script code or link on your homepage.
To place resmio’s booking form “natively” on your WordPress site so that your guests can book online without leaving your homepage, follow these steps:
To embed resmio’s booking form ” in native ” on your wordpress site, so that your guests can make online bookings without leaving your homepage, follow the steps below:
1.
- Log in to your resmio account with your credentials
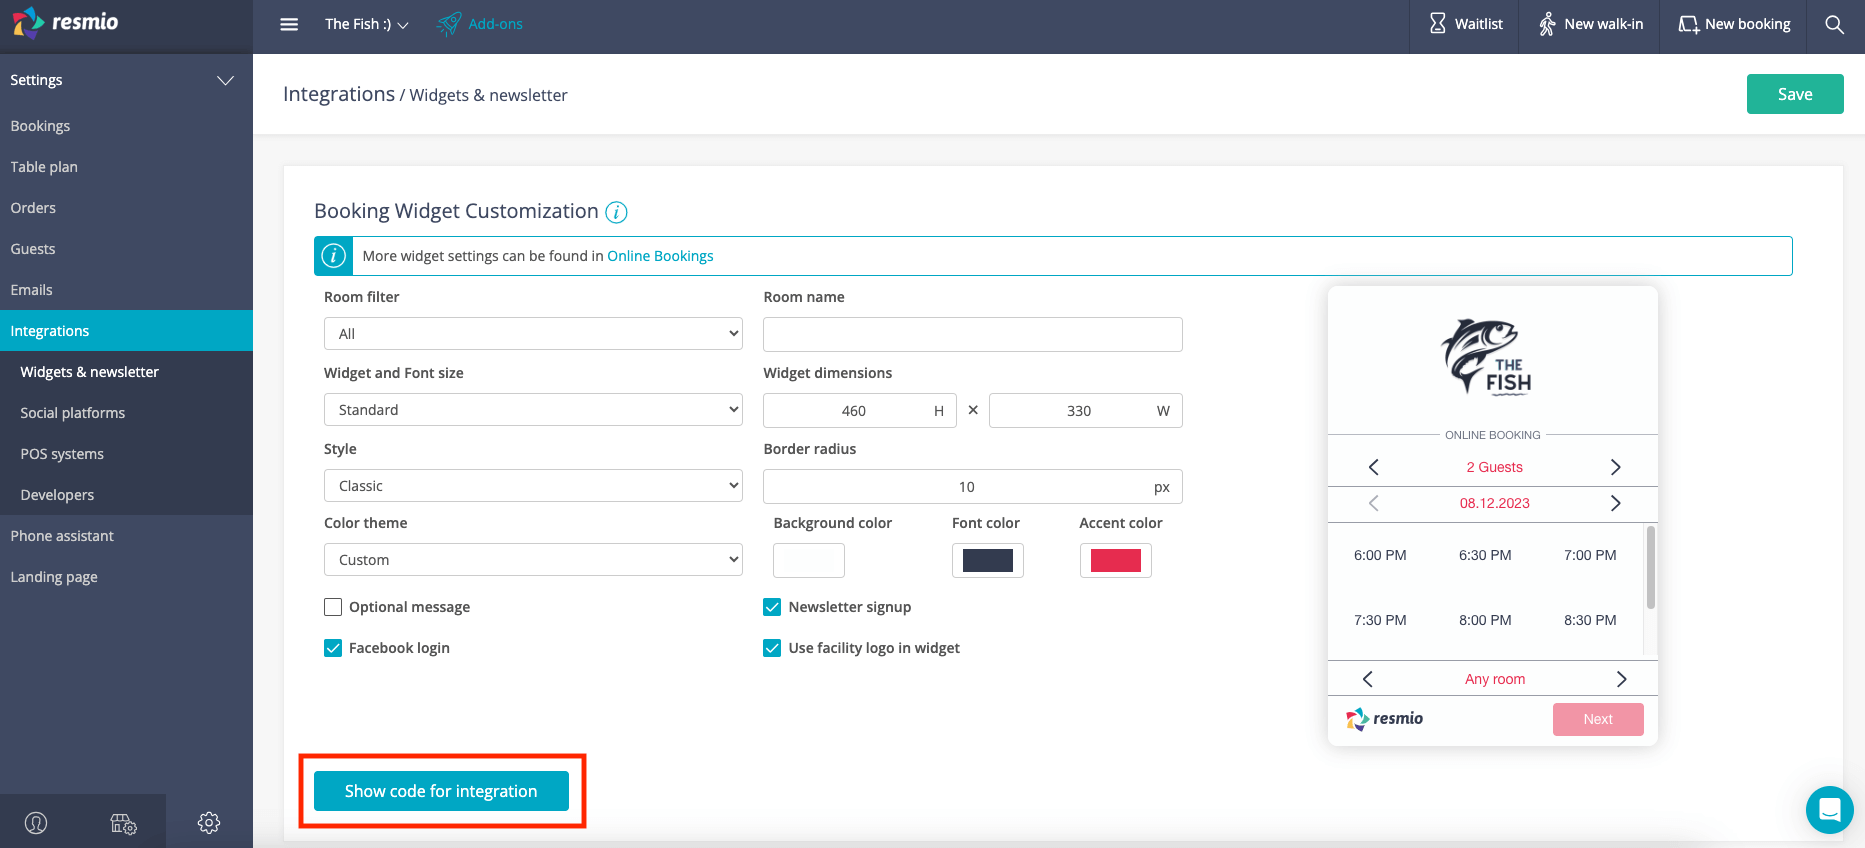
- Click on “Settings” (gear icon) in the bottom of the access bar and then click on “Integrations” > “Widgets & newsletter“ > “Booking widget”.
- Copy the widget code for integration
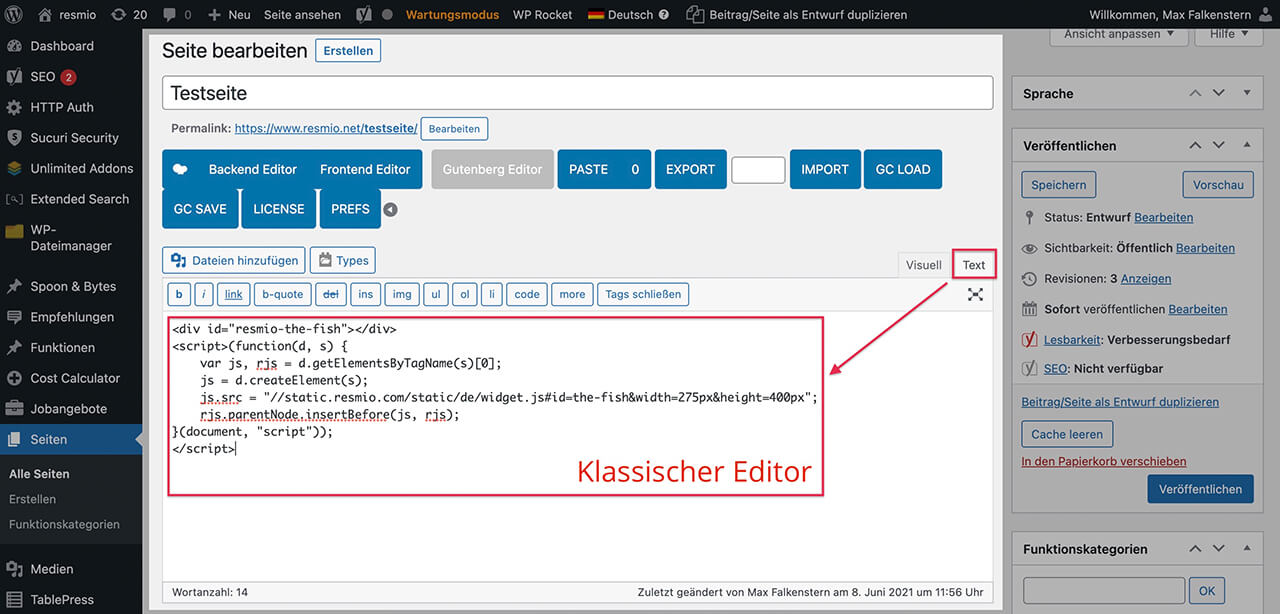
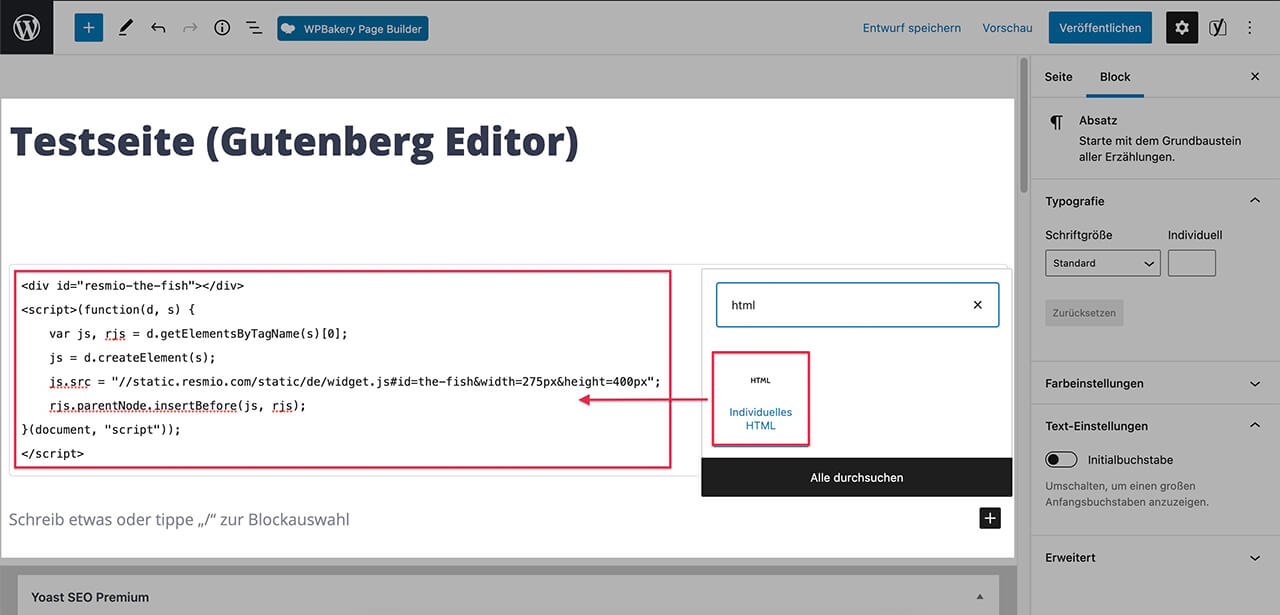
2. Switch to your WordPress account and open the page where you want to place the booking widget.
- In the Classic editor: Paste the widget code in text mode (not visual mode) to the desired position
- In the Gutenberg editor: Use the block “Individual HTML” to place the widget code
- In the Visual Composer (Astra, Divi, Elementor, WP Backery & others): Place the widget code in a “HTML” block (sometimes referred to as a code block).
Don’t forget to save your changes and check them on your website!
You can integrate a button in the resmio design to your booking page on your WordPress site or add a suitable link to our reservation tool to an already existing button. In the following we show you how:
1.
- Log in to your resmio account with your credentials
- Click on “Settings” (gear icon) in the bottom of the access bar and then click on “Integrations” > “Widgets & newsletter“ > “Booking Button Customization” and scroll down to the section “Show code for integration”
- Copy the button code for integration
Alternatively: If you simply want to add a link to the resmio booking tool to an existing button on your WordPress site, copy the URL from the bar below instead of the button code and paste this link into the desired button element on the homepage.
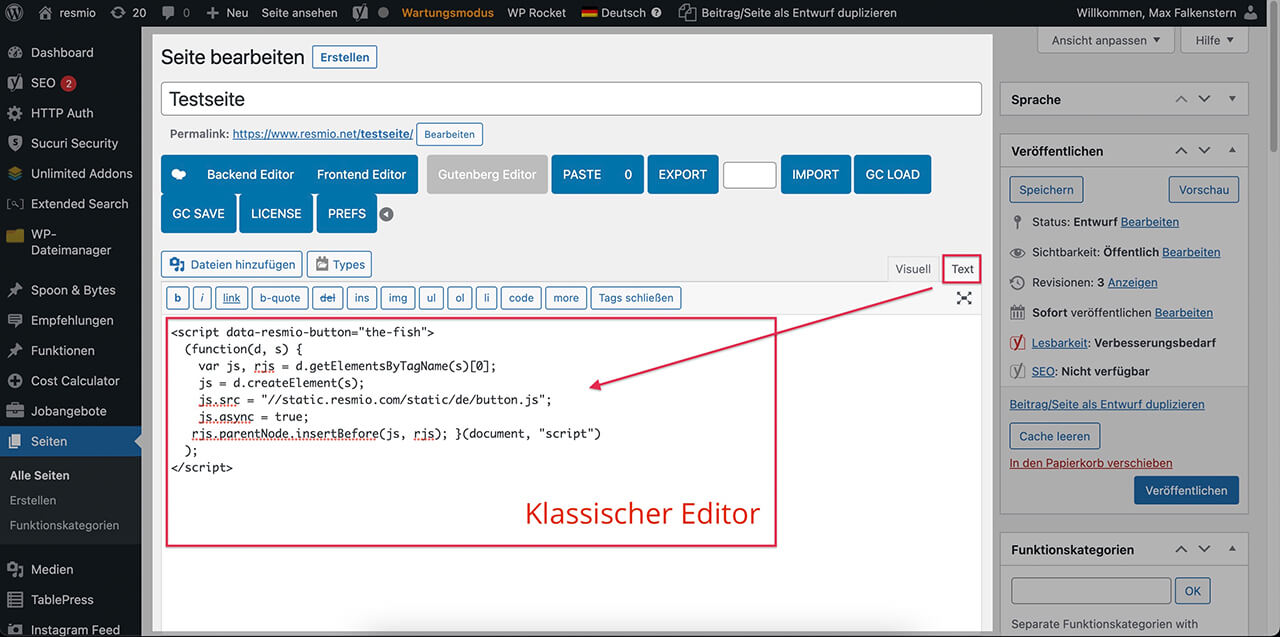
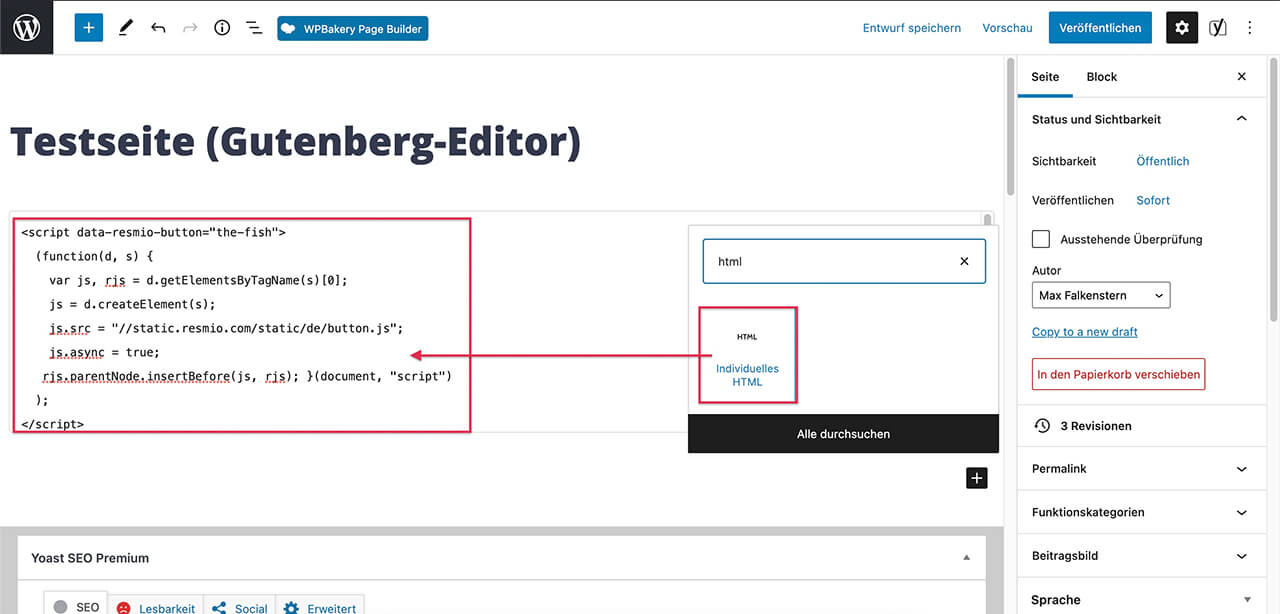
2. Switch to your WordPress account and open the page where you want to place the booking button.
- In the Classic editor: Paste the button code in text mode (not visual mode) to the desired position
- In the Gutenberg editor: Use the “Individual HTML” block to store the button code
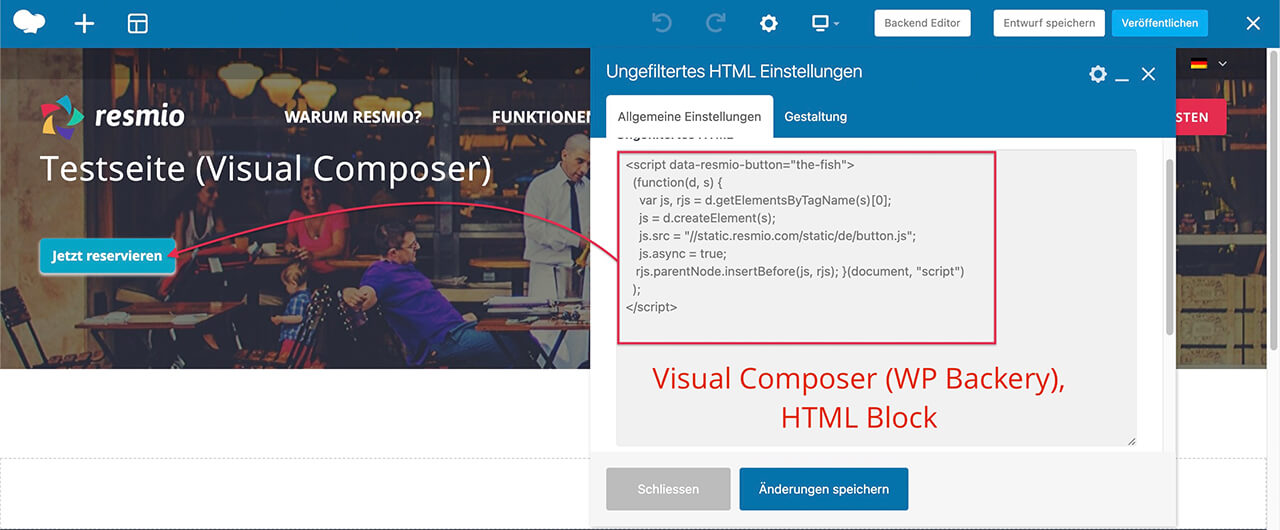
- In the Visual Composer (Astra, Divi, Elementor, WP Backery & others): Place the button code in an “HTML” block (sometimes called a “code” block). Alternatively, you can use a “Button” block and add the URL from the previous step instead of the button code.
Make sure that the button on your published web page is working properly.


