resmio » Help » Integration »
Integration of resmio on Wix CMS
To place resmio’s booking widget “natively” on your Wix site so that your guests can book online without leaving your homepage, follow these steps:

1. To begin, we start in the resmio webapp:
- Log in to your resmio account with your credentials
- Click on
 “Settings” in the access bar at the bottom, then go to “Integrations” > “Widgets & newsletter“ > “Booking widget”.
 - Copy the widget code for integration
2. Switch to your Wix account and open the page where you want to place the booking widget.
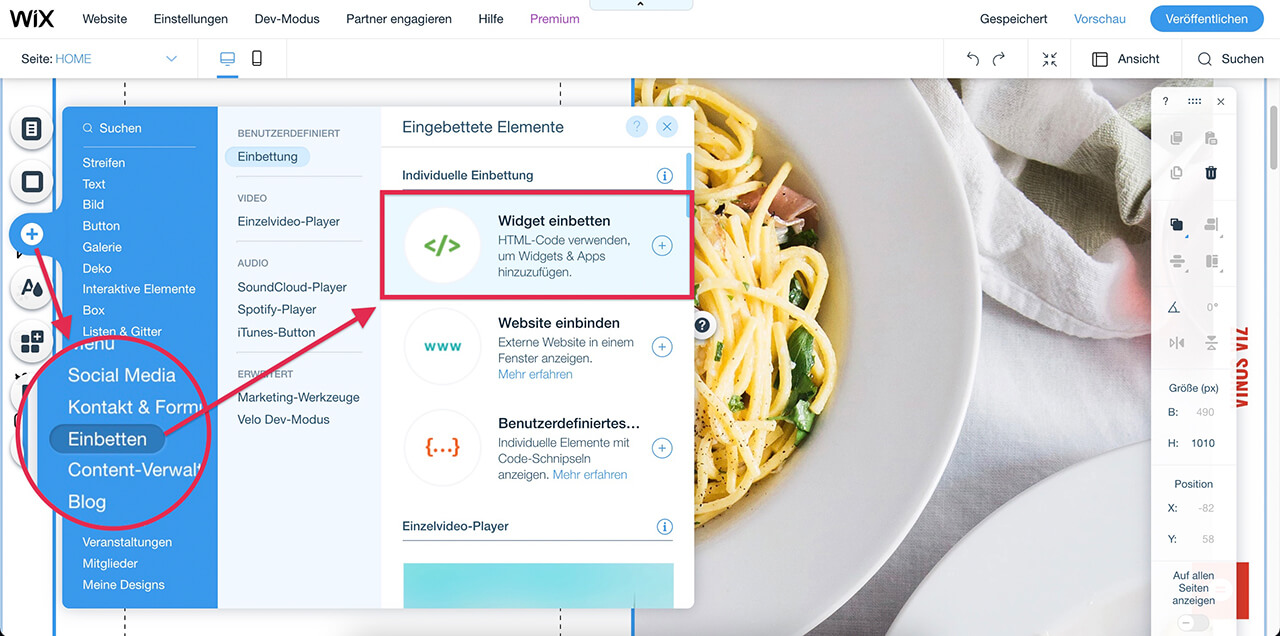
- Click on the “+” icon (add) on the left toolbar
- In the “Embed” category, select the “Embed Widget” module
- The empty “widget” element will appear on your page, and you can place it in the desired position
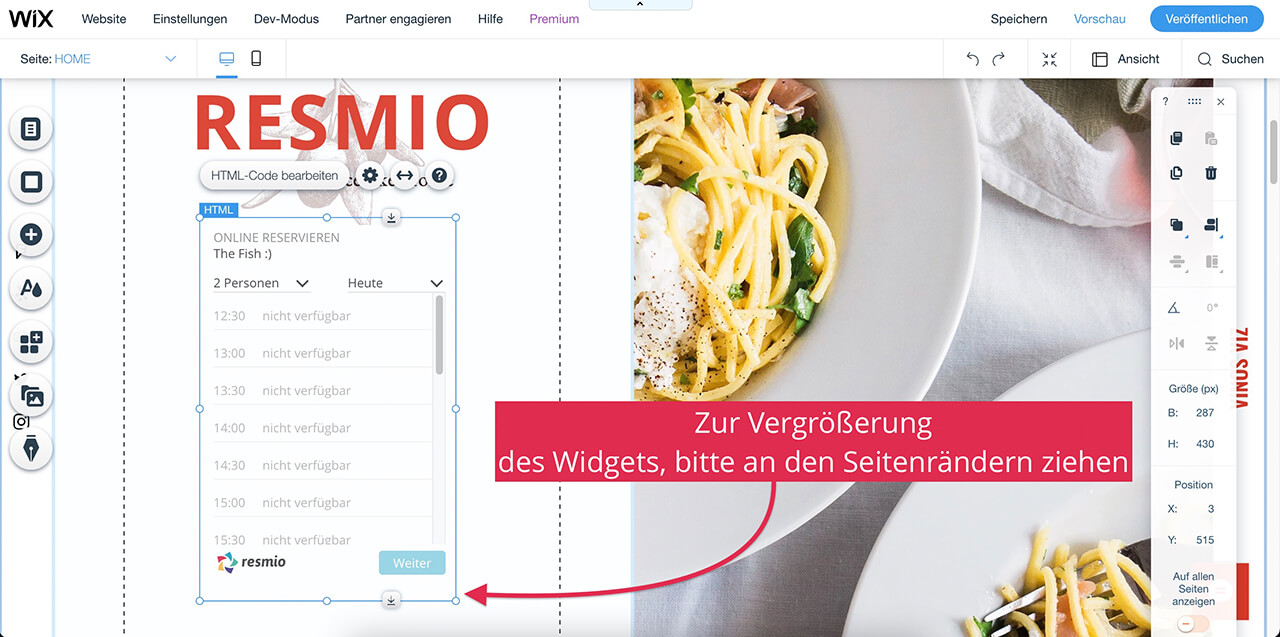
3. We are almost there:
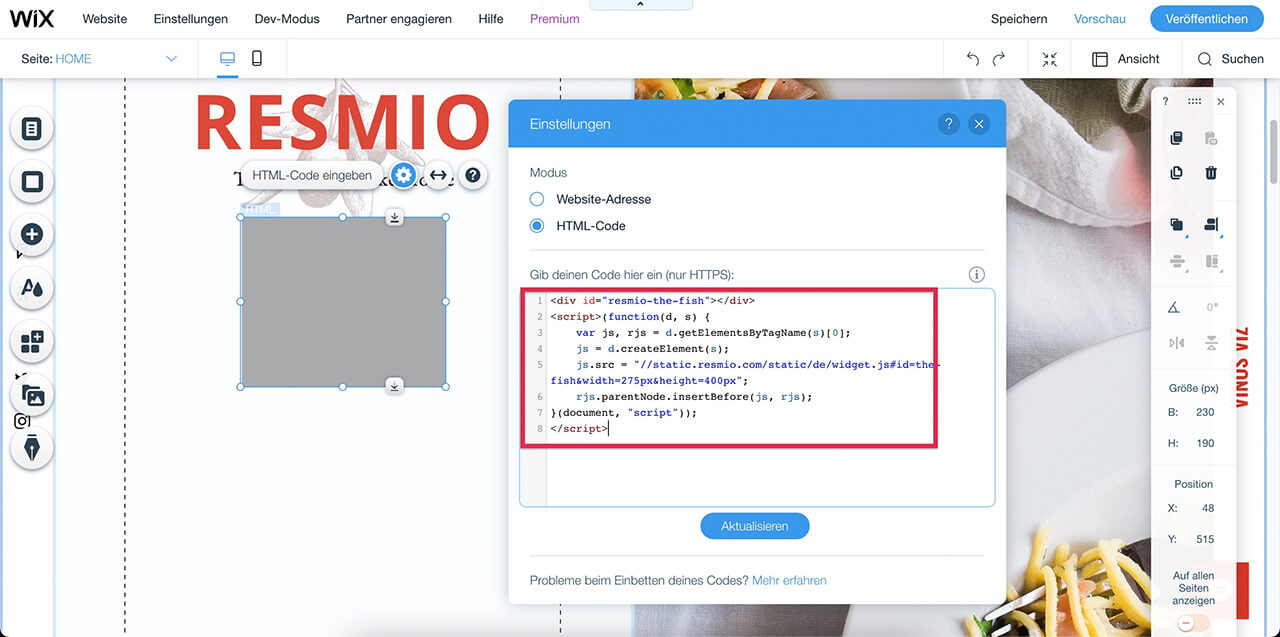
- Double-click on the empty, gray “Widget” module.
- Now paste the widget code you copied in the first step into the window.
- Confirm the change by clicking on “Update”.
- If your resmio online booking form appears cut off, enlarge the element by dragging it with the mouse along the edges of the page.
Please check immediately on your published website if the reservation widget works properly.
Add a new button on your wix website or use an existing one to take your guests to the reservation widget. In the tutorial, we’ll show you how to proceed with the integration:
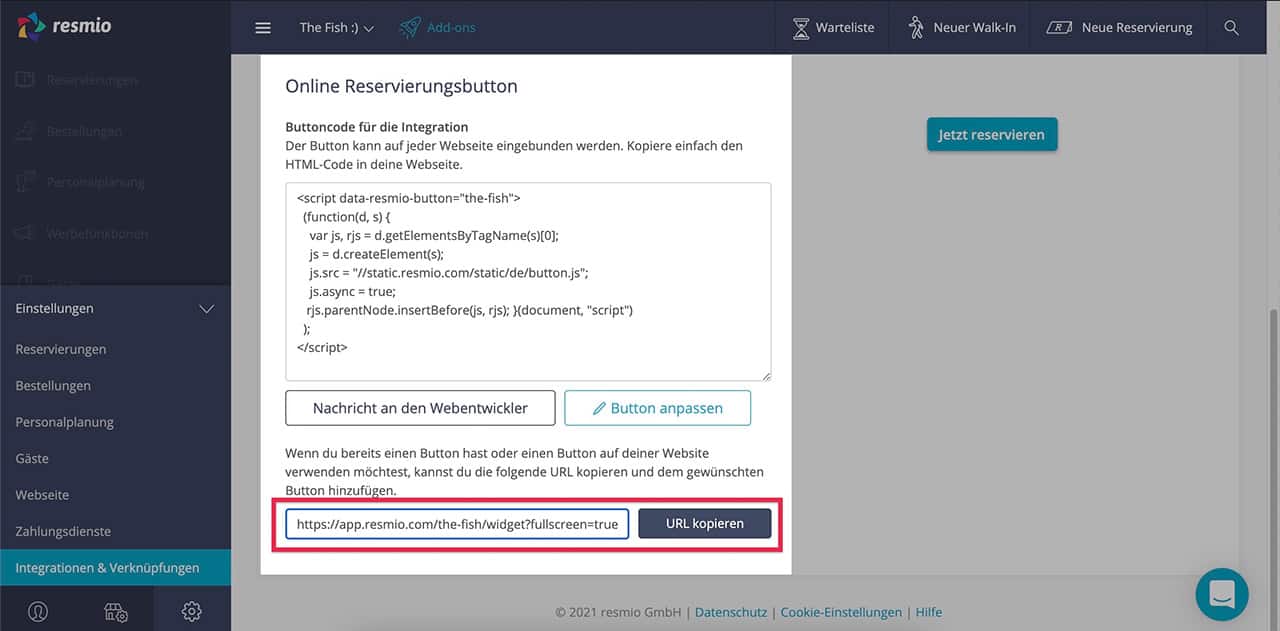
1. We start with the resmio webapp
- Log in to your resmio account with your credentials
- Click on “Settings” in the bottom of the access bar and then click on “Integrations” > “Widgets & newsletter” > “Booking widget”.
- Copy the button code for integration

2. Back to your wix website. Log in with your credentials and open the page where you want to integrate the button.
- Click on the “+” icon (add) on the left toolbar
- In the “Button” category, choose a button that suits your taste.
- Then position the button where your guests can easily see it.

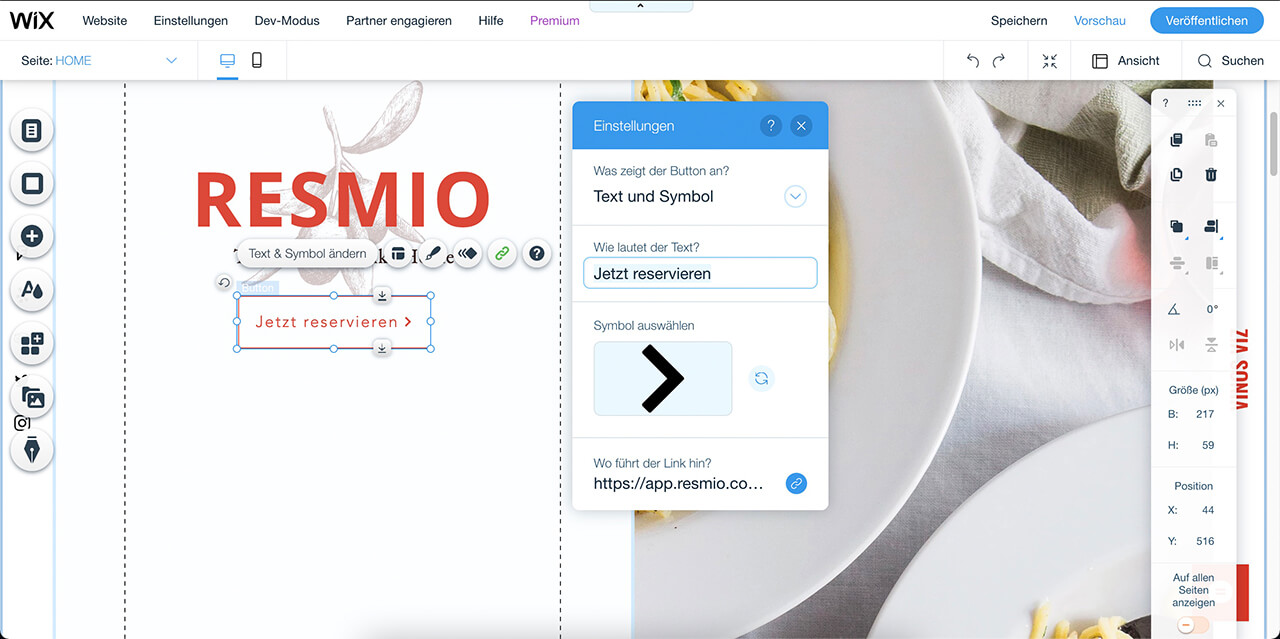
3. Now we connect the button with the resmio link
- Doubleclick on the button to access the settings
- Choose a meaningful name for the button, e.g. “Reserve now”
- Click on the “link” icon at the bottom of the window.
- Insert in the next window, the button link you copied in the first step
- Confirm the changes by clicking on “ok”
Make sure that the button on your published website is working properly.