resmio » Help » Integration »
Integration of resmio on Jimdo

To place resmio’s booking widget “natively” on your Jimdo site so that your guests can book online without leaving your homepage, follow these steps:

1. Log in to your Jimdo account with your credentials and switch to the edit mode of your website.
- Choose a suitable page (e.g. home page or a subpage for bookings).
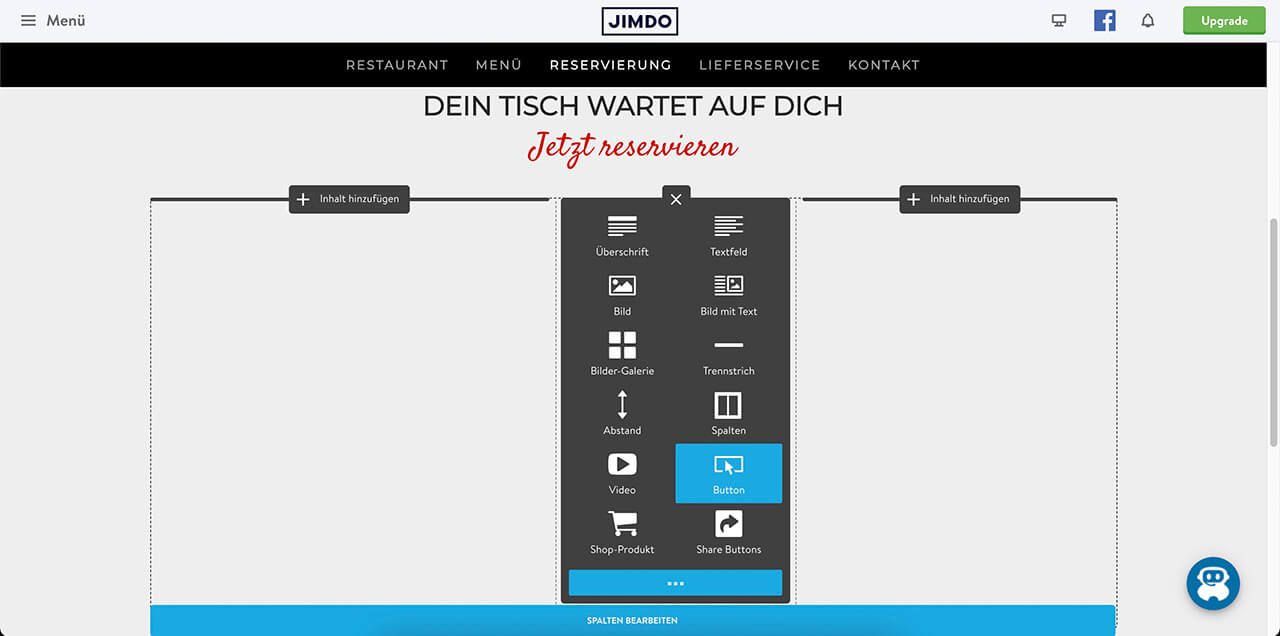
- Then click on the “+” symbol at the place where you want your booking widget to be positioned later.
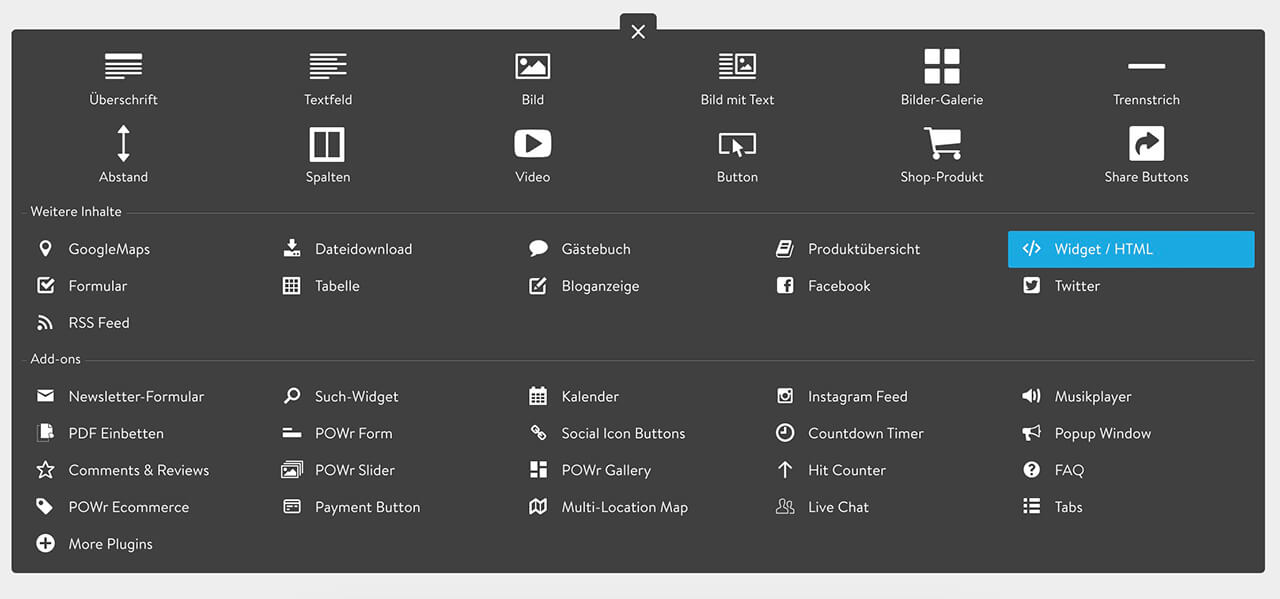
2. Select the module “Widget / HTML” from the following window. If you don’t see all the content as shown in the image above, you may need to click the “More content and add-ons” button first.

3. Now we go to the resmio webapp:
- Log in to it with your credentials
- Click on “Settings”
 in the access bar at the bottom, then go to “Integrations” > “Widgets & newsletter“ and scroll to the section “Online booking widget”
 - Copy the widget code for integration
4. Back to Jimdo:
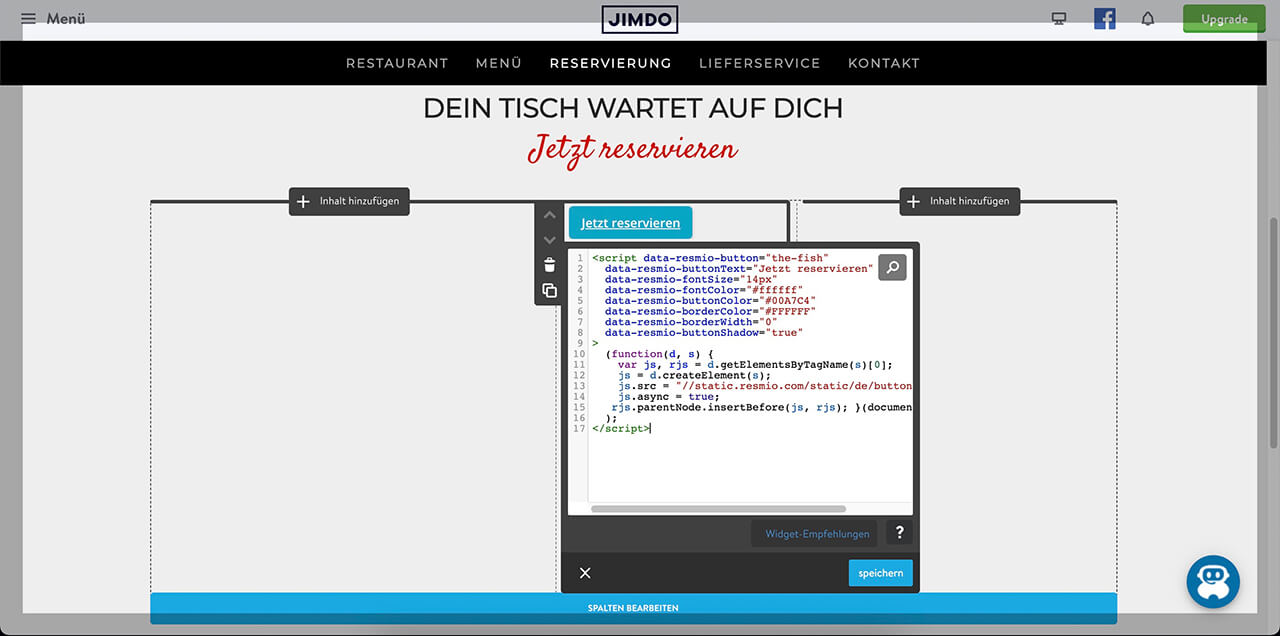
- Paste the widget code you just copied into the HTML element and confirm your input by clicking “Save”.
- Your booking widget should be visible in edit mode.
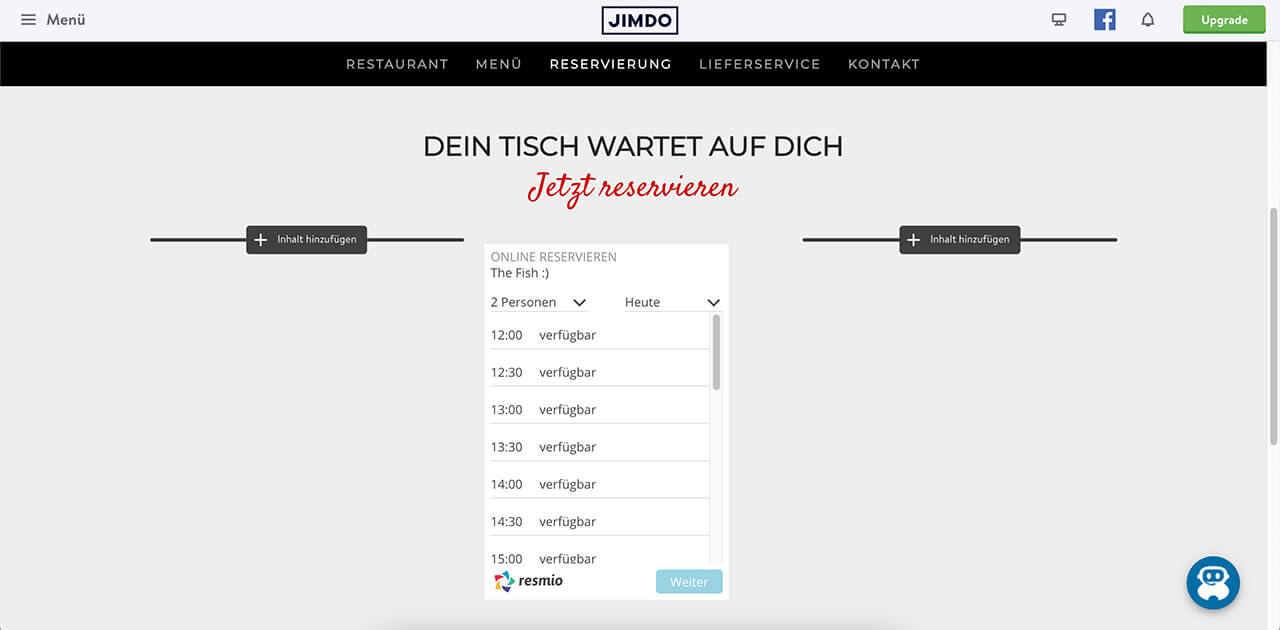
- Test the changes on your published website to make sure the reservation form is working properly.
You can integrate a button in the resmio design to your booking page on your Jimdo site or add a suitable link to our reservation tool to an already existing button. In the following we show you how:
1.
- Log in to your resmio account with your credentials
- Click on “Settings” in the access bar at the bottom, then go to “Integrations” > “Widgets & newsletter“ and scroll down to “Booking button”
- Copy the button code for integration
Alternative: If you just want to add a link to the resmio reservation tool to an existing button on your Jimdo page, copy the URL from the bar below instead of the button code and paste this link into the desired button element on the homepage.
2. Now we go back to Jimdo:
- Log in to you Jimdo account with your credentials and go into the edit mode of your website
- Select a suitable page (e.g. the home page or a subpage on the subject of reservations) and click on the “+” symbol at the desired position where the resmio button is to appear later on.
3. Select the module “Widget / HTML” from the following window. If you don’t see all the content as shown in the image above, you may need to click the “More content and add-ons” button first.
Alternative: Use website button from Jimdo
To connect a button in your website’s design to resmio, select the “Button” element in Jimdo instead of the “Widget / HTML” mode. Then do the following:
- Click on the “Link icon” in the left upper corner of the window
- Instead of the default option “Internal link”, select the option “Link or e-mail address”
- Insert the button URL from your resmio app (see box in step 1) into the link field on Jimdo
- Confirm the changes by clicking on “Set link”.
The images below visualize the steps for you once more.
Do not forget, to save the changes and to check on your website immediately!

